You've cleared a space in the bedroom, the adjustable base is still in its carton, and you're wondering whether it will fit inside the bed frame you already own. That fit check matters as much as attaching the legs. A base that's squeezed against a rail or blocked by a crossbar can't move freely, even if the assembly itself looks tidy.
A reliable setup follows three checks: mechanical stability, safe wiring, and movement with the mattress in place. Keep the power unplugged while you assemble the frame, work with a second adult, and stop if the room or furniture doesn't suit the base.
Check Fit, Floor and Tools Before Unboxing
Before opening the carton, decide where the base will sit: stand-alone on the floor, inside an existing bed frame, or on a platform. Check the manufacturer's guidance for that exact model and configuration. In particular, find out whether the base is approved for zero-clearance use, whether its legs must rest on the floor, and whether the existing slats, center supports, drawers, or crossbars need to be removed. A frame can look spacious while still blocking a moving panel or trapping a cable. This adjustable-base fit guide explains why compatibility depends on the base and the surrounding frame, not appearance alone.
Measure the frame's interior length and width, along with the headboard thickness. Compare those measurements with the base's dimensions and allow room for the sections to articulate, the mattress retainer, and cables. Check the floor where the base will stay. It should be firm and level, and a grounded outlet should be reachable without improvising with an extension cord. If the measurements or model instructions don't support the setup, choose another placement rather than forcing the base into the frame.
| Item | Why you need it | Check before you start |
|---|---|---|
| Hex key or Allen set | Attaches legs and brackets | Confirm the sizes match the hardware bag |
| Socket or adjustable wrench | Tightens leg and frame fasteners | Make sure it fits the bolt heads without rounding them |
| Phillips screwdriver | Removes packaging screws and covers | Keep screws sorted by size |
| Tape measure | Confirms clearance and mattress fit | Measure frame interior length, width, and headboard thickness |
| Spirit level | Confirms the base sits flat | Check the floor where the base will stay |
| Second adult | Helps lift and turn the base | Agree on the room layout before unboxing |
Count the parts against the manual and note the specified leg-height range. A quick photo of the hardware bag can help you match fasteners later, especially if several bolts look alike. Assemble the base in the room where it will remain, so you don't have to maneuver the heavy frame through a doorway afterward.
If you're weighing whether to handle the job yourself or get help, compare DIY and professional assembly before opening the box. The practical choice depends on the weight of the base, the room access, and whether you have a capable helper.
How to Assemble the Base Step by Step
Keep the base unplugged throughout the mechanical build. A cord connected too early can be pinched under the frame or caught in a hinge before you notice it.
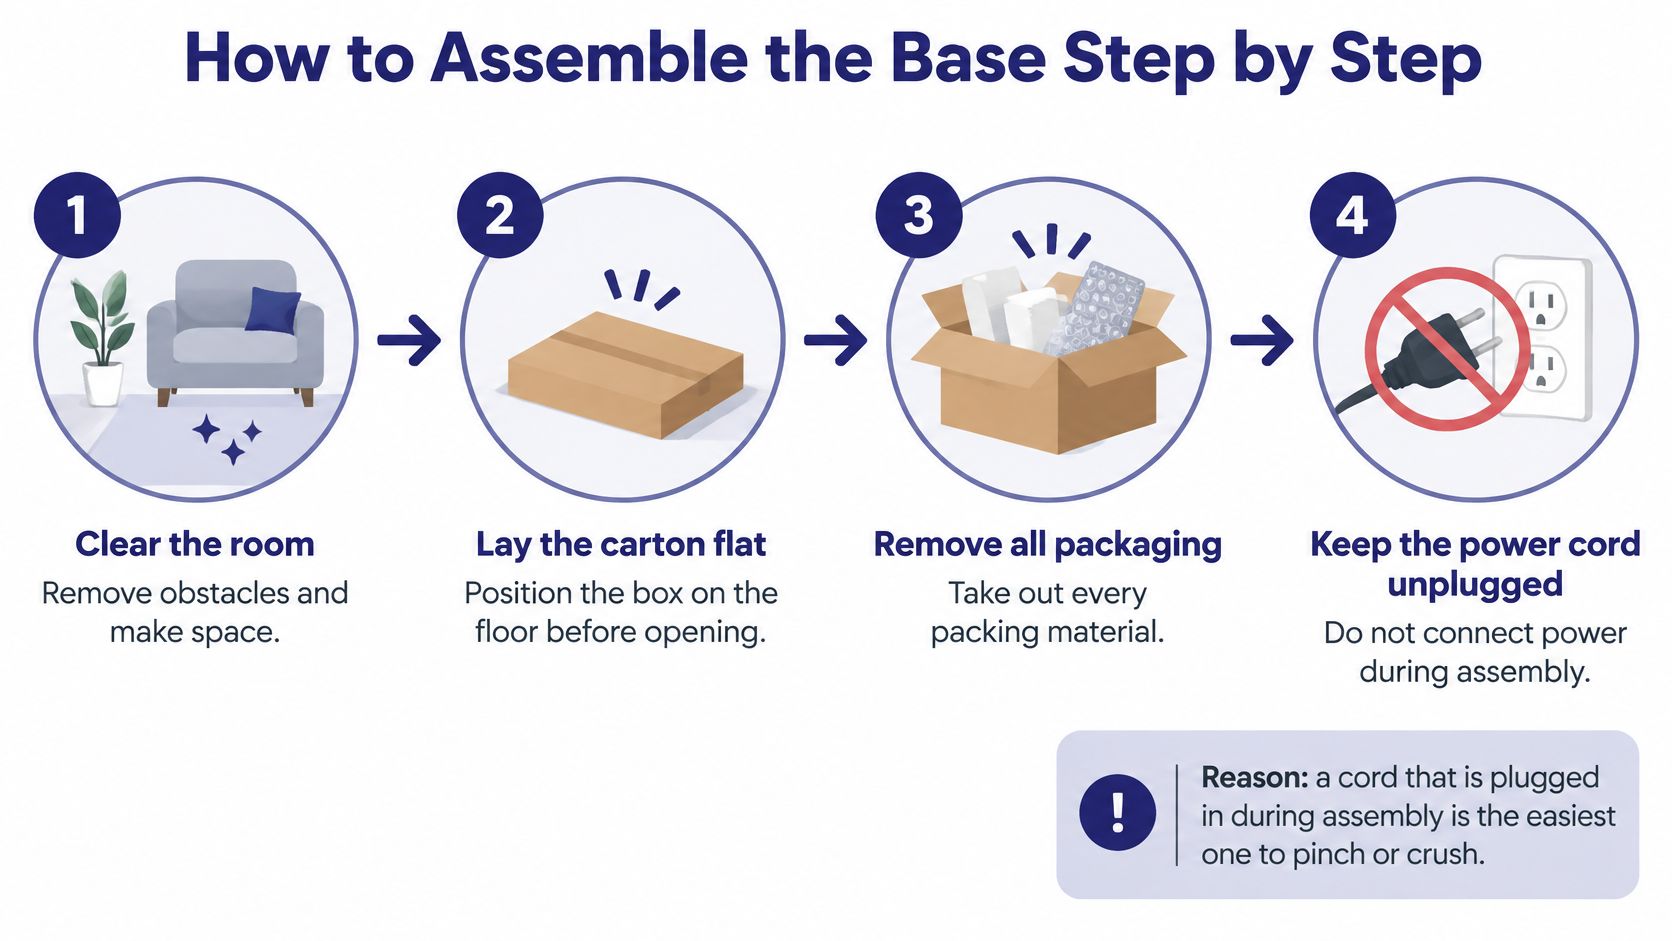
Clear the room and lay the carton flat. Move rugs, shoes, and small furniture out of the work area, then open the carton on the floor. Keep the power cord unplugged, and remove all packing material from the hinges, motors, and underside of the base.
Find the head and foot ends. Use the labels and diagrams in the manual rather than guessing from the shape of the frame. Adjustable bases aren't symmetrical, and fitting a bracket at the wrong end can create extra work or interfere with movement.
Hand-start each leg. Line up each leg with its pre-drilled socket and turn it by hand before tightening. This helps prevent cross-threading; if the leg won't turn smoothly, back it out and realign it rather than forcing it with a wrench.
Install center supports if your model has them. Fit center brackets over the locations shown in the manual, then attach the center legs as directed. Some models use a different support layout, so don't add parts in positions that aren't specified.
Turn the base with help. Have two adults lift from the outer metal frame and turn the base mattress-side up. Don't lift by a moving section, fabric, retainer bar, or leg, since those parts aren't handles and can bend under pressure. The base assembly instructions also call for careful handling, even support, and keeping hands clear of hinge pinch points.
Square the frame before tightening. Align the frame and supports first, then tighten the fasteners. Tightening while the frame is twisted can leave the base uneven or put stress on the joints.
Check the legs on the floor. Lower the base carefully onto a firm, level surface. Press down at each corner and confirm that every leg contacts the floor and the frame doesn't rock. A representative setup specifies six legs, with leg height from 6 to 12 inches for clearance and stability; use your own model's instructions if its requirements differ.
Route cables and stop before power-up. Keep wires away from hinges, lift points, and places where the frame could crush them. Don't connect power until the electrical connections and cable routing are complete.
A correctly built base sits still, every leg touches the floor, and no fastener is loose or cross-threaded. Don't try to fix rocking by leaning on the frame or tightening bolts at random. Recheck the leg seating and alignment first.
Wire the Motor, Remote and Outlet Safely
Treat first power-up as an electrical check. If a motor, outlet, cord, or control box gets unusually hot, smells burned, trips the protector, or moves in bursts, unplug it and find the cause before trying again. A motorized bed is covered as an electrical furnishing: the UL 962 furnishings standard applies to motor-operated furniture, including beds, rated at 600 volts AC or less. Wiring faults in this category have been serious enough to trigger recalls, so verify each connection instead of assuming every base leaves the factory wired the same way.
Work from the port map, not from cable shape. With power disconnected, attach only the motor, remote, and accessory leads named in the manual, seat each connector fully, and leave enough slack for the deck to articulate without pulling a plug sideways. Keep every lead off hinge pins and lift arms, add the specified strain relief, and connect the transformer last. Match the wall supply to the rating label, use a grounded receptacle or a suitable surge protector, and skip ungrounded outlets and improvised extension-cord runs. A representative adjustable-base manual gives the same sequence: cord unplugged during assembly, connections checked before operation.
Bring the base up empty. Keep people, bedding, and spare cords away from the mechanism, then run flat, head, foot, and each preset one command at a time. Watch underneath for a cable tracking toward a moving section, a connector backing out, an obstruction, hesitation, or a new noise. Any of those means stop and unplug. Do not open the motor housing, and keep the remote out of children's reach while you finish these checks.
How to Position the Mattress and Retainer
Start with the mattress retainer and size match. Install the retainer at the foot end as the manual shows, and check that the micro-hook strips are in place if your model uses them. The adjustable-base installation guide describes the foot-end retainer and micro-hook strips as part of holding the mattress in place. It also lists size-specific options, including Twin XL, Full, Queen, King, and California King. Match the mattress size to the base rather than assuming two products labeled with the same general size will fit exactly.
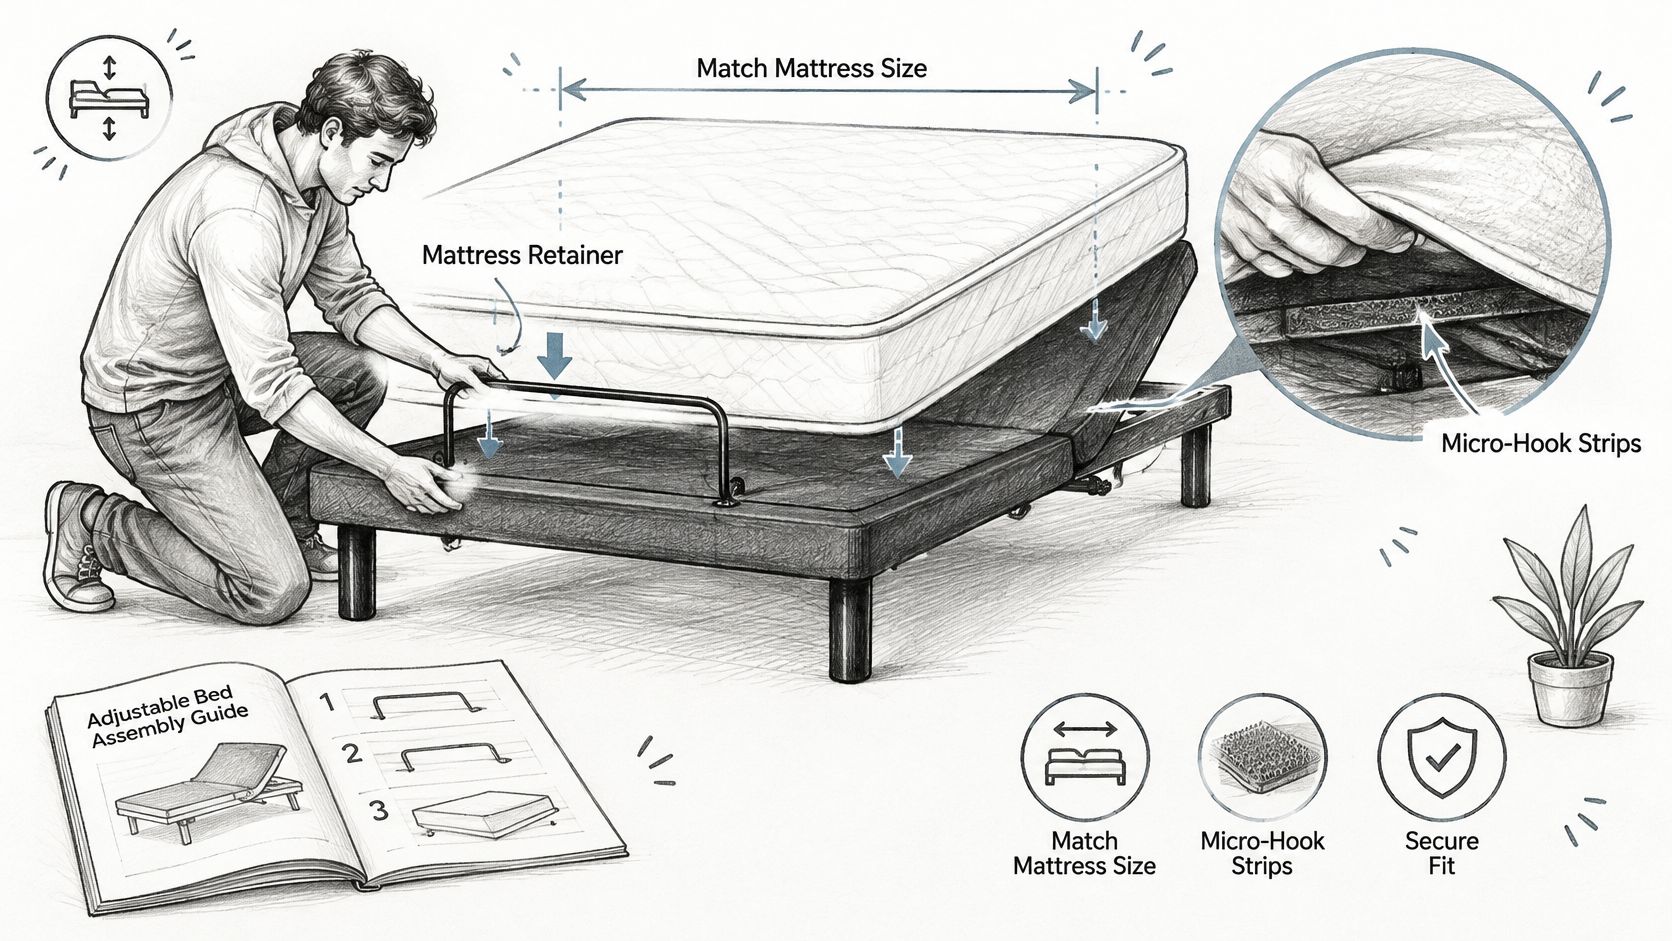
Lower the mattress onto the base, square it with the frame, and check that its corners sit flat. The mattress also needs to bend with the platform. If it's too stiff for the base or oversized for the surface, it can bunch or shift as the head or foot section rises.
Test the fit with small movements before using the bed normally. Raise the head section partway and watch the mattress edge, then lower it and check the foot section in the same way. Look for a gap forming, the mattress slipping toward a wall, or the retainer catching the fabric. Keep bedding and any tubing away from the moving sections while you check.
The included video can help you follow the mattress-positioning process visually.
If the mattress still moves after you've fitted the retainer correctly, don't keep adjusting the motor to compensate. Recheck the mattress and base compatibility instructions before using the bed.
Test Under Load and Fix Common Faults
Test movement in two stages. First, with the mattress off and nobody underneath, run the head and foot sections through their available range. Watch for rubbing, twisting, uneven lifting, or contact with a wall, headboard, or nightstand. Then install the mattress and repeat the movement check, testing the head and foot separately.
Check the base's stated weight limit before anyone lies down. A load rating is not interchangeable across models. For context, the UL 962 requirements summarized by Intertek specify a test weight of 500 pounds (227 kilograms) per intended person. A twin is treated as a one-person bed and a queen as a two-person bed for that test. It includes the mattress and, where applicable, the foundation, with weight distributed evenly according to the test configuration. That test basis isn't a substitute for your model's user limit. Follow the limit on the base and keep weight balanced across the surface.
After the first full operating cycle, recheck the fasteners and support brackets. Use the table to narrow down common assembly faults.
| Symptom | Likely cause | Fix |
|---|---|---|
| Base rocks on the floor | A leg isn't touching the floor evenly | Re-level the base, tighten each leg evenly, and recheck all corners |
| Motor stops partway through its range | A cable is pinched or the mattress is obstructing travel | Unplug, free the cable, check clearance, and retest unloaded |
| Head or foot section makes grinding or rubbing noise | A center bracket or hardware is missing or misplaced | Reinstall center brackets over the middle leg holes and recheck fasteners |
| Remote doesn't respond | A cable isn't fully seated or the remote isn't paired | Reseat connectors and follow the manual's pairing steps |
| Mattress shifts when the base moves | The retainer is missing or misplaced, or the mattress size doesn't match | Reinstall the retainer at the foot end and confirm the mattress size |
| Control box, cord, or outlet feels warm | Possible overload, damaged cord, or extension-cord use | Unplug, stop using the power functions, and contact the manufacturer or store |
If an electrical issue also causes a household breaker to trip, leave the base unplugged rather than repeatedly resetting the breaker. A general guide to what to check when a breaker keeps tripping can help you understand when the problem may involve the home circuit rather than the bed. Stop using the base if the same mechanical or electrical fault returns after you've checked the setup.
Confirm the Bed Is Ready for First Use
Make the final decision a plain go or no-go. Go only if the base stands firmly, every leg contacts the floor, cables are clear of pinch points, and the head and foot sections move without rubbing, shifting, or unusual noise. Check that the motor, cord, and control box aren't getting unusually hot. Keep children and pets out from under the bed whenever it's moving; adjustable-base safety guidance identifies them as a hazard near an operating base.
Record the model and serial number and check the CPSC recall database for the specific unit. Keep those details with the manual and your room measurements so they're available if the base needs adjustment or service. If a check fails, unplug the unit and correct the problem before sleeping on it.
If your questions are about sleep positioning rather than assembly, a resource such as the Pain and Sleep Therapy Center's apnea tips may be useful background, but it doesn't replace medical advice for you. For an uncertain fit, bring the base model and room measurements to a showroom. Woodstock Furniture & Mattress Outlet offers delivery options to customers, and its team can talk through the setup in person.
For help choosing an adjustable base that suits your room, visit Woodstock Furniture & Mattress Outlet. Our team can help you review the fit and available setup options, and we offer delivery options to customers.
Leave a Reply
You must be logged in to post a comment.