
Tag: storage solutions

  • Closet Organization Systems: A Practical Buying Guide

    Closet Organization Systems: A Practical Buying Guide

    You pull a shirt from the closet and a stack of folded clothes shifts onto the floor. The shelf above is too shallow for the things you need to store, while the hanging space is crowded with items you rarely wear. A closet organization system can help, but only if it fits your room, belongings, and living situation. Renters, in particular, may need storage that works without permanent changes.

    What Closet Organization Systems Are and Why They Matter

    A closet organization system is a coordinated arrangement of storage components, such as hanging rods, shelves, drawers, bins, and shoe racks. Some systems are freestanding and easy to move. Others attach to the walls, adjust to different needs, or are designed as built-ins. Their purpose is to make the available space easier to use, not merely to make the closet look tidy.

    That distinction matters. A row of bins may hide clutter without making daily items easier to find. A better layout puts frequently worn clothes within reach, gives folded garments a stable surface, and keeps the floor clear enough to access the rest of the closet.
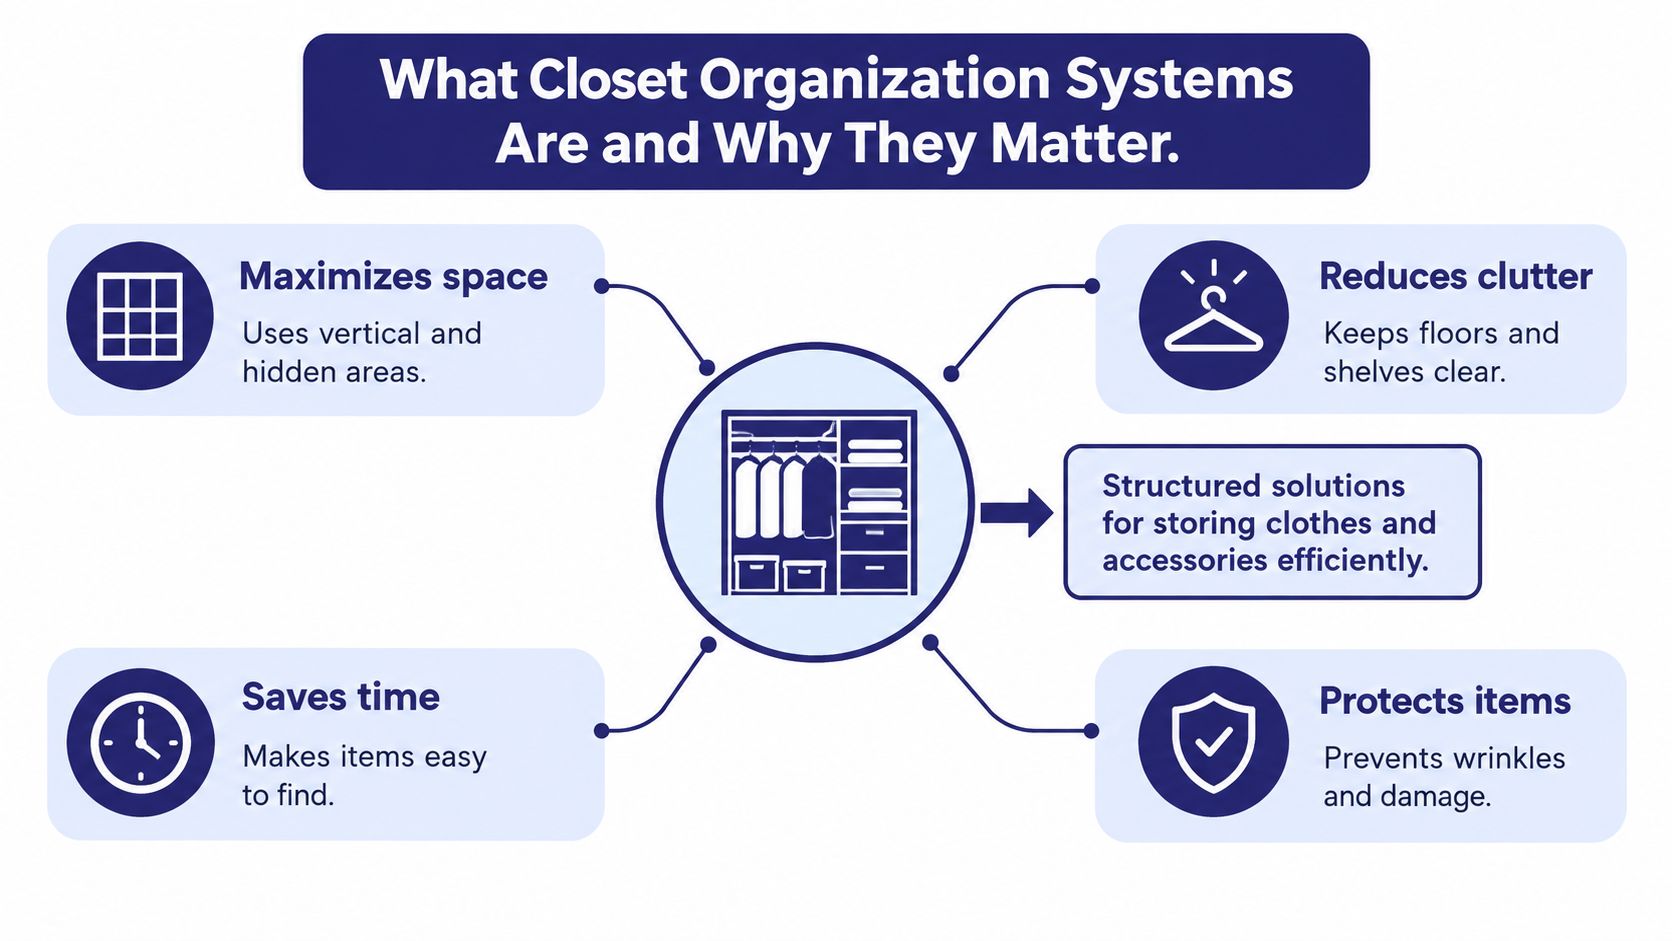
    A diagram illustrating the benefits of closet organization systems including space maximization, clutter reduction, time saving, and item protection.

    Why a system can help

    When storage has a clear place for different belongings, getting dressed can take less searching and reshuffling. Separating hanging clothes from folded items also reduces the chance that stacks topple each time you take something from the bottom. A system won't remove belongings you no longer use, but it can make what you keep more visible and accessible.

    The need for organized storage isn't limited to large walk-in closets. A 2024 U.S. consumer survey found that 55% of homeowners said they didn't have enough home-storage solutions, such as cabinets, benches, shelves, or racks, to give everything a proper place. The survey covered home storage broadly, not closets alone, but it shows why closet planning can be part of a larger effort to create usable storage around the home. (2024 U.S. homeowner storage survey)

    Start with what the closet needs to do

    Think about the items that cause the most trouble. If shirts and jackets crowd the rod, a second hanging level may help. If shoes and folded clothes compete for shelf space, adjustable shelves or drawers may suit them better. If the problem is a lack of storage in a rental, a portable wardrobe may be more practical than a wall-mounted installation.

    The right system depends on space, belongings, and daily habits, not on one universal closet plan. A small freestanding piece can be enough for a narrow closet, while a larger shared space may need several distinct zones.

    Comparing Closet System Types and Who Each Fits Best

    Different system types solve different problems. The main choices are freestanding units, modular systems, wire shelving, and custom built-ins. Compare them by how they attach, whether they can move with you, and how much flexibility you need, rather than assuming one category works for every home.

    Freestanding units

    Wardrobes and armoires provide hanging space and may include shelves or drawers. Because they don't require a permanently installed closet framework, they can suit renters, bedrooms without closets, or households that need portable storage. The tradeoff is that the unit occupies floor space, so check that doors and drawers can open without blocking pathways.

    Modular systems

    Modular pieces combine components that can be rearranged or expanded. They can be a practical option if you want to tailor a layout without committing to a fully built-in design. You'll need to confirm that the available widths and heights fit your closet, and that assembly and wall attachment, if required, are appropriate for your home and lease.

    Wire shelving

    Wire systems leave items visible and allow air to move around stored belongings. They're often used in utility and linen closets, but the open grid can be less suitable for small objects or delicate folded items. Don't assume a shelf can hold a particular load just because it's made of metal; span, supports, fasteners, and installation all matter.

    Custom built-ins

    Built-ins are designed for a particular space and can use its walls and vertical area efficiently. They're a more permanent choice, which can make them a poor fit for a renter or someone expecting to move soon. Before choosing one, consider whether the added fit and fixed installation suit how long you plan to stay and how you use the room.

    A September 2022 storage report found that more than 53% of homeowners in homes larger than 2,000 square feet had wire organizers or a built-in closet organizer, and 27% upgraded their closet system after moving in. The figures illustrate that closet storage can be both an existing home feature and a later project. (September 2022 storage report)

    For another homeowner-focused perspective on planning a fitted layout, see this closet organization guide for South Jersey homeowners.

    Materials and Load Limits to Know Before You Buy

    A shelf's material alone doesn't tell you how much weight it can safely hold. Unsupported span, fastener penetration, the number of fasteners, panel density, and anchor quality all affect performance. A sturdy-looking shelf can still sag if it's too long for its supports or attached to the wall with unsuitable hardware.

    As a general benchmark, a shelf spanning 24–36 inches may support approximately 50–75 pounds under a static, evenly distributed load. At a 36–48 inch span, the approximate capacity may fall to 40–50 pounds. These are not universal ratings for every product, so use them as context and follow the manufacturer's tested specifications for the actual shelf and installation. (closet shelf span and load guidance)

    Shelf span Approximate load capacity Notes
    24–36 inches 50–75 pounds Static, evenly distributed load
    36–48 inches 40–50 pounds Longer spans may need added support

    Distributed weight isn't the same as a heavy stack

    A load rating for weight spread across a shelf doesn't automatically apply to a concentrated pile. A dense stack of books, shoes, or folded linens puts more pressure in a smaller area. If a shelf will hold heavy or tightly grouped items, check the manufacturer's guidance for that use rather than relying on a distributed-load figure.

    Practical rule: Keep regularly loaded shelves within the manufacturer's tested span and load range. Add a center support or vertical panel when the design calls for one.

    Check the wall connection

    Whenever possible, secure the system to structural studs using the specified hardware. If studs aren't available where you need the supports, choose anchors with a rated capacity that exceeds the calculated load, including the shelf, brackets, and contents. Follow installation instructions for the wall type; drywall alone shouldn't be treated as a reliable support method without appropriate rated anchors.

    This is especially important for renters. Ask the property manager what attachments are permitted before drilling, and make sure the system's weight and anchoring needs suit the approved installation. A freestanding unit avoids many wall-attachment questions, though it still needs to fit the room and remain stable in use.

    Measuring Your Closet and Planning the Layout

    Measure before choosing a system. A product that looks suitable online may be too deep for a door to close over, or too tall for a closet with a low ceiling. Write down the clear dimensions and note anything that could interfere with installation or everyday access.
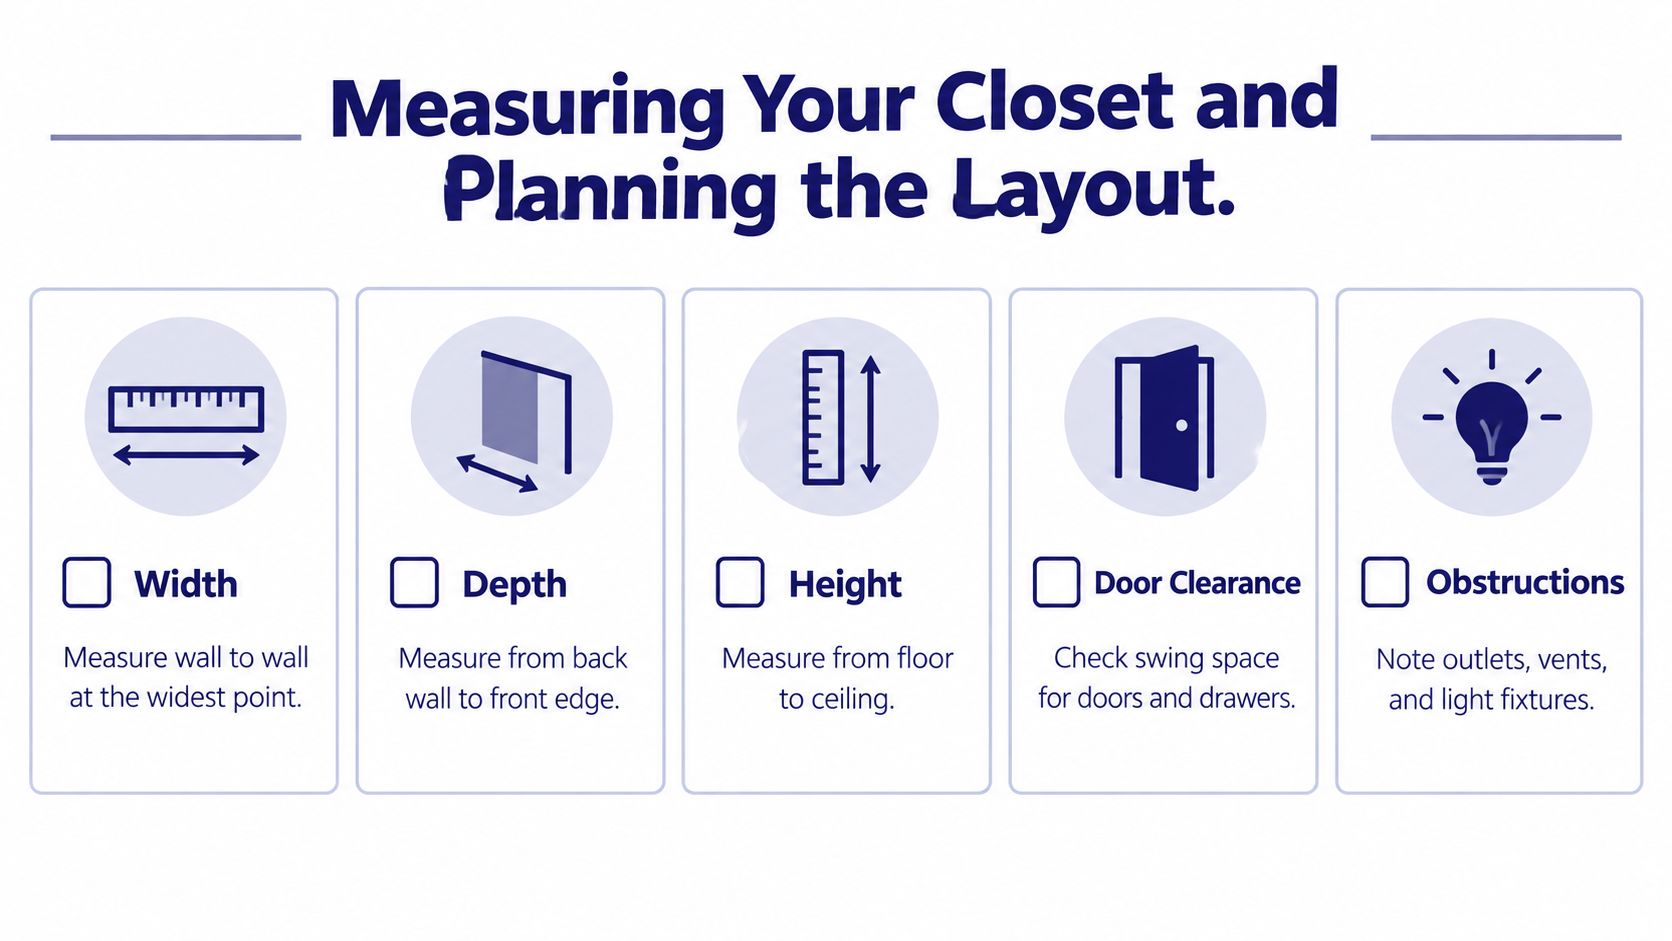
    A guide infographic illustrating the essential steps for measuring a closet when planning a layout.

    Record the usable space

    Measure width from wall to wall, depth from the back wall to the front edge, and height from the floor to the ceiling. If the walls or floor aren't perfectly even, note that too. Record door swing and clearance for drawers, and mark outlets, vents, light fixtures, and existing shelving that might limit where components can go.

    Then inventory the belongings you plan to store. Separate clothes that hang from those you fold, and set aside space for shoes, bags, and accessories. If two people share a closet, identify which items each person needs to reach daily. That inventory gives you a more useful starting point than choosing a layout based only on an attractive display.

    Put daily items where they're easy to reach

    Place the items you use most often in convenient locations, then assign less-used or seasonal belongings to harder-to-reach areas. The 2010 ADA Standards use a forward-reach range of 15 to 48 inches above the floor, which can serve as a practical reference for frequently accessed clothing and accessories. It's a helpful planning benchmark, not a substitute for adapting the layout to the people who use the closet. (2010 ADA Standards reference for reach range)

    Preserve airflow

    Closets also need ventilation. Building Science Corporation identifies relative humidity above approximately 80% as a condition associated with mold growth in closets and recommends airflow paths that help equalize closet temperature and pressure with adjacent rooms. (Building Science Corporation on closet airflow and humidity)

    Avoid blocking return grilles with bins, and don't close off an intended door undercut or transfer opening when arranging storage. In humid areas, leave airflow paths open and avoid crowding dense clothing storage tightly against every surface where practical.

    Choosing a System Based on Space, Budget, and Lifestyle

    A useful choice balances three things: the physical room, the amount you want to spend, and how you use your belongings. A system that holds a lot but makes daily items hard to see may not solve the problem. Similarly, a permanent installation may be a mismatch if you expect to move.

    Consider a renter in a small apartment. A freestanding wardrobe or a combination of removable hanging organizers and a portable drawer unit may provide useful storage without permanent wall changes. The tradeoff is floor space, so measure the room and check that doors, drawers, and walkways remain clear.

    A family sharing a walk-in closet has a different challenge. Instead of filling every wall with identical shelving, assign separate zones for each person and for different storage needs. Open shelves can make folded clothes easier to spot, while drawers keep smaller items contained. If seasonal belongings take up too much room, set aside a designated area for items that aren't in current use rather than mixing them into everyday storage.
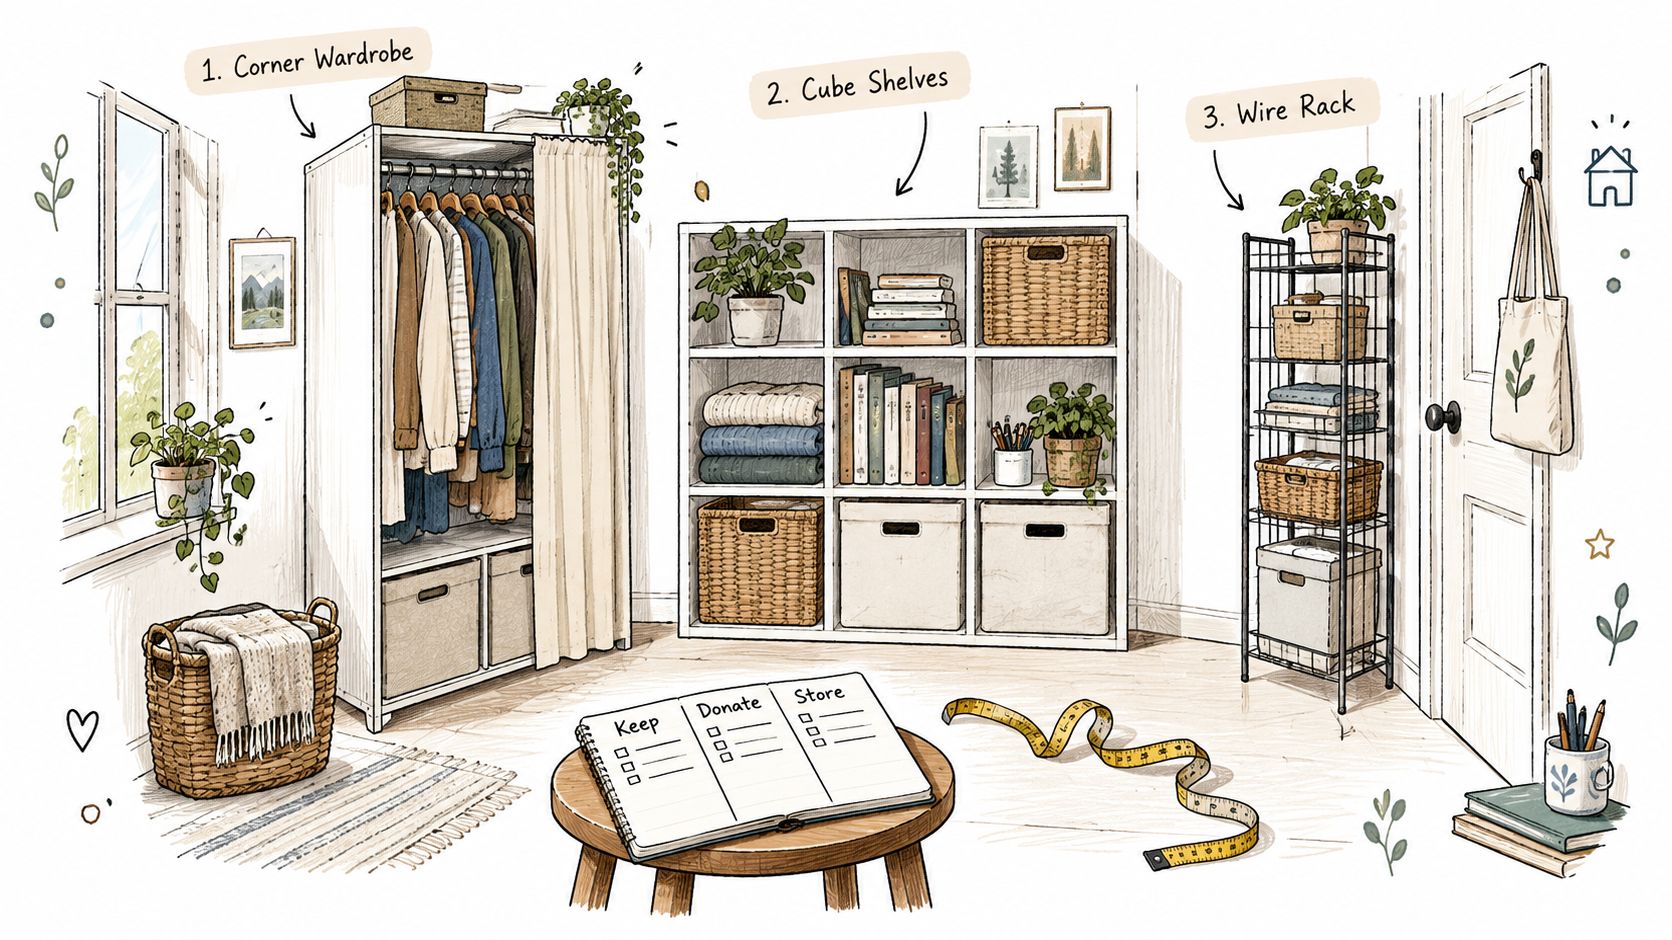
    A cozy, hand-drawn illustration showing a organized room with a wardrobe, cube shelves, and a wire rack.

    For a homeowner planning to stay in the home, a built-in may be worth considering if the closet's existing layout wastes space or doesn't suit the household. Compare that investment with adjustable or modular alternatives, and decide whether you want the system to remain in place if your needs change.

    A workable closet is the one you can use and reset without turning putting clothes away into another chore.

    Before adding more capacity, ask whether everything needs to stay in the closet. A visible, easy-to-edit arrangement can be more useful than extra shelves that make it easier to hold items you rarely wear. Choose the simplest layout that supports your routines and makes the belongings you want to keep easy to find.

    Installation and Maintenance Options and What They Cost

    Installation can be a do-it-yourself project, a professional job, or a mix of the two. Freestanding furniture typically avoids permanent closet construction, though you'll still need to assemble it and confirm it sits safely in the room. Modular systems may require careful assembly and wall attachment; built-ins usually need accurate measurement and installation suited to the walls and product.

    If you're renting, check your lease or ask the property manager before drilling or making any other lasting change. For a portable system, keep the assembly instructions and hardware together so you can dismantle and move it more easily. A hybrid approach can also work: have a qualified installer handle the structural work while you organize clothes and accessories afterward.

    Costs vary with size, materials, drawers, accessories, delivery, and installation, so compare itemized quotes rather than relying on a broad label such as “custom.” Wire shelving is generally a more economical category, modular systems offer a middle ground, and custom built-ins typically require a larger investment. Ask what the quoted price includes, including measurements, hardware, removal of existing fixtures, and any wall repair.

    Maintain the system you choose

    Use cleaning guidance for the specific finish and material. Check that fasteners and brackets remain secure, and adjust shelves or rods when your storage needs change. Do not overload a component because it has held a lighter load without problems; use the product's instructions and rated limits.

    A flexible system can also make later changes easier. If your wardrobe shifts from mostly hanging clothes to more folded items, adjustable shelves may save you from replacing the whole layout. That flexibility has value, but only if the system's components can be repositioned safely and the wall attachments remain suitable.

    Getting Local Design Help and Planning Your Purchase

    A local furniture or storage consultant can help translate measurements and storage needs into a workable layout. Bring photos of the closet, your measurements, and a rough list of what you need to store. Be clear about whether you rent or own, whether you can drill into the walls, and whether the system may need to move later.

    Ask how each option attaches, what wall types it supports, what load limits apply, and which parts are included. If you're comparing quotes, check that they describe comparable materials, components, installation, and service. The Federal Trade Commission says advertisers need a reasonable basis for objective claims before publishing them, so statements such as “fits any closet” or “doubles storage” should be backed by measurable specifications and clear conditions. (FTC advertising substantiation policy)

    Woodstock Furniture & Mattress Outlet offers armoires and wardrobes with hanging space, shelves, drawers, and removable closet rods for clothing storage. Seeing a piece in person can help you judge its size and layout, especially if you're considering a portable option instead of permanent installation.


    Bring your measurements and photos to Woodstock Furniture & Mattress Outlet and ask about wardrobes and armoires that suit your room and storage needs. The team can help you compare practical options in person, including pieces with hanging space, shelves, drawers, and removable closet rods. Visit Woodstock Furniture & Mattress Outlet to explore what may fit your home.

  • Design Your Dream His and Hers Bathroom in 2026

    Design Your Dream His and Hers Bathroom in 2026

    Two people can ruin a perfectly nice bathroom before 8 a.m.

    One person is leaning into the mirror with a toothbrush. The other is reaching past an elbow for skincare, trying not to knock a hair dryer into the sink. The counter looks wide enough on paper, but the routine still feels cramped. That's usually when couples start asking whether a His and Hers bathroom is worth it, or whether they just need a better layout.

    The honest answer is that most homes don't need full duplication. In the current residential market, only 6% of homebuyers classify his-and-hers bathrooms as essential, while 18% want private toilet compartments, which tells you privacy often matters more than a completely split setup, according to Pebble Grey's review of homebuyer preferences. In practice, that tracks with what works. Many couples don't want two of everything. They want fewer collisions, less waiting, and clearer personal space.

    A well-planned his and hers bathroom solves routine friction more than it solves style. The right version might mean dual vanities, separated storage, and a toilet compartment. In a larger primary suite, it might mean two distinct grooming zones. In a tighter room, it may mean giving each person a defined side and protecting the walking path.

    Introduction

    A lot of bathroom frustration gets blamed on storage bins, mirror size, or countertop mess. Usually the actual issue is choreography.

    If two people use the room at the same time, every move matters. Where the door opens. Whether someone can access a drawer while another person stands at the sink. Whether a shower user blocks the vanity user. These are small design decisions that create daily tension when they're wrong.

    A his and hers bathroom is commonly defined as a primary bathroom split into two distinct sections for double use, often with two sinks and sometimes separate toilets, baths, or showers, as outlined in Pioneer Industries' definition of the layout. That sounds luxurious, but the practical question is simpler. Can two people move through the room without negotiating every step?

    A bathroom for two works best when it removes decision-making from the morning routine.

    Some couples benefit from full separation. Shift workers, parents getting ready at different speeds, and people with very different grooming habits usually notice the difference right away. Others are better served by partial privacy. A private toilet compartment, a wider vanity, and assigned storage can fix most of the stress without rebuilding the room into a boutique hotel suite.

    The mistake I see most often is chasing symmetry before function. Matching sinks and mirrors look clean. They don't automatically make the bathroom easier to share. A strong plan starts with movement, then fixture placement, then storage, then finishes.

    Plan Layout for Two Users

    The footprint decides whether your his and hers bathroom feels easy or irritating. Get the layout wrong, and even expensive fixtures will still feel crowded.

    Start with the room you currently have, not the one you wish you had. Measure wall-to-wall dimensions, ceiling drops, windows, door swings, and any fixed plumbing locations. Then mark where two people would stand, turn, pass, and open drawers during the busiest part of the day.

    An infographic titled Planning Your His and Hers Bathroom Layout, showing three steps to design a dual bathroom.

    Start with clear floor space

    Industry benchmarks recommend a minimum floor dimension of 3,000 mm × 2,500 mm, with 1,524 mm of unobstructed floor space between opposing fixtures for safe maneuverability, according to the Universal Design bathroom specifications. That gives you a practical baseline for a room that can support two vanity zones without constant sidestepping.

    If your room is smaller, don't force a fully mirrored layout. It's better to build one strong dual-use wall than two compromised zones that pinch circulation.

    Use a quick sketch and mark these points first:

    • Entry path: Keep the route from the door to the vanity and toilet free of cabinet corners and open drawers.
    • Standing zones: Draw where each person's feet will be during peak use.
    • Conflict points: Note the places where a drawer, door, or body blocks another task.
    • Wet and dry separation: Try to keep shower traffic from crossing directly through the grooming zone.

    If you want another practical reference while sketching dimensions and fixture relationships, Planning your next UK bathroom renovation offers a useful layout-oriented read.

    A short walk-through can help before you finalize your plan:

    Build for simultaneous use

    The best shared layouts don't just fit two people. They let both people complete different tasks at the same time.

    That usually means one person can use the sink while the other accesses storage, enters the shower, or uses a separate toilet space. If every action happens on the same wall, the room may still feel crowded even when dimensions look acceptable.

    Practical rule: Sketch the room around your busiest 15 minutes of the day, not around the empty room.

    A good plan should answer three questions quickly. Can both users stand comfortably at once? Can one person leave without forcing the other to move? Can drawers and doors open without blocking the walkway? If the answer to any of those is no, the layout needs work before you choose finishes.

    Design Dual Vanity Zones

    Dual vanities are where couples usually start, and that makes sense. The vanity is the highest-traffic area in most shared bathrooms. But two sinks alone don't fix crowding. Width, spacing, mirror placement, and storage access do.

    The National Kitchen and Bath Association calls for at least 36 inches center-to-center between double lavatories, and most dual vanities work best at 60 to 72 inches total width to provide landing space and storage, according to this summary of NKBA vanity sizing guidance. Those numbers matter because they protect elbow room and reduce the constant re-shuffling of everyday items.

    Choose the right vanity arrangement

    There are three common approaches, and each one works for a different kind of room.

    A single long vanity is the easiest to fit and usually the most efficient for plumbing. It works well when the room is rectangular and the walking path needs to stay simple.

    Two separated vanity units create more psychological ownership. Each person gets a distinct base cabinet, drawer stack, and mirror. This arrangement often feels calmer, especially when one person keeps a much fuller routine than the other.

    Split vanities on opposing or adjacent walls can be excellent in larger spaces. They reduce shoulder-to-shoulder tension, but they require more planning so circulation doesn't become awkward.

    For another dimension-focused reference, this South Jersey double vanity planning guide is useful when comparing standard widths and layout options.

    Ideal dual vanity dimensions

    Specification Dimension
    Minimum lavatory spacing 36 inches center-to-center
    Optimal total vanity width 60 to 72 inches

    What the table doesn't show is the lived experience. A vanity can meet minimum spacing and still fail if one sink sits too close to a wall, a tower cabinet steals shoulder room, or one drawer stack opens into the standing zone.

    Don't center the cabinetry and assume the room will feel balanced. Center the users first.

    Mirror and landing space matter

    Separate mirrors help more than many couples expect. They reduce visual overlap and make the vanity feel like two stations instead of one long counter. If one partner uses electric grooming tools, makeup organizers, or daily medication, build that into the landing area instead of treating it as clutter to solve later.

    The most successful dual vanity zones also divide storage by habit, not just by side. If one person needs shallow top drawers and the other needs tall appliance storage, identical interiors can become a nuisance even when the exterior looks clean.

    Optimize Storage for Shared Use

    Storage problems in a shared bathroom rarely come from having too little cabinet volume. They come from mixing fast-access items, backup supplies, and personal tools in the same few places.

    A his and hers bathroom works better when shared items are obvious and personal items are protected. That means each person should have a defined home base, and shared supplies should live outside the prime counter zone whenever possible.

    Divide storage by routine, not category

    Many bathrooms get organized like a retail display. Hair products together. Dental products together. Skin care together. That sounds tidy, but it creates morning traffic because both people reach into the same drawer families at the same time.

    Instead, organize around use:

    • Personal daily zone: Keep each person's most-used items in their own top drawer or immediate cabinet reach.
    • Shared support zone: Put toothpaste, hand soap backups, extra tissues, and common items in neutral storage that neither person has to defend.
    • Low-frequency storage: Towels, cleaning products, refill stock, and travel items can move farther from the vanity.

    This one shift does more to reduce countertop creep than buying prettier containers.

    Reduce reach conflicts

    The biggest friction point isn't visual clutter. It's interruption. One person bends for a drawer while the other is standing at the sink. One opens a mirrored cabinet into the other's line of use. One keeps tall bottles on the counter because the under-sink area is packed with plumbing and bulk supplies.

    A cleaner setup usually includes:

    • Drawer-first vanities: Drawers expose contents better than deep doors and prevent the “everything piled underneath” problem.
    • Vertical separation: Use shallow top drawers for small daily tools and deeper lower drawers for bulkier items.
    • Open shelf restraint: Open shelving works best for folded towels or trays, not for every product both people use daily.
    • Shower storage at reach height: Keep shampoos and body products where a standing user can grab them easily without twisting or bending.

    Give each person ownership

    Shared bathrooms become calmer when each partner has at least one area the other person doesn't need to touch. That could be a drawer stack, a linen cabinet section, or a mirrored cabinet interior.

    Storage should remove negotiations. If you have to ask where your things go every week, the layout is still unfinished.

    A useful test is simple. Clear the counter completely, then ask whether both users can put away their daily routine without stuffing, stacking, or doubling up. If they can't, the storage plan needs refinement before the renovation is complete.

    Configure Plumbing and Lighting

    Plumbing and lighting shape whether the room feels polished or frustrating. Good-looking plans often fail in real life precisely due to these considerations.

    You can have the right vanity width and still dislike the room if hot water fluctuates, shutoffs are hard to reach, shadows fall across the mirror, or two fixtures interfere with each other during peak use. Technical decisions don't need to be flashy, but they do need to be deliberate.

    An infographic showing plumbing and lighting options for dual bathrooms with pros and cons for each configuration.

    Fix movement before rough-in

    A critical planning detail is the 1,800 mm diameter clear turning area. Paired with offset bath and shower controls on perpendicular walls, that layout reduces fixture collisions by 40% and cuts usability failures by 35% during peak use, according to the Irish Universal Design sanitary facilities guidance. Those numbers matter because they describe a common problem in shared bathrooms. The room may look large enough, but people still bump into doors, each other, or fixture edges.

    That same guidance also supports offsetting controls so one user doesn't get sprayed or interrupted while another adjusts water. In practice, that's one of the smartest upgrades in a dual-use shower or tub zone.

    If you need local plumbing insight on drainage or fixture servicing, a specialist such as MG Drain Services LLC can be a helpful example of the kind of trade support worth consulting early.

    Compare plumbing approaches

    Wall-mounted plumbing can look cleaner and free up cabinet space below. It also asks for careful rough-in work and leaves less flexibility if you change fixtures later.

    Under-counter plumbing is easier for many installers and often simpler to service. The trade-off is lost storage volume inside the vanity, which matters a lot in a shared setup.

    A practical comparison:

    • Wall-mounted fixtures: Better for floor cleaning and cleaner visual lines.
    • Standard deck or under-counter plumbing layouts: Easier to fit into many remodels and often easier to modify later.

    Layer light by task

    One overhead light won't do the job in a bathroom for two. Each sink needs reliable face lighting, and the room needs broader illumination that doesn't create harsh contrast.

    Use a layered approach:

    • Task lighting at each mirror: This supports shaving, makeup, skincare, and contact lenses.
    • Ambient lighting: This fills the room evenly so corners and walk paths don't feel dim.
    • Accent lighting: Use it carefully for niches, ledges, or architectural features if the room has enough space and restraint.

    Good bathroom lighting should help both people see clearly at the same time, not flatter the room from one angle.

    Plan electrical locations early. Hair tools, electric toothbrushes, and mirror accessories need power near the point of use, but placement still has to respect wet-area safety requirements and local code.

    Balance Styles Set Budget and Source Products

    A shared bathroom usually stalls when style decisions become personal. One person wants warm wood and softer shapes. The other wants slab fronts, metal framing, and a cleaner palette. The way through that disagreement isn't compromise for its own sake. It's choosing which surfaces must feel shared and which details can feel individual.

    A neutral architectural base tends to work best. Keep the expensive elements quiet. Tile, cabinetry, countertops, and plumbing finishes should age well and support both tastes. Then let mirrors, hardware, textiles, stools, trays, or wall color carry more personality.

    A guide on designing and budgeting a shared bathroom featuring steps for styling and financial planning.

    Budget for the parts that solve problems

    Adding fixtures such as a second sink or showerhead typically increases renovation costs by 10–25%, and allocating 10–15% of the total remodel budget for storage enhancements is commonly advised, according to Homestyler's practical guidance on shared bathroom planning. That's a useful reminder because couples often spend heavily on surfaces, then underfund the drawers, dividers, pull-outs, and cabinet interiors that keep the room functioning.

    A smart budget usually protects these categories first:

    • Cabinet internals and organizers: These prevent daily clutter and make a smaller vanity perform above its size.
    • Good mirrors and lighting: Better visibility changes how the room works every day.
    • Durable faucets and drawer hardware: Shared bathrooms get heavy use.
    • Storage accessories: Trays, drawer inserts, laundry containment, and towel handling are not afterthoughts.

    Source products with function in mind

    Many remodels frequently drift into impulse buying. A vanity can look excellent online and still fail because the drawers are shallow, the countertop edge steals space, or the sink bowls leave almost no landing area.

    When comparing products, check for:

    • Material honesty: Painted finishes, wood veneers, laminates, stone tops, and composite surfaces all wear differently.
    • Interior usability: Open the drawers mentally before you buy the vanity. Can you place real items, not just folded towels?
    • Fixture serviceability: Ask how easy it will be to repair or replace parts later.
    • Mirror proportion: The mirror should support both lighting and user height, not just fill wall space neatly.

    A cohesive his and hers bathroom doesn't need every finish to match perfectly. It needs the room to feel intentional and easy to use. That's a better standard than symmetry.

    Conclusion and Next Steps

    A strong his and hers bathroom doesn't start with twin sinks or matching mirrors. It starts with friction. Where do you wait, reach, bump, or interrupt each other now? Fix those moments first, and the room will feel better long before the finishing touches go in.

    Use a short final checklist before you commit:

    • Confirm the layout: Walking paths, standing zones, drawer swings, and door clearances.
    • Review the vanity plan: Width, mirror placement, landing space, and personal storage.
    • Check plumbing logic: Control placement, maintenance access, and wet-zone separation.
    • Audit lighting: Each person should be able to groom without shadows.
    • Finish the product list: Cabinet interiors, hardware, mirrors, accessories, and storage inserts.

    If your sketch still depends on one person stepping aside so the other can function, keep refining it. That's the clearest sign the bathroom is still designed for one user with duplicate fixtures.

    A contractor, designer, or plumber can help verify rough-in and installation details, but the household routine has to come from you. Walk through a weekday morning. Note what slows you down. Then build the room around those patterns instead of around a showroom photo. That's how a shared bathroom becomes calm, practical, and worth the investment.


    If you're updating more than the bathroom and want the rest of the home to feel just as intentional, Woodstock Furniture & Mattress Outlet is worth a visit. Their team helps North Georgia shoppers think through layout, storage, scale, and everyday function across bedrooms, living spaces, and home offices, with a hands-on approach that can make whole-home planning feel a lot simpler.