Category: Uncategorized

  • How Big is a Queen Size Bed? A Guide to Dimensions and Room Fit

    How Big is a Queen Size Bed? A Guide to Dimensions and Room Fit

    If you're wondering, "how big is a queen size bed?", the standard queen mattress measures 60 inches wide by 80 inches long. It’s the most popular mattress size in the United States, offering a good balance between spacious comfort and a manageable footprint that fits well in most bedrooms.

    The Standard Queen Bed Dimensions Explained

    Understanding the exact measurements of a queen bed is the first step in making sure it’s the right fit for your room and your lifestyle. For couples, singles who enjoy spreading out, or guest rooms, the queen has become a go-to choice because it offers ample space without making smaller rooms feel cramped.

    Introduced in the 1950s, the queen bed offered a welcome upgrade from the full size bed, which was the standard at the time. A queen mattress has a total surface area of 4,800 square inches. For couples, that provides about 30 inches of personal space for each person — a noticeable improvement over the 27 inches per person available on a full mattress.

    For those who need to see the numbers laid out, here's a quick reference table to make your bedroom planning a bit easier.

    Queen Bed Dimensions at a Glance

    This table breaks down the standard queen bed dimensions in both inches and centimeters, providing a clear reference for your planning.

    Measurement Inches Centimeters Total Surface Area
    Width 60 in. 152 cm
    Length 80 in. 203 cm
    Surface Area 4,800 sq. in. (3.09 sq. m.)

    With these exact numbers in hand, you can start measuring your space and determining how a new queen bed will fit with your other bedroom furniture.

    Comparing the Queen Bed to Other Mattress Sizes

    Knowing the exact dimensions of a queen bed is a great start, but those numbers can feel a bit abstract. To get a better feel for its scale, it helps to see how it compares to other common mattress sizes. This isn't about finding a "winner," but about helping you visualize the real-world trade-offs in space and comfort.

    This quick visual gives a clear breakdown of a standard queen bed’s width, length, and total sleeping surface.

    Infographic detailing queen bed dimensions, showing 60 inches width, 80 inches length, and 4800 square inches.

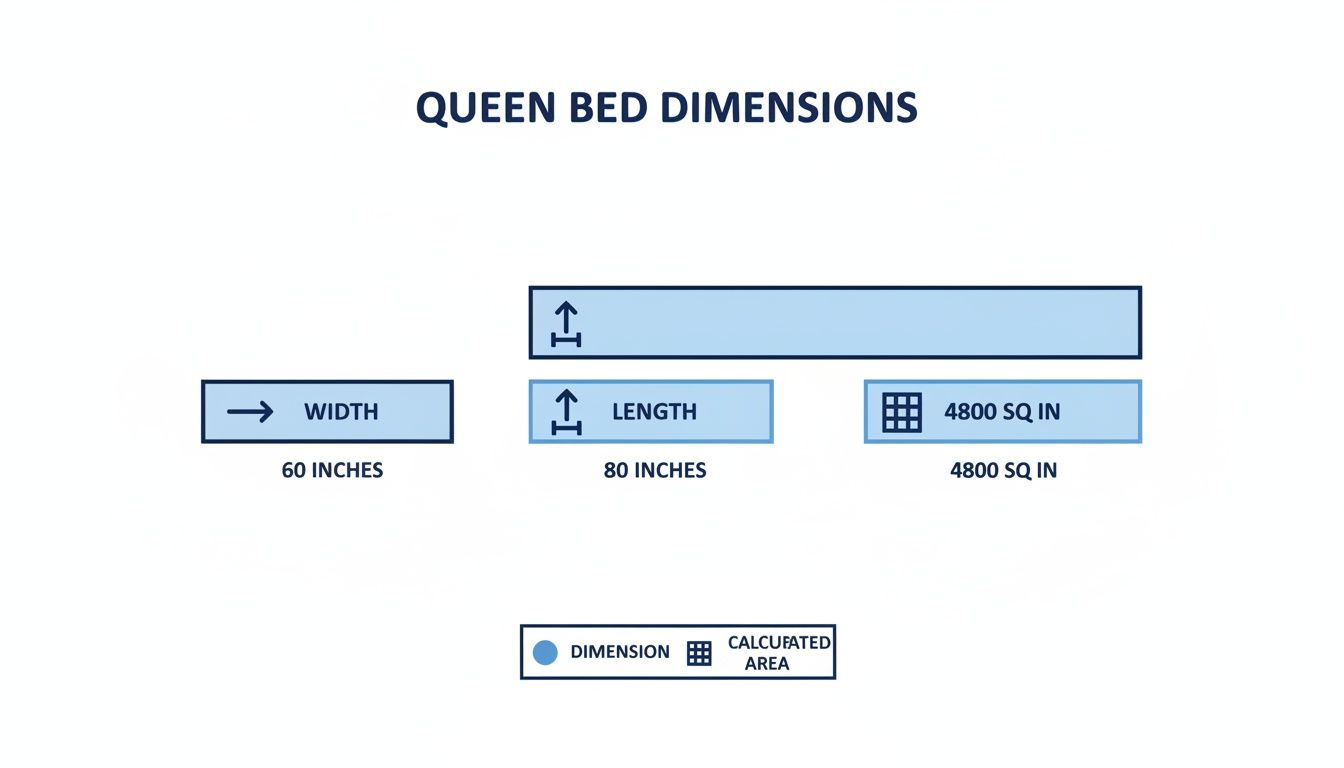
    Seeing the 60-inch width and 80-inch length helps put its 4,800 square inches of sleeping surface into perspective.

    Queen vs Full Bed

    One of the most common decisions shoppers face is choosing between a queen and a full size bed. A full mattress, also known as a double, measures 54 inches wide by 75 inches long. While a six-inch difference in width and five-inch difference in length might not sound like much, that extra space can be significant in practice.

    A full bed can feel comfortable for a single sleeper. For couples, however, those missing inches mean each person only gets 27 inches of personal space, which is the same width as a crib mattress. The queen’s slightly wider frame gives each person 30 inches, which can contribute to a more comfortable night's sleep without bumping elbows.

    A queen bed is 6 inches wider and 5 inches longer than a full bed. This extra space makes a considerable difference for couples or taller individuals seeking more room to stretch out without feeling cramped.

    Queen vs King Bed

    Going up in size, a standard king bed measures 76 inches wide by 80 inches long. It offers the same length as a queen but provides an additional 16 inches of width.

    A king is a suitable choice for couples who value personal space, often share their bed with children or pets, or simply prefer a more luxurious, sprawling feel. Each person gets 38 inches of width—the same as a twin mattress. The main trade-off is bedroom real estate. Choosing a king often means sacrificing floor space that could be used for a dresser, a chair, or walking room.

    Why the Queen Bed Became a Household Staple

    Have you ever wondered why the queen bed is so common in homes across America? The story behind it reflects major changes in how we live. Before the 1950s, the much smaller full bed was the primary choice for couples — a size that can feel quite snug by today’s standards.

    This began to change after World War II as American homes started getting larger. With more space available, people began to place a higher value on personal comfort and a good night's sleep. The queen bed emerged as an ideal solution, offering a significant upgrade in sleeping room without needing the massive footprint of a king mattress. It filled a gap in the market, giving couples more breathing room.

    A Shift in American Lifestyles

    This move toward more spacious living is a huge piece of the puzzle. It wasn't just about the dimensions; it was about the idea of a more comfortable life. Mattress marketers in the 1950s and 60s tapped into this by using regal names like "queen" and "king" to associate these larger beds with luxury and status.

    This marketing approach was effective. By 1999, the once-dominant full size bed saw its popularity decline, while the queen bed became the new standard for couples. Today, it remains the top-selling mattress size, making up a large portion of all mattress sales in North America. It’s a testament to its blend of comfort and practicality. You can get more information on the history of mattress sizes at The Bedding Mart.

    The queen bed solved a real problem for millions of people: it offered a more comfortable sleep experience for two without requiring an oversized master bedroom. Its rise in popularity mirrors the country's growing focus on personal wellness and comfort at home.

    Ultimately, understanding how big a queen size bed is goes beyond just its measurements. It’s about recognizing its role as a practical, comfortable centerpiece that fits the way many people live today.

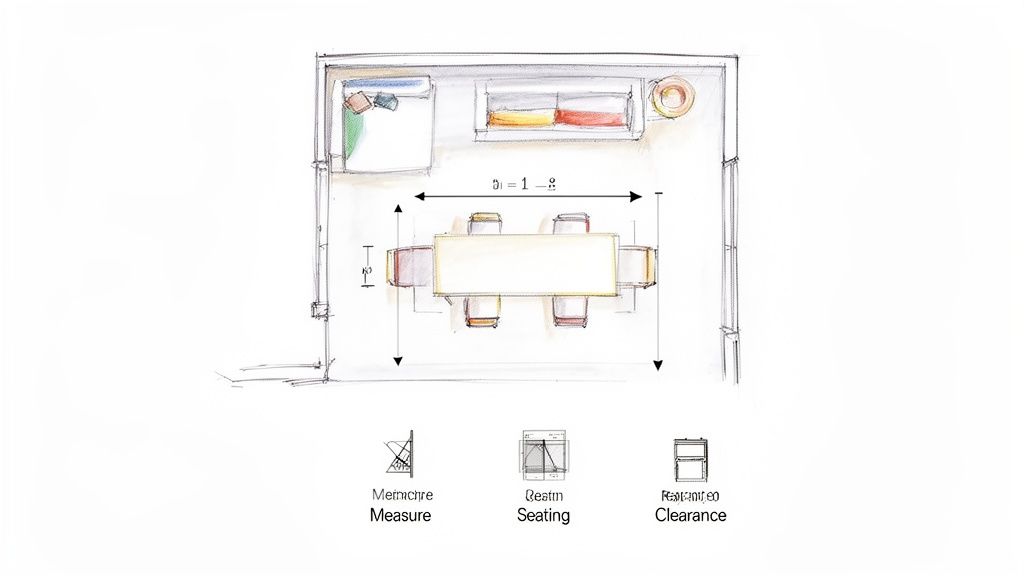
    Planning Your Room Layout Around a Queen Bed

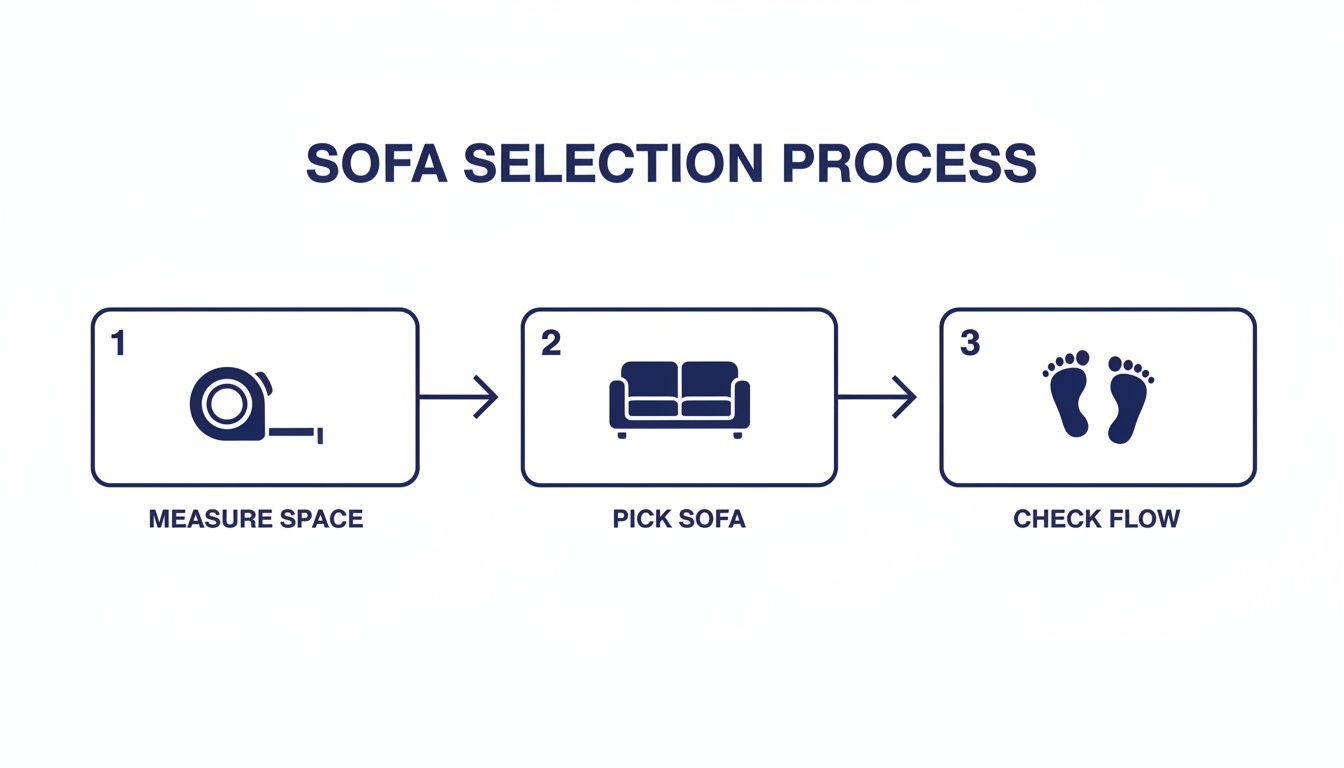
    Knowing the measurements of a queen bed is a good start, but the real test comes when you place it within your bedroom. A bed’s dimensions on paper can feel very different once it’s actually in the room. Thoughtful planning can help create a space that feels open and functional.

    Bedroom layout sketch with queen size bed, nightstands, dresser, wardrobe, and dimensions.

    Before committing to a bed frame or bedroom set, it’s always a good idea to use a tape measure. Once you have your queen bed’s dimensions, the next step is to figure out how to arrange your bedroom furniture for a space that feels both balanced and functional. This planning stage can help you avoid the common issue of buying furniture that is too large for your home.

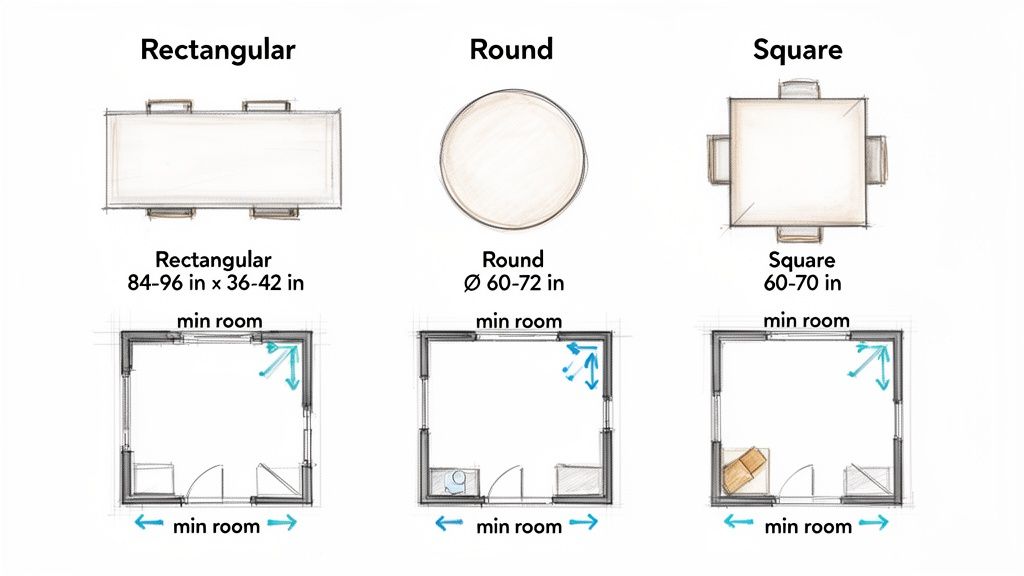
    The Minimum Room Size for a Queen Bed

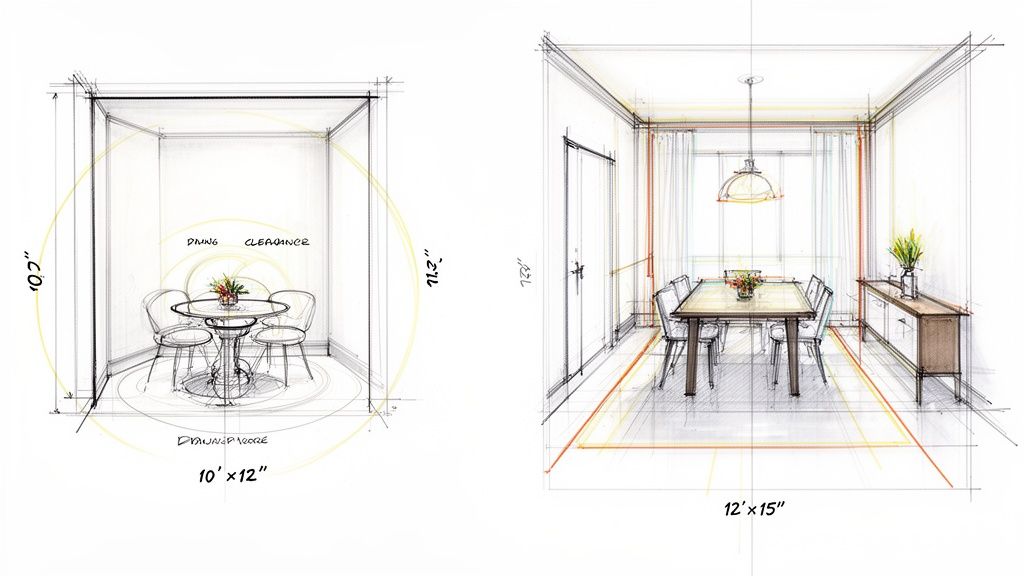
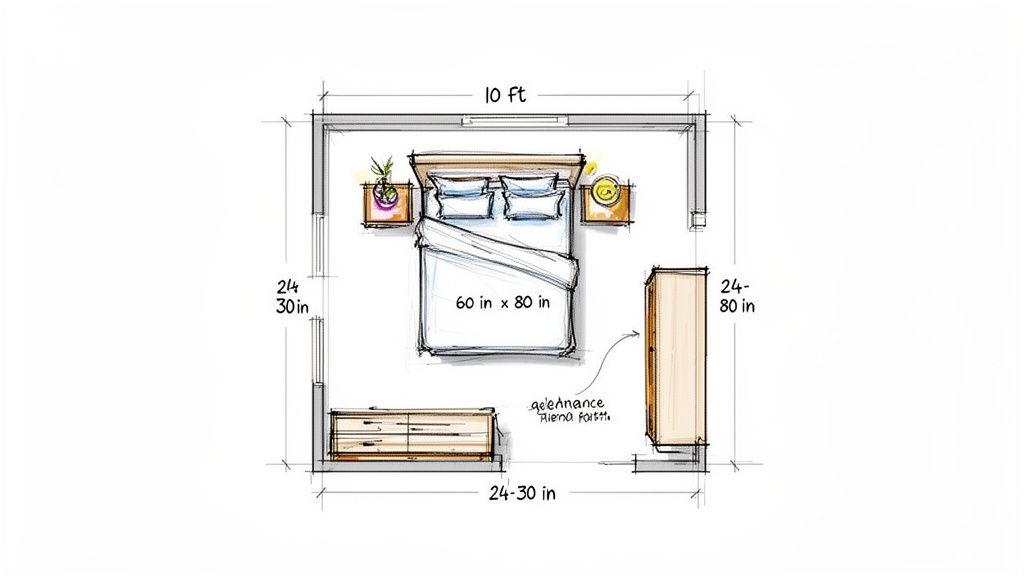
    So, how big of a room do you need? While every layout is different, a general guideline is that a queen bed fits most comfortably in a room that's at least 10 feet by 10 feet. This size provides enough space for the bed while leaving room for other essential pieces and for you to move around.

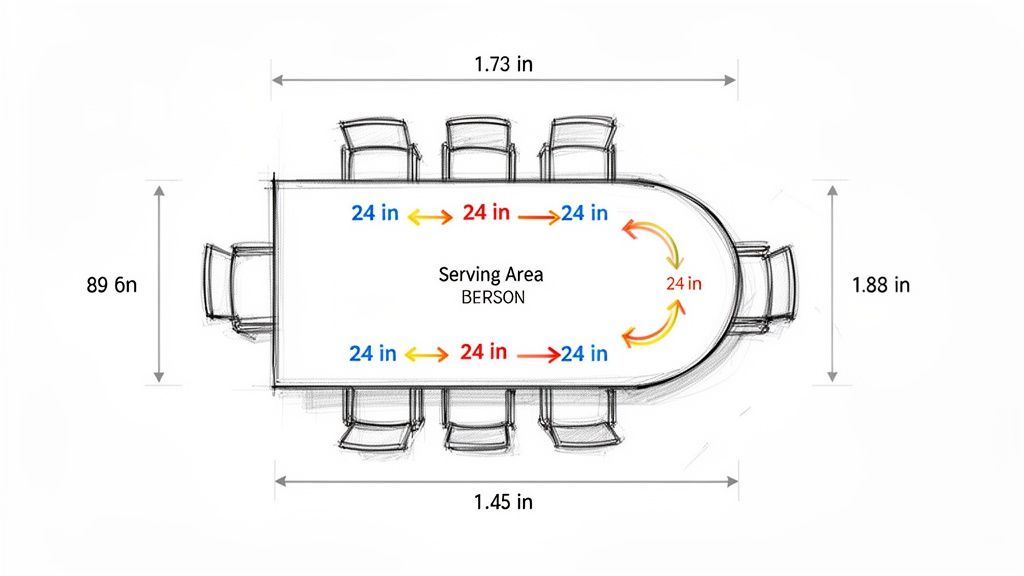
    For a room to feel comfortable, you need clear pathways. It is recommended to leave at least 24 to 30 inches of open space on two or three sides of the bed. This clearance allows you to walk around without difficulty, make the bed, and access your closet or dresser.

    Leaving at least two feet of clearance around your bed is more than just a design tip—it's a practical necessity. This space ensures you can navigate your room comfortably and prevents the layout from feeling crowded and stressful.

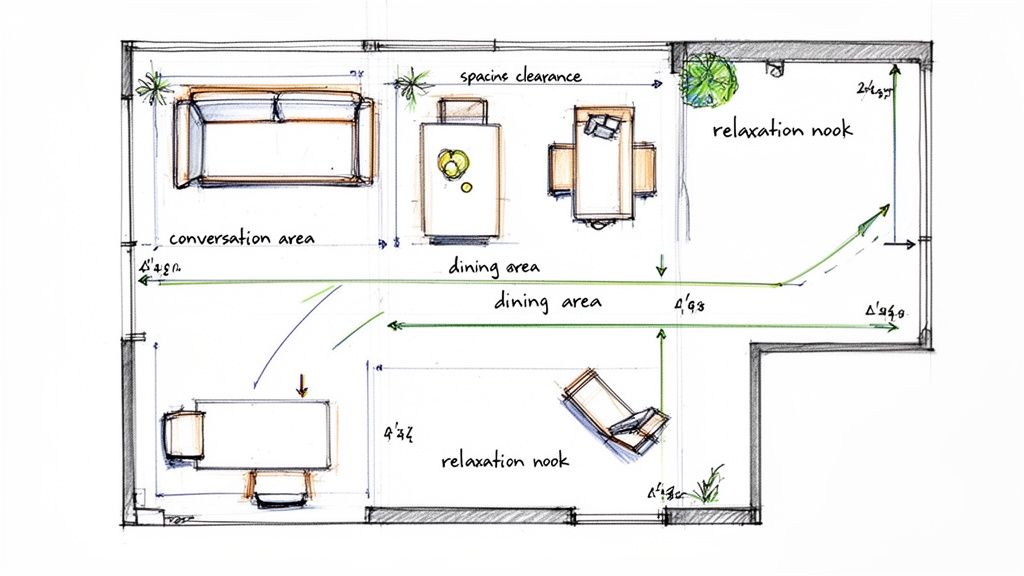
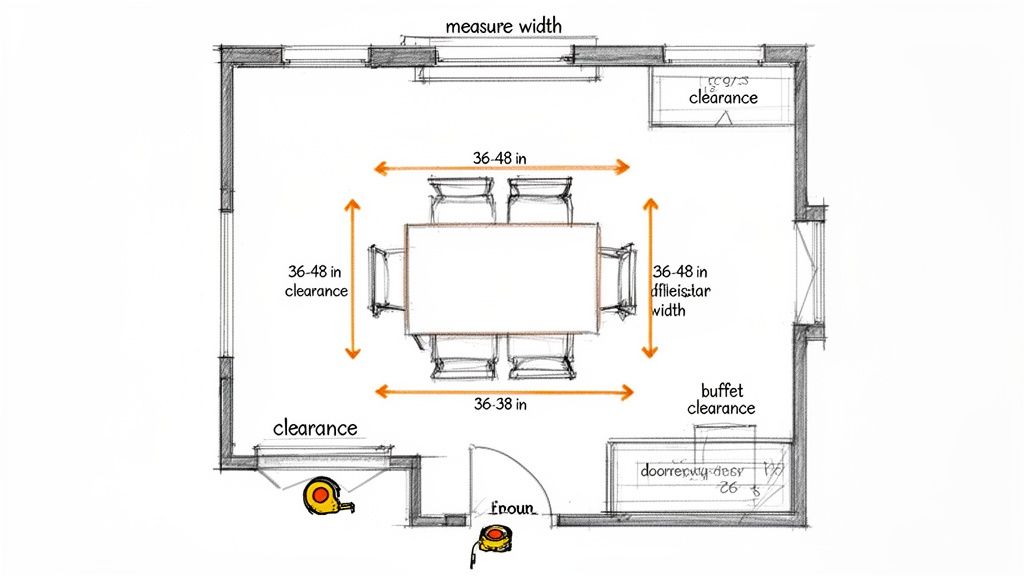
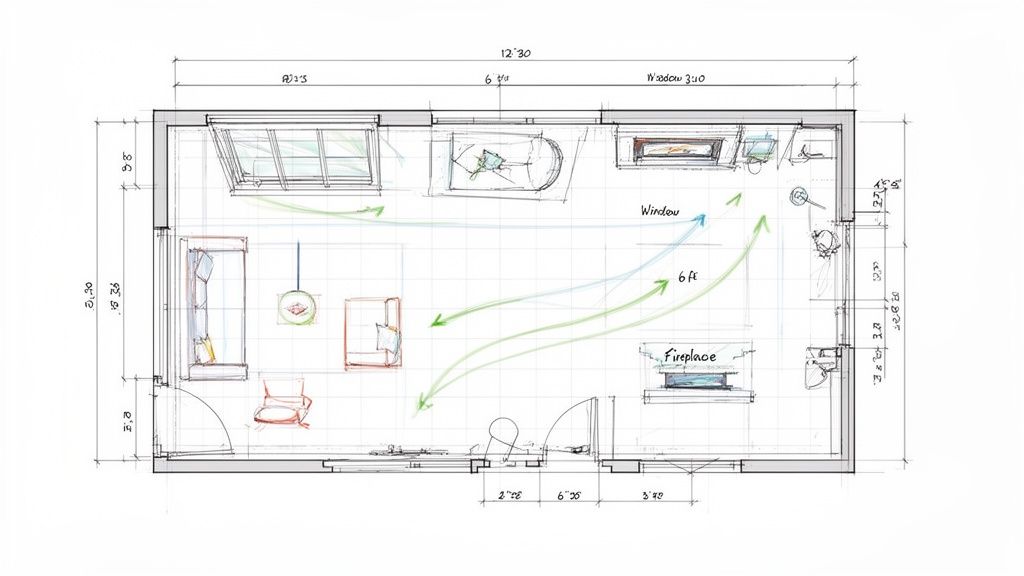
    Arranging Furniture for a Balanced Feel

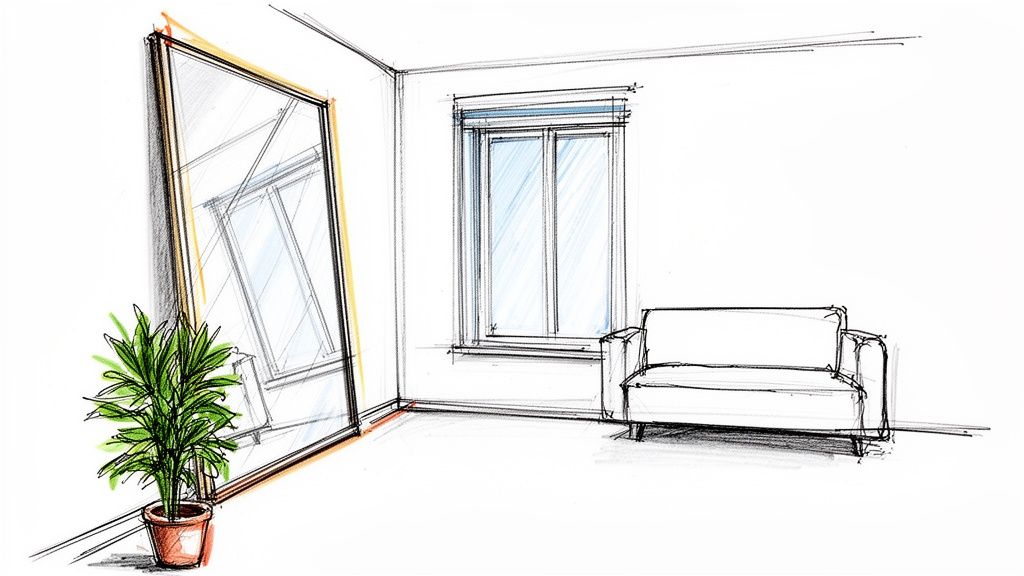
    Smart furniture placement is key to a well-balanced bedroom. Placing the queen bed against the longest, uninterrupted wall usually creates a natural focal point and makes the entire room feel more spacious. This placement typically leaves enough room on either side for nightstands.

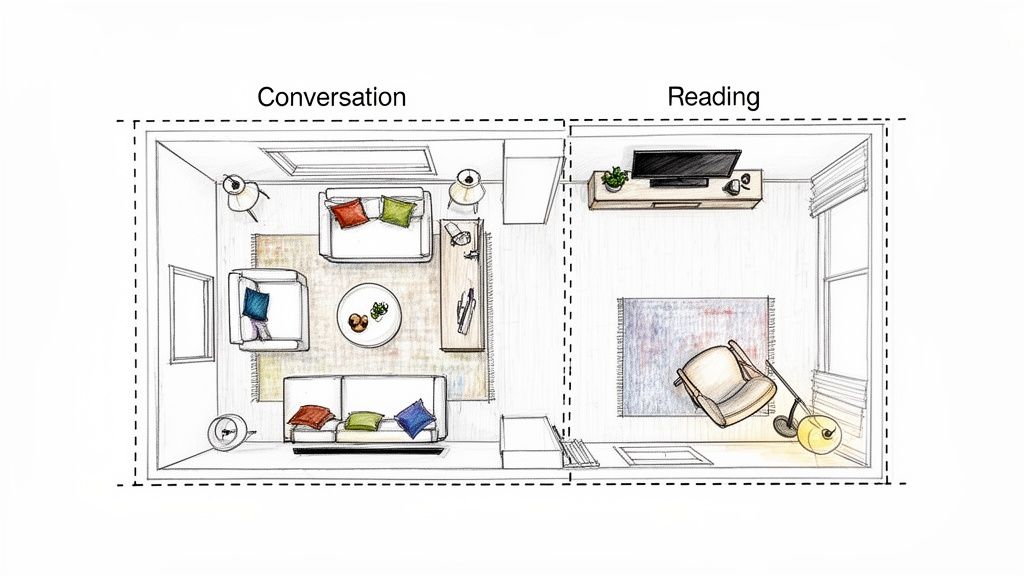
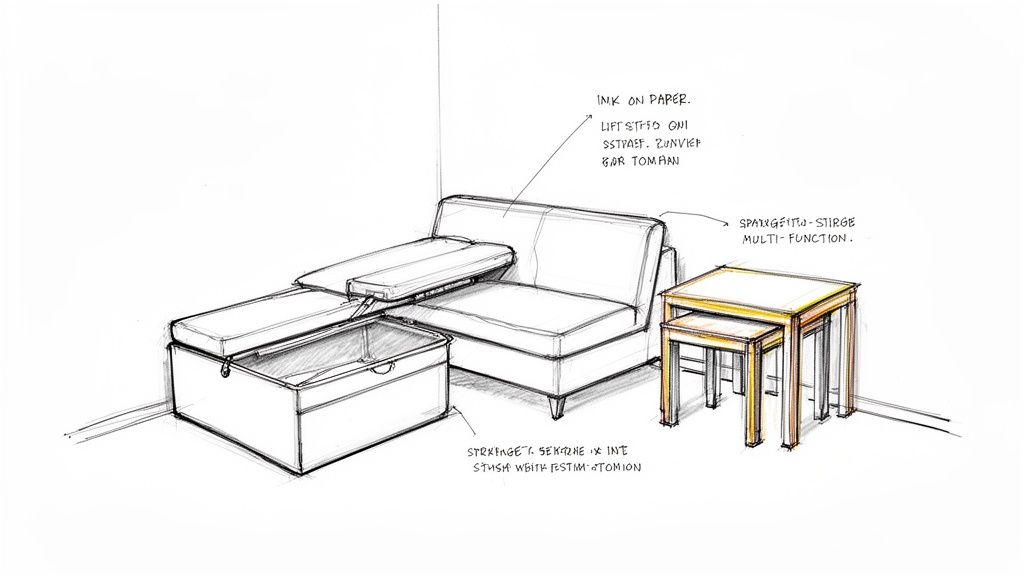
    When you start adding in other pieces, think about their function and footprint:

    • Nightstands: Try to find nightstands that are about the same height as the top of your mattress. This makes them easier and more comfortable to reach from bed.
    • Dressers: If you have the space, place your dresser on the wall opposite the bed. Be sure to account for the clearance needed to fully open all its drawers.
    • Walkways: Before you finalize the layout, do one last check. Is your main path—from the door to the bed and over to the closet—clear and easy to walk?

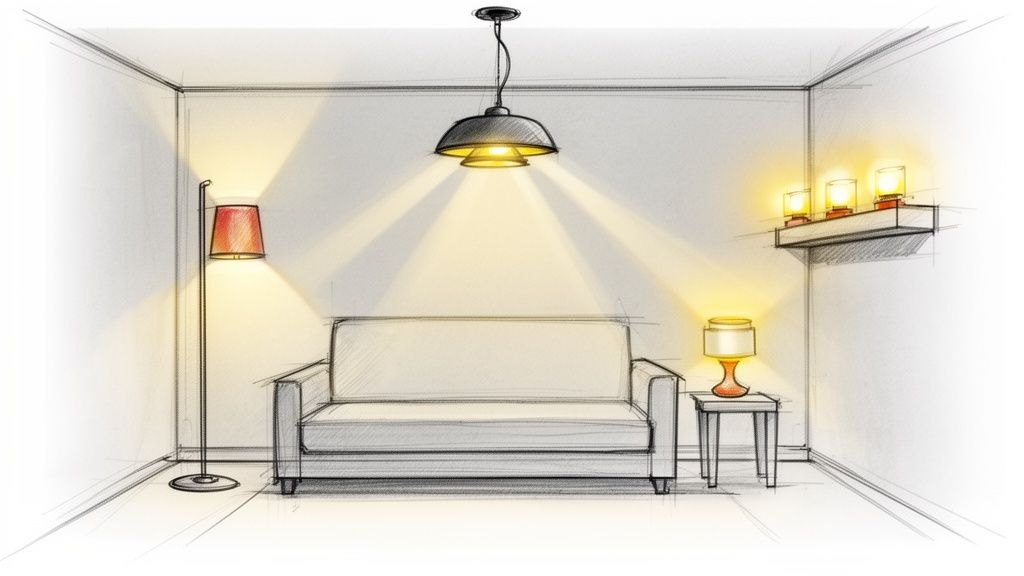
    By thinking through these layout details ahead of time, you can ensure your new queen bed not only fits but also enhances your bedroom’s overall comfort and style.

    Exploring Queen Bed Variations You Should Know

    While the standard 60-inch by 80-inch queen is the most common mattress size, it's not the only option. A few less-common variations were created to solve specific problems, such as needing more width or preventing feet from hanging off the end. Knowing about these alternatives can help you find the right mattress for your home.

    Illustration comparing standard, Olympic, and California queen bed sizes with their dimensions.

    The standard queen remains a versatile choice, fitting a wide range of accessories and accounting for a significant portion of mattress purchases in the U.S. You can learn more about how mattress sizes became standardized in this article on the evolution of mattress sizes on gottasleep.com. But if the standard queen doesn't quite meet your needs, one of these unique sizes might be a better fit.
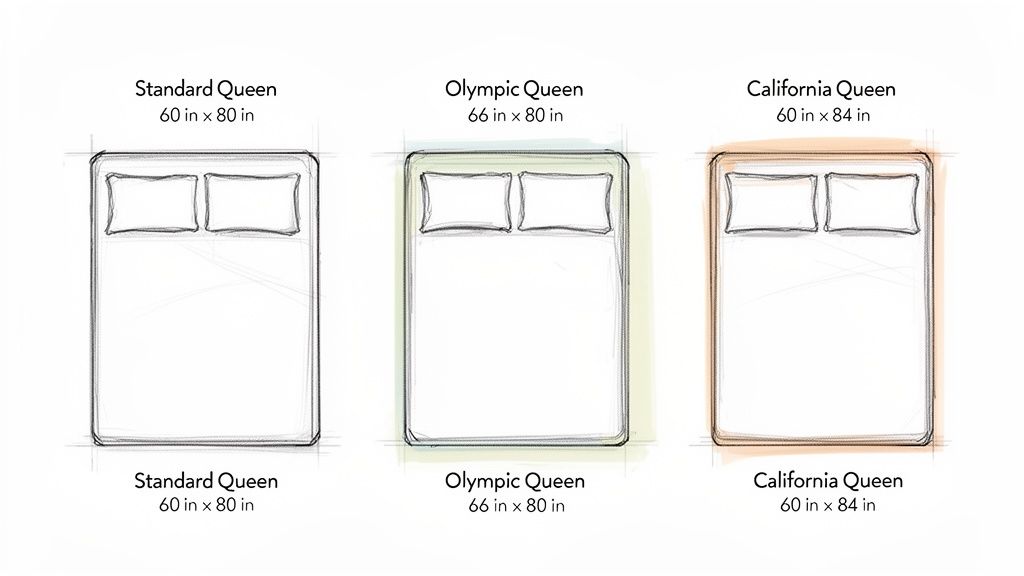
    Olympic Queen

    The Olympic Queen mattress adds six inches of width to the standard queen, measuring 66 inches wide by 80 inches long. For couples who feel a bit cramped on a regular queen but don’t have space for a king, that extra space can be a useful alternative.

    It’s an interesting "in-between" solution, but be aware that finding sheets and bed frames that fit this non-standard size can be more challenging.

    California Queen

    If you or your partner are tall and find your feet dangling off the end of the bed, the California Queen might be a solution. It keeps the standard 60-inch width but adds four inches of length, making it 60 inches by 84 inches. For taller sleepers, those extra inches can make a significant difference.

    Much like its more famous counterpart, the California King, the California Queen is built with one thing in mind: extra length for a more comfortable night's sleep for taller individuals.

    Split Queen

    A Split Queen is a unique setup. Instead of one mattress, it consists of two separate mattresses, each measuring 30 inches by 80 inches. When placed side-by-side on a bed frame, they have the exact footprint of a standard queen.

    This design is often used with an adjustable bed base. It allows each person to raise or lower their head and feet independently, accommodating different sleeping preferences.

    Choosing the Right Frame for Your Queen Mattress

    The mattress is only half of the equation. The bed frame you choose sets the style and determines the final footprint of your bed in the room. While a queen mattress will always be 60 inches wide by 80 inches long, the frame can add anywhere from a couple of inches to over a foot in both directions.

    This is a detail that is often overlooked when planning a room layout. A simple metal frame or a sleek, modern platform bed will keep the overall size close to the mattress dimensions, making them a good fit for smaller spaces. On the other hand, a large sleigh bed or a frame with a thick, upholstered headboard can dramatically increase how much floor space the bed occupies.

    Measuring for Your New Bed Frame

    When browsing different styles, it's important to think beyond the mattress size. Always ask for the frame's total dimensions—including the headboard and footboard—to ensure it won’t overwhelm your bedroom or block walkways.

    Always measure the full dimensions of the bed frame—not just the mattress. A larger frame with a decorative headboard can easily add several inches to the length and width, impacting your room's available space and layout.

    Don't forget to consider vertical height. If you’re pairing a thick mattress with a new, taller frame, your bedding might suddenly look too short. For instance, a king-size comforter often drapes better and looks more balanced on a high-profile queen bed than a standard queen comforter would. Keeping these details in mind helps ensure your entire setup looks cohesive and functions well in your room.

    Common Questions About Queen Size Beds

    Choosing a new bed is a significant decision, and it’s natural to have questions. Here are answers to some of the most common questions we hear from shoppers.

    Can Two Adults Sleep Comfortably on a Queen Bed?

    Yes, a standard queen bed was designed to accommodate two adults. It provides each sleeper with 30 inches of personal space, which is enough room for most couples to sleep soundly without feeling cramped. This balance of individual space and a manageable footprint is why the queen is the most popular mattress size in America for couples.

    What Is the Real Difference Between a Full and Queen Bed?

    A queen bed is 6 inches wider and 5 inches longer than a full-size bed. A queen measures 60” x 80”, while a full is 54” x 75”. While those numbers might not seem like a huge jump, the difference is often noticeable. That extra room is beneficial for couples who want more personal space or for taller individuals who find their feet hang off the end of a full bed.

    Do I Need Special Sheets for a Thick Queen Mattress?

    It is very likely. If your new queen mattress is particularly thick—especially if it’s over 14 inches tall—you will likely need to buy deep-pocket sheets. Standard sheets may not have enough fabric to wrap all the way around and under, which can cause the corners to pop off during the night.

    Before shopping for new bedding, measure your mattress’s height. Then, check the sheet packaging for its "pocket depth" to ensure it can accommodate your mattress.

    Quick tip: Don't forget to include your mattress topper when you measure! A plush topper can easily add another 2 to 4 inches, making deep-pocket sheets a necessity for a snug, secure fit.

    Is an Olympic Queen the Same as a Standard Queen?

    No, they are two different sizes. An Olympic Queen is a non-standard mattress that measures 66" x 80", making it 6 inches wider than a standard queen. While that extra width can be nice, be prepared for a challenge when it comes to finding frames and bedding that fit correctly, as they may need to be special-ordered.


    Still have questions? The team at Woodstock Furniture & Mattress Outlet has extensive experience and is here to help you find the right mattress and bedroom furniture for your home. Visit us in person to explore our great selection and see these options for yourself!

  • Unlocking the Real Adjustable Base Benefits for Health and Sleep

    Unlocking the Real Adjustable Base Benefits for Health and Sleep

    With an adjustable base, you can fine-tune your sleep position to help with common problems like back pain, snoring, and acid reflux. By raising your head or feet with a simple remote, you can take pressure off your spine, open up your airways, and improve circulation for a more restful night’s sleep.

    From Simple Luxury to a Wellness Essential

    For a long time, adjustable bases were seen either as a high-end luxury or something you’d only find in a hospital room. That's not the case anymore. As more of us are focusing on better sleep and overall wellness, the benefits of adjustable bases have made them a key part of the modern bedroom.

    The idea behind it is straightforward: a flat mattress doesn’t always support the natural curves of your body or address specific health issues. An adjustable base addresses this by putting you in control of your sleeping posture. This is about more than just finding a comfortable angle to watch TV in bed — it’s about creating an ergonomic sleep environment that works with your body, not against it. For an even deeper dive, check out this article on the health and lifestyle benefits of adjustable beds.

    Solving Common Sleep and Comfort Problems

    Where an adjustable base really shines is in its ability to tackle everyday aches and pains that can ruin a good night's sleep and affect you the next day. Even small, precise adjustments can make a significant difference.

    • Easing Back and Joint Pain: Lifting your legs just a little can take a surprising amount of pressure off your lower back. At the same time, a slight incline for your head can relieve tension in your neck and shoulders, helping you maintain better spinal alignment all night long.
    • Reducing Snoring and Improving Breathing: Propping your head up slightly uses gravity to help keep your airways open. For many people, this simple change can reduce or even eliminate snoring.
    • Helping with Acid Reflux and Heartburn: If you suffer from acid reflux or GERD, sleeping with your upper body elevated makes it much harder for stomach acid to travel up your esophagus, offering much-needed relief.
    • Boosting Circulation: Raising your feet is a great way to improve blood flow and can help reduce swelling in your legs and ankles. This is especially helpful after a long day of being on your feet or sitting at a desk.

    When it comes down to it, an adjustable base turns your mattress from a passive, flat surface into an active, dynamic sleep system. It gives you the power to find the exact position that brings you relief and comfort, which leads to deeper, more restorative sleep and a much better-feeling day ahead.

    How Ergonomics and Gravity Improve Your Health While You Sleep

    An adjustable base does more than just make your bed feel extra cozy; it turns it into a tool for your well-being. By putting ergonomics and the simple force of gravity to work for you, you can tackle some of the most common issues that disrupt a good night's sleep.

    The key is in how it lets you shift your body weight and change your posture while you rest. Instead of your body fighting against a flat surface all night, you can find the ideal position to naturally align your spine, open up your airways, and even improve circulation. It’s a proactive approach that helps you wake up feeling refreshed, not sore.

    The Zero-Gravity Position and Spinal Decompression

    One of the most talked-about features of an adjustable base is the zero-gravity preset. This position lifts your head and feet just slightly above your heart, copying the posture astronauts use during liftoff to handle intense gravitational forces.

    This position offers some notable relief right here at home. By creating a gentle "S" curve in your spine, it takes a significant amount of pressure off your lower back. When you consider how poor posture contributes to back pain during the day, it's easy to see why proper alignment is just as critical at night.

    This gentle cradling effect lets the muscles all along your back relax, helping to melt away the tension that builds up from hours of sitting or standing. Many people find this one position helps them fall asleep faster and wake up with less stiffness.

    Using Gravity to Ease Snoring and Acid Reflux

    For anyone who struggles with snoring or acid reflux, gravity can feel like an obstacle every night. With an adjustable base, you can make it work for you. Just by raising the head of the bed a few degrees, you can make a huge difference.

    • Reducing Snoring: When you're lying flat, gravity can cause your tongue and soft tissues in your throat to sag, which partially blocks your airway and causes snoring. A slight incline helps keep those passages open for clearer, quieter breathing.
    • Alleviating Acid Reflux and GERD: For those with digestive troubles, lying flat makes it easier for stomach acid to travel up the esophagus, leading to painful heartburn. Elevating your upper body keeps that acid where it belongs—down in your stomach—giving you relief and preventing those middle-of-the-night wake-up calls.

    This quick reference chart breaks down how specific positions can help with some of the most common sleep complaints.

    Common Issue Adjustable Position How It Helps
    Lower Back Pain Zero-Gravity or slight leg elevation Reduces spinal pressure and allows back muscles to relax.
    Snoring / Sleep Apnea Slight head incline (5-10 degrees) Keeps airways open by preventing soft tissue from collapsing.
    Acid Reflux / GERD Moderate head incline (15-20 degrees) Uses gravity to keep stomach acid from flowing into the esophagus.
    Swollen Legs / Feet Leg elevation above heart level Promotes better circulation and reduces fluid retention.

    As you can see, it's all about finding the right angle to support your body's needs, whether it's taking pressure off your back or managing digestive issues.

    The diagram above brings it all together. Every benefit comes back to one simple thing: the ability to customize your sleep posture to work with your body, not against it. By using basic principles of physics and ergonomics, an adjustable base offers tangible solutions to the things that stand between you and a great night's sleep.

    The Shift from Medical Beds to Modern Sleep Systems

    Not that long ago, the only place you were likely to run into an adjustable bed was in a hospital. They were built for one thing: patient recovery and mobility. Comfort and style weren't the focus. But things have certainly changed.

    Today’s adjustable bases have come a long way from their clinical roots. As more of us have gotten serious about our personal wellness, these bases have transformed into sophisticated sleep systems that look right at home in any modern bedroom. This evolution is part of a bigger trend where we’re turning our homes into personal sanctuaries for health and well-being.

    An adjustable base is no longer just another piece of furniture; it's a long-term investment in your health. It’s an acknowledgment that a flat mattress isn't the only way to sleep and that personalized support can be the key to deeper, more restorative rest.

    From Function to Lifestyle Integration

    The story of this evolution is in the features that are now considered standard. The core adjustable base benefits of finding the perfect ergonomic position are still there. But modern models offer so much more, making them a seamless part of your daily life—not just when you’re sleeping, but for all the hours you spend awake in your bedroom too.

    These features have turned the bedroom into a truly versatile living space.

    • Integrated Technology: Most bases now include built-in USB ports for charging your phone or tablet, helping clear up the tangle of cables on your nightstand.
    • Convenience Features: Under-bed lighting gives you a soft, gentle glow for those late-night trips to the kitchen, while massage functions offer a way to unwind after a tough day.
    • Smart Home Connectivity: Some advanced models can even link up with your smart home system, letting you adjust your bed with voice commands or an app on your phone.

    This leap from a medical device to a feature-packed sleep system shows just how much demand has grown. In fact, the global adjustable bed market was valued at USD 9.58 billion in 2025 and is on track to grow significantly by 2033, all thanks to a growing awareness of just how important ergonomic sleep is. You can read more about this market growth and its key drivers here.

    A Part of a Complete Sleep Ecosystem

    At the end of the day, a modern adjustable base is the heart of a complete sleep ecosystem. It works hand-in-hand with your mattress, pillows, and bedding to create a personalized environment built specifically for your body’s unique needs.

    The goal is no longer just to have a comfortable bed but to create a space that actively contributes to your physical and mental well-being. This shift in perspective is what has brought the adjustable base from the hospital into the heart of the home.

    Once you understand this journey, you can see an adjustable base for what it truly is—an essential tool for anyone who's serious about upgrading their sleep quality and their overall lifestyle.

    Making Your Bedroom a More Comfortable Living Space

    An adjustable base does more than just help you sleep better—it can completely change how you use your bedroom. For a lot of us, the bedroom has become a personal retreat for more than just rest. An adjustable base leans into this lifestyle shift, turning a flat mattress into a versatile, ergonomic hub for all kinds of daily activities.

    A person reads a book and uses a laptop comfortably on an adjustable bed, demonstrating ergonomic posture.

    Just think about the last time you tried to read or watch a movie in bed. It probably involved a frustrating tower of pillows that kept shifting around, leaving you with a sore neck and an aching back. This is where the practical, everyday adjustable base benefits really shine.

    Your Personal Hub for Work and Relaxation

    With the press of a button, you can raise the head of your bed to create a supportive incline. This transforms your bed from a simple sleeping surface into a comfortable and ergonomically sound space for things that used to be awkward or uncomfortable.

    • Reading Comfortably: You can get lost in a good book for hours without straining your neck or shoulders. The base gives you consistent, reliable support that a pillow pile just can't match.
    • Working from Home: For those days when you need to answer a few emails or work on your laptop from the comfort of your bed, an inclined position helps you maintain better posture.
    • Watching TV or Movies: Get a theater-like experience by finding the ideal viewing angle that reduces glare and helps prevent slouching.

    An adjustable base turns your bed into an active piece of furniture that adapts to your needs all day long. It’s no longer just a place to sleep—it’s a personalized space for rest, work, and leisure.

    This adaptability makes your bedroom a far more functional and enjoyable part of your home. Instead of wrestling with pillows or having to move to the living room couch, you can relax in a position that’s perfectly customized for you, no matter what you're doing. It’s a simple upgrade that can have a huge impact on your daily comfort and routine.

    How to Find a Mattress That Works with Your Base

    An adjustable base is only one half of your sleep system; the mattress you pair it with is just as important. To get all the benefits you're hoping for, your mattress needs to be flexible enough to bend and contour without getting damaged. A mismatched mattress can fight against the base's movement, create awkward lumps, or wear out too fast.

    The good news is that you don’t have to hunt down a special “adjustable-friendly” model. Most modern mattresses are built with this kind of flexibility in mind. The key is understanding which materials and construction styles work well with the motion of an adjustable base. Once you know what to look for, you can easily tell if your current mattress will work or confidently pick out a new one that’s a perfect match.

    Compatible Mattress Types for an Adjustable Base

    When it comes to mattress compatibility, one word is key: flexibility. Think of it like trying to bend a high-quality yoga mat versus a stiff wooden plank. One can curve into any position you want, while the other will resist and probably break. It’s the same idea with mattresses – you need something made from pliable materials that can move smoothly with the base.

    The most compatible mattress types are:

    • Memory Foam: This material is practically made for adjustable bases. Memory foam mattresses are incredibly flexible and have no problem conforming to any angle without putting stress on the foam layers.
    • Latex: Much like memory foam, latex is both highly flexible and very durable. It bends easily with the base and offers responsive support, making it another fantastic choice.
    • Hybrid Mattresses: Most hybrids, which combine pocketed coils with layers of foam or latex, are also a good option. Because the coils are individually wrapped, they can move independently of each other, allowing the whole mattress to flex without issue.

    The core principle is simple: if the mattress materials can move and bend freely, they will work well with an adjustable base. This ensures you get the full range of motion and comfort without damaging your mattress’s integrity.

    What to Avoid When Pairing a Mattress

    On the flip side, some mattresses are just too rigid for the job. The most common type to avoid is the traditional innerspring mattress. These beds often have a stiff, interconnected coil system and a thick border wire running around the edge.

    Trying to bend this kind of mattress can permanently damage the springs and ruin its support structure. That rigid border wire simply isn't designed to flex, which is why old-school innerspring models are almost never recommended for adjustable bases. If you’re ever unsure, always check the manufacturer’s recommendations or ask a knowledgeable professional.

    What to Look for When Choosing an Adjustable Base

    Shopping for an adjustable base can feel a little overwhelming at first with all the different features and options out there. This practical guide will walk you through the key things to consider, helping you figure out what really matters for your own sleep and lifestyle needs.

    A detailed diagram illustrating the features of an adjustable bed base, including quiet motor, remote, zero-gravity, massage, and USB port.

    A good place to start is with the core functions that deliver the main adjustable base benefits. Think about the motor – is it quiet? Most modern bases are, but it's always worth checking. Then there's the remote. Is it backlit so you can see it in the dark? Does it feel simple and intuitive to use? These are the basics that impact the experience.

    Essential Features vs. Lifestyle Upgrades

    Beyond just moving the head and feet up and down, many bases come loaded with handy preset positions. The zero-gravity setting is probably the most popular, and for good reason. It raises your head and legs to a "neutral posture" that takes pressure off your spine. Some models even have an "anti-snore" button that gives your head a gentle lift.

    From there, you get into the lifestyle features. These are the additions that can elevate your comfort but aren't necessarily critical for everyone.

    • Massage Functions: Built-in massage can be a great feature for relaxing and soothing sore muscles at the end of a long day.
    • USB Ports: Having ports right on the base means no more fumbling for a charger on the nightstand. It's a small thing that makes a big difference.
    • Under-Bed Lighting: This is helpful for those late-night trips to the kitchen. A soft glow lights your way without waking up your partner.

    The trick is to separate your "must-haves" from the "nice-to-haves". This simple step makes it so much easier to compare models and find a base that fits your needs and your budget.

    Technology is a huge part of this category. In 2025, standard powered electric models made up 69.35% of the market, but smart bases are catching up fast as more of us get used to connected devices in our homes. You can even check out more data on the growing market for smart adjustable bases, which is expected to keep climbing.

    Finally, don't forget the practical stuff like warranties, delivery, and setup. There's no substitute for trying these bases out in person. Visiting a showroom lets you hear the motors, test the features, and get real advice from people who know these products inside and out.

    Common Questions About Adjustable Bases

    Even after you've learned about all the benefits, it's normal to have a few lingering questions. Making a purchase like this is a process, and it's important to have all the practical info you need to feel confident.

    Let's tackle a few of the most common questions we hear from shoppers on our showroom floor.

    Will an Adjustable Base Work with My Existing Bed Frame?

    This is a great question, and for most people, the answer is yes. The vast majority of modern adjustable bases have what's called a "zero clearance" design. This just means they are built to drop right inside your existing decorative bed frame, replacing your old box spring or foundation. They can also sit directly on a platform bed.

    To be sure, it's always a good idea to measure the inside dimensions of your bed frame and compare that to the specs of the adjustable base you're considering. It’s a simple step that guarantees a proper fit and saves you any headaches later on.

    How Loud Are Adjustable Bases When They Move?

    Worried about waking up your partner? Today's adjustable bases are engineered to be very quiet. The motors produce a soft, low hum during adjustments that is unlikely to disturb anyone's sleep.

    When the base isn't moving, it’s completely silent. Features like the massage function will create a gentle vibration and sound, but that's a normal part of its operation and is designed to be soothing.

    How Long Does an Adjustable Base Last?

    A well-made adjustable base is a long-term investment in your sleep and comfort. These are built to last a decade or more. Reputable manufacturers back their products with solid warranties, though they often cover different parts for different lengths of time.

    For instance, it's standard for the heavy-duty steel frame to have a 10 to 20-year warranty. The motor and other electronic components are usually covered for somewhere between one and five years. Ultimately, the lifespan comes down to the quality of construction and how it's used.


    Still have questions? At Woodstock Furniture & Mattress Outlet, our sleep experts can answer anything else on your mind and let you try out different models in person. Come see for yourself what a difference an adjustable base can make.

    Explore Our Adjustable Bases Now

  • A Guide to Finding the Right Outdoor Rugs for Your Home

    A Guide to Finding the Right Outdoor Rugs for Your Home

    For a lot of homeowners here in North Georgia, the hunt for a great outdoor rug starts with one simple idea: making a patio or deck feel just as cozy and inviting as the living room. An outdoor rug is really the foundation that ties your whole outdoor space together. It adds comfort, carves out different zones, and lets you show off your personal style, all under the open sky.

    Your Guide to Choosing the Right Outdoor Rug

    An outdoor rug does so much more than just look pretty. It truly anchors your patio, porch, or deck, turning it into a genuine extension of your home. Think of it as the starting point for your outdoor "room"—that one design piece that can transform cold concrete or plain wood into a welcoming oasis.

    The right rug can solve several common outdoor design headaches all at once. It can:

    • Define Functional Zones: Use a rug to visually separate your dining area from the seating area where everyone hangs out. This little trick creates a much more organized, intentional layout, even if you’re working with a wide-open space.
    • Add Comfort Underfoot: A quality outdoor rug feels great on bare feet, making your patio more comfortable and creating a cozier vibe for you and your guests.
    • Introduce Style and Color: It’s one of the easiest ways to bring your unique style outside. Add a pop of color, a sophisticated pattern, or a calming texture that plays well with your home’s exterior and patio furniture.

    The Foundation of a Lasting Outdoor Space

    While looks are important, the most critical things to consider when picking an outdoor rug are its material and construction. This is especially true here in Georgia, where the trifecta of high humidity, intense sun, and pop-up rainstorms demands some serious durability. A rug that isn’t built for our climate can fade, grow mildew, or fall apart in no time.

    A true outdoor-ready rug is engineered from the ground up to withstand the elements. That means it has features like UV resistance to keep the colors from fading in our bright sun, and a construction that actively resists mold and mildew. Getting a handle on these core features is the first step toward making a smart choice you won't regret.

    This desire to create better outdoor living spaces is a trend we're seeing everywhere in the home furnishings world. In fact, the global market for carpets and rugs is expected to jump from USD 121.39 billion in 2025 to a whopping USD 174.79 billion by 2032. It just goes to show that homeowners are ready to invest in quality pieces that truly extend their living spaces. You can read more about this market growth on ResearchAndMarkets.com.

    By focusing on these fundamentals from the get-go, you’ll be able to pick a rug that not only looks fantastic but will also hold up for many seasons to come.

    Understanding Outdoor Rug Materials That Last

    The true test of an outdoor rug isn't how it looks the day you unroll it, but how it holds up to a North Georgia summer. Intense sun, punishing humidity, and those sudden afternoon downpours can quickly ruin a rug that isn't made from the right stuff. The material is the single most important factor that will determine your rug's lifespan, feel, and how much work it takes to keep it clean.

    Making sense of the options can feel a bit technical, but it really boils down to two main camps: hardworking synthetics and classic natural fibers. Each has its own set of pros and cons, especially when you throw our local climate into the mix. Getting a handle on these differences is the key to choosing a rug you'll be happy with for seasons to come.

    This visual guide can help you map out the decision-making process, starting with your outdoor space's purpose and leading you to the right material and style.

    Flowchart guiding the selection of an outdoor rug based on purpose, durability, material, and style.

    As you can see, your choice of material is a critical step that influences both how long your rug will last and the whole vibe of your outdoor area.

    To make it even simpler, we've put together a quick comparison of the most common materials you'll find.

    Outdoor Rug Material Comparison for Georgia Homes

    Material Weather Resistance Stain Resistance Feel Underfoot Ideal For
    Polypropylene Excellent Excellent Varies; can be soft High-traffic, fully exposed areas like patios and decks
    Polyester Very Good Excellent Soft, often plush Poolside, lounge areas; good for vibrant colors
    Natural Fibers Poor Poor Textured, natural Covered and screened-in porches only; low-moisture zones
    Bamboo Fair Good Firm, smooth Covered porches; needs protection from direct rain

    This table gives you a snapshot, but let's dig into what makes these materials tick.

    Synthetic Rugs: The All-Weather Champions

    When you imagine a rug you can just hose off and leave to dry in the sun, you’re thinking of a synthetic rug. These materials are essentially man-made plastics engineered specifically to fight off the very things that destroy other fabrics outdoors: moisture, mold, mildew, and fading from UV rays.

    They are, without a doubt, the most practical choice for fully exposed patios, decks, and poolside areas. Let's look at the most common types.

    • Polypropylene (or Olefin): This is the workhorse of outdoor rug materials, and for good reason. Polypropylene is what’s known as a solution-dyed fiber. Think of a carrot versus a radish—the color of a carrot goes all the way through, while a radish is only red on the outside. Polypropylene is like a carrot; the color is part of the plastic itself, making it incredibly fade-resistant. It also repels water, which is huge for preventing mold and mildew. It's tough, a breeze to clean, and offers fantastic value.
    • Polyester: Known for its brilliant, vibrant colors and a surprisingly soft feel, polyester is another strong contender. It has excellent stain and fade resistance. A cool bonus is that some modern polyester rugs (often labeled as PET) are made from recycled plastic bottles, giving you a more sustainable option. While it’s very durable, it might not hold up to years and years of heavy foot traffic quite as well as polypropylene.

    These durable materials are a big reason why residential applications have become such a key growth driver in the flooring industry. In fact, consumer preferences have shifted so much that materials like nylon were valued at USD 22.50 billion in 2022, signaling a strong demand for performance-driven fibers in home settings. You can discover more industry insights on Technavio.com.

    Natural Fiber Rugs: A Cautious Consideration

    Natural fiber rugs bring an organic texture and earthy style to an outdoor space that’s hard to beat. Materials like jute, sisal, and bamboo look beautiful and feel great underfoot. However—and this is a big however—they come with a significant trade-off, especially in a humid state like Georgia.

    Key Takeaway: Natural fiber rugs are basically giant sponges. When exposed to rain or persistent dampness, they can quickly develop mold, mildew, and even start to rot and fall apart. They are best suited for covered, well-protected areas like screened-in porches or sunrooms where they are completely shielded from the weather.

    If you love the look of natural fibers but need true outdoor durability, there's a great compromise. Look for a polypropylene rug designed to mimic the appearance of sisal or jute. This gives you the aesthetic you want without the maintenance headaches. You get that lovely braided, textured look with all the weather-resistant, easy-clean benefits of a synthetic. It’s truly a great combination.

    How to Select the Perfect Rug Size and Placement

    Think of an outdoor rug like the frame on a beautiful piece of art. The wrong one can make the whole thing feel off. In the same way, a poorly sized or placed rug can throw off your entire patio, making it feel unbalanced and awkward. Getting the size and placement right is just as critical as picking the right material or color—it’s what anchors the space, defines its purpose, and makes your furniture feel like a cohesive, intentional group.

    The single biggest mistake we see homeowners make? Picking a rug that’s way too small for their furniture. A little rug floating by itself in the middle of a big patio looks like an afterthought and makes the whole area feel disconnected. The goal is to find a size that pulls your seating or dining area together into one, unified zone.

    First things first, break out the tape measure. Get the total dimensions of your patio, deck, or porch. Then, measure the footprint of your furniture grouping exactly as you have it arranged. This gives you a clear picture of the minimum and maximum sizes that will work, taking a ton of the guesswork out of the equation.

    Here's a look at how different arrangements can play out. Visualizing the layout ahead of time is a huge help.

    Diagram illustrating two common rug placement ideas for living rooms: front legs on rug and all legs on rug.

    Seeing how the rug connects all the pieces ensures you choose a size that truly complements your setup, rather than fighting with it.

    Sizing Rules for Outdoor Seating Areas

    For outdoor living rooms built around a sofa, loveseat, and chairs, there are a couple of tried-and-true placement strategies. The key is to connect the furniture, not just plop a rug in the empty space between everything.

    • All Legs On the Rug: This is the gold standard for creating a luxurious, well-defined outdoor room. You’ll need a rug large enough for every piece of furniture—sofa, chairs, coffee table, and end tables—to sit completely on top of it. This approach works best in larger, more open spaces where you really want to carve out a distinct zone.
    • Front Legs On the Rug: This is a more common—and often more practical—option. With this layout, you only place the front legs of your sofa and chairs onto the edge of the rug. It still ties all the furniture together visually and anchors the conversation area, but without requiring a massive, budget-busting rug.

    As a general rule of thumb, make sure your rug extends at least 6 to 12 inches beyond the sides of your biggest piece of furniture, usually the sofa. This creates a little visual breathing room and helps the whole arrangement look more balanced.

    Sizing Rules for Outdoor Dining Areas

    When you’re putting a rug under an outdoor dining set, function is the name of the game. You absolutely need a rug that’s large enough for the chairs to stay on it, even when people are pushing back to get up from the table.

    There’s nothing more annoying than a chair leg catching on the edge of the rug every single time someone stands up. To avoid that headache, just follow this simple guideline:

    1. Measure the length and width of your dining table.
    2. Add a minimum of 24 inches to each of those measurements.
    3. This buffer guarantees that when chairs are pulled back, all four legs stay comfortably on the rug. It makes for a much smoother, more stable dining experience.

    Tackling Awkward Spaces

    Of course, not every North Georgia patio is a perfect square or rectangle. If you’re dealing with an L-shaped sectional, a narrow balcony, or an oddly shaped deck, finding the right rug can feel like a puzzle. In those cases, you might have to get a little creative.

    • Use Multiple Rugs: For a big, L-shaped patio, trying to find one giant rug is often a challenge. Instead, consider using two separate rugs to define distinct zones—one for your dining area and one for the seating area.
    • Focus on the Main Zone: On a long, skinny balcony, a small rug or a runner placed just under your main bistro set or lounge chair can be enough to define that single functional spot without overwhelming the space.
    • Think About Custom or Round Rugs: For circular patios or unique layouts, a round rug can be a game-changer. It softens all the hard angles and creates a more organic, flowing feel that really complements the space.

    By thinking about how your furniture will actually live on the rug, you can pick a size that not only looks fantastic but makes your outdoor space more functional and enjoyable for years to come.

    Matching a Rug to Your Outdoor Style and Decor

    Okay, once you’ve nailed down the practical stuff like material and size, you get to the fun part—picking a rug that actually shows off your personality. An outdoor rug is one of the quickest and most effective ways to set the vibe for your patio or deck. It can be a quiet, grounding element that pulls everything together, or it can be a bold statement piece that steals the show.

    The real key is to step back and think about how a rug’s color, pattern, and texture will play with your existing furniture, the outside of your house, and the general atmosphere you’re trying to create.

    Three outdoor patio settings, showcasing modern, boho, and farmhouse rug styles with furniture and plants.

    Creating a Cohesive Outdoor Look

    Well-designed outdoor spaces feel intentional, and the rug is a huge part of that. Before you fall in love with a specific pattern, do a quick inventory of your space. What color is your siding or brick? What finish is your deck? What colors are already in your patio cushions?

    Your goal is to find a rug that complements these existing pieces. You can go about this in a couple of ways:

    • The Harmonizing Approach: This is a safe bet. Pick a rug with colors that are already present in your outdoor area. For instance, if your house has gray siding and you’ve got navy blue cushions, a rug with shades of blue and gray will create a beautifully seamless, coordinated look.
    • The Contrasting Approach: Want to liven things up? Use the rug to inject a pop of accent color. If your patio is mostly neutral—think beiges and browns—a vibrant rug in terracotta, teal, or a sunny yellow can add a jolt of energy and create a clear focal point.

    Design Insight: A great trick is to pull a secondary color from your surroundings for your rug. If your house is beige with dark green shutters, a rug that features that same green will feel deliberate and tie the whole look together perfectly.

    Translating Interior Styles to Your Outdoor Oasis

    So many of today’s popular interior design styles translate beautifully to outdoor living. Your rug is the perfect anchor to establish a specific theme, turning your patio into a true extension of your home.

    Think about these common styles and how the right rug can help you nail the look:

    • Modern Minimalist: This style is all about clean lines, uncluttered space, and a simple color palette. You’ll want to look for rugs with subtle geometric patterns, solid colors in neutral tones like charcoal or beige, or a classic, simple stripe. The rug should ground the space without screaming for attention.
    • Rustic Farmhouse: For that cozy, modern farmhouse feel, look for rugs that mimic natural textures. A polypropylene rug designed to look like jute or sisal is a fantastic, durable choice. Simple patterns like plaid, wide stripes, or distressed traditional motifs in muted colors also work wonders.
    • Vibrant Bohemian (Boho): This style is all about being eclectic, colorful, and full of personality. This is a great place to go bold with a rug featuring intricate medallions, global-inspired patterns, or a riot of warm colors like pink, orange, and rust. Fringed edges are another great touch that adds to the relaxed, boho vibe.
    • Coastal or Nautical: To capture that breezy, on-the-water feel, lean into blues, whites, and sandy beiges. Classic stripes are the go-to for this style, but you can also find rugs with subtle wave patterns or even rope-like textures that really evoke a seaside atmosphere.

    The Role of Color and Mood

    Beyond just matching your furniture, the color of your rug has a huge impact on the mood of your outdoor space. Color psychology isn’t just for your living room; it works just as well under the sun and stars.

    Think about the atmosphere you want to cultivate out there:

    • For Relaxation and Calm: Cool colors like blues and greens are known to have a calming effect. They're perfect for creating a tranquil outdoor lounge area where you can kick back and unwind.
    • For Energy and Socializing: Warm colors like reds, oranges, and yellows can create a more energetic and inviting vibe. This makes them ideal for a dining area where you host lively get-togethers with friends and family.
    • For a Sophisticated Foundation: You can never go wrong with neutrals. Tones like gray, beige, and cream provide a versatile and timeless base that allows your furniture, plants, and other decor to really pop.

    To really round out your new look, think about adding some essential outdoor entertaining accessories that tie in with your rug and elevate the space. The right mix of outdoor lighting, planters, and serving ware can take your styled patio from nice to absolutely stunning.

    Keeping Your Outdoor Rug Clean and Maintained

    Picking out the perfect outdoor rug is step one, but knowing how to care for it is what really makes it last season after season. Here in Georgia, the constant exposure to sun, a thick blanket of spring pollen, and those classic pop-up showers mean your rug needs a little attention to stay looking its best.

    The good news? Most modern outdoor rugs, especially the polypropylene ones, are designed to be incredibly low-maintenance. A little bit of consistent care prevents dirt and grime from getting ground deep into the fibers, which is what causes a rug to look old before its time.

    Routine Upkeep for Lasting Freshness

    Simple, regular cleaning habits will do more for your rug than any deep-cleaning marathon. Think of it less as a big chore and more of a quick touch-up for your patio or deck.

    • Sweep or Vacuum Regularly: Just like its indoor cousins, your outdoor rug is a magnet for dust, leaves, and dirt. Once a week, give it a good sweep with a broom. You can also use a vacuum, but just make sure to use a setting without the spinning beater bar to avoid snagging the fibers.
    • Shake It Out: If your rug isn't too big to manage, giving it a good shake is a fantastic way to knock out all the trapped dirt. This works wonders on flatweave designs.
    • Hose It Down Monthly: For a slightly deeper clean, pull the rug out onto the driveway or lawn and give it a thorough rinse with your garden hose. This is the easiest way to wash away that layer of pollen and grime that builds up over time.

    Crucial Tip: The single most important thing you can do is let your rug dry completely after hosing it down or after a heavy rain. Drape it over a deck railing or a couple of patio chairs so air can circulate underneath. This is your number one defense against mold and mildew.

    Tackling Common Stains and Issues

    Life happens outside. Spills, bird droppings, and muddy paw prints are just part of the deal. Thankfully, synthetic outdoor rugs are built to resist stains and moisture, so when messes do happen, they’re usually easy to handle.

    For most everyday spills, a simple mix of mild dish soap and water is your best friend. Grab a soft-bristled brush, gently scrub the spot, and then rinse it completely with clean water from the hose.

    Here’s how to handle a few specific outdoor challenges:

    1. Mildew or Mold: If you spot some mildew starting to form, mix a solution of one part white vinegar to three parts water. Spray it on the area, let it sit for about 10-15 minutes, scrub gently with a soft brush, and rinse thoroughly.
    2. Tree Sap: This sticky stuff can be a pain. Try dabbing it with a rubbing alcohol-based hand sanitizer. Let it sit for a few minutes to break down the sap, then blot and scrub the area before rinsing it clean.
    3. Grease Stains: For those inevitable oily drips from the grill, immediately sprinkle cornstarch on the stain to soak up the grease. Let it sit for an hour, scrape it away, and then clean what's left with your trusty dish soap and water mixture.

    Off-Season Storage to Protect Your Rug

    While many synthetic rugs are tough enough to be left out all year, storing them during the winter months when you're not using your patio will seriously extend their lifespan. Protecting your rug from the worst of the cold and wet weather preserves its color and keeps the fibers strong.

    Before you put it away, make absolutely sure the rug is completely clean and bone-dry. Any moisture trapped in the fibers can lead to musty smells or mildew while it's in storage.

    Roll the rug up tightly with the colorful top side facing inward—this protects the pattern. Try to avoid folding it, as that can create permanent creases that are tough to get out. Stash it in a dry, protected spot like a garage, shed, or basement. If you can, keep it up off the concrete floor to avoid any potential dampness. Taking this one simple step ensures your rug will be fresh and ready to unroll the moment spring arrives.

    Finding Your Perfect Outdoor Rug in North Georgia

    After digging through all the details on materials, sizes, and styles, there's really only one thing left to do—see your options for yourself. Online research is a fantastic place to start, but nothing beats seeing and feeling a rug in person. It’s the final step that takes all the guesswork out of the equation.

    Let’s be honest, digital photos can only tell you so much. Hopping into a showroom lets you see how vibrant the colors really are and feel the actual texture under your hand. Is that polypropylene weave softer than you thought? Is the pattern as bold as it looked on your phone? Answering these questions on the spot ensures the rug you bring home is the one you truly envisioned for your space.

    Why a Local, Hands-On Approach Matters

    Visiting a local store also gives you the chance to ask questions that are super specific to our North Georgia climate. You can chat with someone about which materials hold up best to our infamous pollen season, how certain colors resist fading in that intense summer sun, and get real, practical advice on cleaning and care from people who know their stuff.

    Making a confident choice for your home is about more than just buying a product; it’s about feeling sure that your investment will last. Experiencing different outdoor rugs in person is one of the most effective ways to build that confidence.

    It's clear that homeowners are putting more and more love into their spaces, both inside and out. In fact, the U.S. market for carpets and rugs is booming, with projections showing it could hit USD 13.24 billion by 2026, largely thanks to positive trends in homeownership. This just goes to show how much we all value creating beautiful, functional places to live. You can read more about these market trends over at Fortune Business Insights if you want to get nerdy with us.

    Here at Woodstock Furniture & Mattress Outlet, our whole goal is to be that helpful local resource for you. We invite you to come by, walk around, and explore a great selection of outdoor rugs and furnishings in a friendly, no-pressure environment. Our team is here to help you pull all these ideas together so you can create an outdoor oasis you’ll love for years to come.

    A Few Common Questions We Get About Outdoor Rugs

    Once you've narrowed down your choices, a few final, practical questions usually pop up. We hear them all the time from North Georgia homeowners just like you, so we've put together some straightforward answers to help you feel totally confident in your decision.

    Can My Outdoor Rug Actually Get Wet?

    Yes, absolutely! Think of it this way: a good outdoor rug is designed for the outdoors, and in Georgia, that means rain. High-quality rugs, especially those made from synthetics like polypropylene, are built to handle moisture.

    The fibers themselves don't absorb water, and the woven construction is meant to let it pass through and dry out. The real key here isn't keeping it dry, but making sure it can get dry. After a big storm, it's a smart move to lift a corner or even drape the rug over a porch railing for a bit. This lets air circulate underneath and prevents any musty smells.

    How Do I Keep My Outdoor Rug from Blowing Away?

    This is a huge one, especially for those of us with open patios or breezy decks. You don't want to chase your rug across the yard every time the wind picks up. The easiest and most effective trick is to use your furniture as an anchor.

    By arranging your seating area so that at least the front legs of your chairs and sofa are sitting on the rug, you add a ton of weight that keeps it in place. If that's not quite enough for a lighter rug or a particularly windy spot, you've got a few other options:

    • Outdoor Rug Pads: These are a great idea. Not only do they add some weight, but they also provide grip to keep the rug from sliding around on smooth concrete or decking.
    • Double-Sided Carpet Tape: Look for a heavy-duty, weather-resistant version. A few strips along the corners and edges can work wonders.
    • Large Planters: This is a great trick because it's both functional and stylish. Placing a heavy potted plant on each corner is a beautiful way to weigh a rug down.

    Will an Outdoor Rug Damage My Wood Deck?

    A well-chosen outdoor rug won't damage your wood deck, but the wrong one (or the right one cared for improperly) can. The enemy here is trapped moisture. If water gets stuck between the rug and the wood, it can lead to discoloration or even rot over time.

    To avoid this, stick with a rug that has a breathable weave—something that water can pass through easily. And just like we mentioned above, make it a habit to lift the rug and let the deck air out completely after a heavy rain. The one thing you absolutely want to avoid is a rug with a solid rubber or latex backing, as those are notorious for trapping water.


    Ready to see for yourself how the right rug can completely transform your patio, porch, or deck? At Woodstock Furniture & Mattress Outlet, we have a great selection of outdoor furnishings ready to help you build the outdoor living space you've been dreaming of. Come on down to one of our North Georgia showrooms to see and feel the options in person. Find your nearest location and start planning your visit today!

  • 10 Deck Decorating Ideas to Transform Your Outdoor Space

    10 Deck Decorating Ideas to Transform Your Outdoor Space

    Your deck is more than just an extension of your home; it’s a canvas for creating an outdoor sanctuary for relaxation, entertainment, and making memories. A well-decorated deck becomes a functional living area, extending your usable space and enhancing your quality of life, especially in Georgia's pleasant climate. The challenge often lies in knowing where to start. Many homeowners struggle with arranging furniture, choosing the right materials that withstand the elements, and creating a cohesive look that feels both personal and practical.

    This guide breaks down ten actionable deck decorating ideas to help you solve these common problems. We'll explore how to define functional zones, layer lighting for ambiance, select durable furniture, and add personal touches that turn a simple wooden platform into a purposeful, inviting retreat. Embracing the potential of your deck starts with inspiring seasonal outdoor deck design ideas that cater to various seasons and styles, ensuring your space is enjoyable year-round.

    From establishing a comfortable conversation pit with a sectional to integrating shade solutions and creating privacy with planters, each idea is designed to be practical and adaptable. You will learn how to maximize your layout, whether you have a small balcony or an expansive multilevel deck. Our goal is to provide clear, straightforward solutions that empower you to transform your outdoor space into an area you'll love using for years to come.

    1. Outdoor Sectional Seating Arrangements

    One of the most effective deck decorating ideas for creating a functional and inviting outdoor living room is to anchor the space with a sectional sofa. Unlike some patio sets with separate chairs, a sectional's modular design offers great versatility. It allows you to define specific zones for conversation, lounging, or entertaining, transforming a simple wooden platform into a true extension of your home.

    Architectural sketch of a a modern outdoor deck, featuring an L-shaped sofa, coffee table, and plants.

    The key benefit is maximizing seating in a consolidated footprint, which helps prevent the cluttered look that can happen with too many individual furniture pieces. An L-shaped sectional, for instance, fits well into the corner of a deck, opening up the center for a fire pit or coffee table. For circular or uniquely shaped decks, a curved sectional can soften the lines and create a cozy, enclosed feel.

    How to Implement This Idea:

    To make a sectional work for your deck, consider these practical steps:

    • Measure Meticulously: Before you shop, measure your deck's total dimensions. Then, map out where the sectional will go, ensuring you leave at least 30-36 inches for major walkways to maintain easy traffic flow.
    • Choose Climate-Appropriate Materials: In Georgia’s humid climate, look for sectionals with rust-proof aluminum frames and cushions made from performance fabrics. These materials are specifically engineered to resist mildew, moisture, and fading from intense sun.
    • Plan for Sun Exposure: If possible, position your sectional to avoid direct, harsh afternoon sun. This will not only make seating more comfortable but will also significantly prolong the life and color of the upholstery. If you can't avoid the sun, a large cantilever umbrella is a valuable accessory.
    • Accessorize for Comfort: Complete the look with outdoor-rated throw pillows and a weather-resistant area rug. These additions introduce color and texture while defining the seating area as a distinct "room."

    By strategically placing a sectional, you create a comfortable and stylish hub for everything from quiet morning coffee to lively evening gatherings with friends and family.

    2. Deck Lighting and String Lights

    Strategic lighting is one of the most impactful deck decorating ideas for transforming an outdoor space from simply usable during the day to functional at night. Proper illumination extends the use of your deck well past sunset, creating an inviting atmosphere for evening entertaining or quiet relaxation. It also significantly improves safety by highlighting steps, edges, and pathways.

    A black and white sketch of an outdoor deck with glowing string lights and path lights, featuring a table and chairs.

    The key is to layer different types of light to build depth and ambiance. For instance, overhead bistro-style string lights cast a warm glow ideal for dining areas, while subtle path lights ensure secure footing without overpowering the mood. This combination of ambient, task, and accent lighting turns a dark deck into a sophisticated and functional outdoor room.

    How to Implement This Idea:

    To effectively light your deck, consider these practical steps:

    • Layer Your Lighting Sources: Don't rely on a single fixture. Combine overhead string lights for general ambiance, install solar-powered stake lights along the perimeter for safety, and consider using discreet LED strips under railings or benches to add a modern, polished glow.
    • Choose the Right Color Temperature: For a cozy and welcoming atmosphere, select bulbs with a warm white color temperature (around 2700K). This mimics the soft glow of traditional incandescent bulbs and is often more flattering than harsh, cool-white light.
    • Consider Smart Controls and Timers: Timers or smart plug systems can automate the process, ensuring your deck is beautifully lit as dusk falls, and can help conserve energy. Dimmers are also excellent for adjusting the brightness to suit any occasion.
    • Plan for Power and Safety: Before purchasing lights, identify the locations of your outdoor-rated power outlets. Always use extension cords and fixtures designed specifically for outdoor use to withstand Georgia’s weather, and position them to avoid creating tripping hazards.

    By thoughtfully layering different lighting elements, you can create a safe, functional, and pleasant outdoor environment that you and your guests will enjoy long after the sun goes down.

    3. Outdoor Dining Sets and Table Arrangements

    Creating a dedicated dining area is one of the most functional deck decorating ideas, instantly turning your outdoor space into a destination for meals and gatherings. An outdoor dining set does more than just provide a place to eat; it establishes a clear zone for entertaining, encouraging you to bring the joys of al fresco dining to your own backyard. It transforms the deck from a simple platform into a purposeful social hub.

    The primary advantage of a designated dining set is its ability to anchor an entertainment space, much like a dining room does indoors. A six-person teak table, for example, signals that the area is meant for family dinners and hosting friends, while a small, round bistro table creates an intimate nook for coffee. By selecting a set that complements your deck’s style and your entertainment needs, you enhance both its utility and aesthetic appeal.

    How to Implement This Idea:

    To effectively integrate a dining set into your deck design, consider these practical steps:

    • Prioritize Traffic Flow: Before purchasing, measure the space and ensure you can leave at least 36 inches of clearance around the table on all sides. This prevents a cramped feeling and allows guests to easily pull out their chairs and walk around the area.
    • Select Durable, Weather-Resistant Materials: In North Georgia's varied climate, choose materials built to last. Look for tables made from naturally rot-resistant woods like teak or eucalyptus, or powder-coated aluminum frames that won’t rust. Cushioned chairs with quick-drying, UV-resistant fabrics offer comfort without succumbing to mildew or fading.
    • Position for Convenience: Place your dining set near the entrance to your kitchen for easy transport of food and drinks. This simple logistical choice makes hosting feel more seamless and encourages more frequent outdoor meals.
    • Plan for Shade and Comfort: No one enjoys dining in the glaring sun. Position your table under a pergola, or ensure it has a center hole for a large patio umbrella. For added comfort during long evenings, select chairs with supportive cushions.

    4. Fire Pits and Outdoor Heating Elements

    One of the most useful deck decorating ideas for extending the usability of your outdoor space is incorporating a fire pit or heating element. These features do more than just provide warmth on chilly evenings; they create a powerful focal point that encourages gathering and conversation. By adding a source of heat and ambient light, you can transform your deck into a cozy, year-round destination for family and friends, effectively increasing its seasonal value.

    Illustrated design of a a modern outdoor deck with a semicircular seating area and a central fire pit.

    The key benefit is the creation of a natural gathering spot. Whether it's a sleek propane fire table acting as a centerpiece for your seating arrangement or a classic wood-burning fire bowl, the radiant warmth and flickering flames draw people together. This makes a fire feature an excellent anchor for a conversation zone, encouraging guests to relax and linger long after the sun goes down.

    How to Implement This Idea:

    To safely and effectively add a fire feature to your deck, consider these practical steps:

    • Prioritize Safety and Compliance: Before purchasing, check your local fire codes and any HOA regulations regarding open flames on wooden structures. Many areas have specific rules about placement and fuel types.
    • Ensure Proper Clearance: Always maintain a safe distance from your home and any other combustible materials. A minimum clearance of 10 to 15 feet is a standard recommendation, but you should always follow the manufacturer's specific guidelines.
    • Choose the Right Fuel Source: Propane or natural gas fire tables offer a clean, smoke-free experience with easy ignition and no cleanup. Wood-burning pits provide a more traditional, rustic ambiance but require more attention and produce embers.
    • Arrange Seating for Conversation: Position your weatherproof chairs or sofas in a circular or semicircular layout around the fire pit. This arrangement promotes face-to-face interaction and ensures everyone can enjoy the warmth and view.
    • Protect Your Deck Surface: Never place a fire pit directly on a wood or composite deck. Use a non-combustible base like a deck protector pad, stone pavers, or concrete blocks to prevent heat damage and create a stable foundation.

    5. Shade Solutions: Pergolas, Umbrellas, and Awnings

    One of the most practical deck decorating ideas for the Georgia climate is incorporating strategic shade. Effective shade solutions do more than just offer relief from the intense sun; they add architectural character and define distinct zones on your deck. Whether you opt for a permanent structure or a flexible accessory, providing shade makes your outdoor space more comfortable and usable, especially during the peak heat of summer afternoons.

    From grand pergolas that create an open-air room to versatile umbrellas that target specific areas, the right choice depends on your deck’s layout and your lifestyle. A retractable awning offers on-demand coverage without a permanent footprint, while a pergola can become a stunning focal point, especially when adorned with climbing vines. These additions protect your furniture from sun damage and make daytime entertaining a much more pleasant experience. For a more permanent structure, understanding the cost to build a pergola can help you plan your budget for this valuable addition.

    How to Implement This Idea:

    To integrate the perfect shade solution into your deck design, consider these steps:

    • Assess Your Needs: Determine which areas need the most protection. A large cantilever umbrella may be perfect for shading a dining table, while a full-size pergola might be better for covering an entire seating arrangement.
    • Prioritize UV Protection: When choosing fabrics for umbrellas or awnings, look for materials with a high UV protection rating. This not only shields you and your guests but also helps prevent your outdoor cushion fabrics from fading prematurely.
    • Plan for Stability: For umbrellas, especially in open, windy areas, use a heavy, weighted base or a model that can be secured directly to the deck. For permanent structures like pergolas, ensure they are professionally installed to meet local building codes.
    • Consider Automation: For maximum convenience, motorized retractable awnings can be extended or retracted with the push of a button. This allows you to adapt to changing weather conditions instantly.
    • Enhance with Greenery: Use a pergola as a trellis for climbing plants like wisteria or jasmine. This creates a beautiful, natural canopy that provides dappled shade and adds a lush, organic element to your deck.

    6. Outdoor Rugs and Floor Coverings

    One of the simplest yet most impactful deck decorating ideas is to introduce an outdoor rug. More than just an accessory, a well-chosen rug acts as a visual anchor, defining specific zones like seating or dining areas. It adds a layer of comfort underfoot, introduces color and pattern, and makes the deck feel like a finished, intentional outdoor room.

    The primary benefit of an outdoor rug is its ability to tie disparate furniture pieces together into a cohesive group. For instance, a large geometric-patterned rug placed under your sofa and chairs immediately establishes a conversation nook. On a larger deck, a striped runner can create a distinct path to a dining set, guiding flow and separating functions without physical barriers. They also protect the deck surface from scratches and wear in high-traffic zones.

    How to Implement This Idea:

    To effectively use outdoor rugs on your deck, consider these key steps:

    • Size It Correctly: The rug should be large enough to anchor your main furniture. For a seating area, ensure at least the front legs of all pieces are on the rug. For a dining set, the rug should be big enough so that the chairs remain on it even when pulled out.
    • Select Weather-Resistant Materials: Look for rugs made from synthetic fibers like polypropylene, polyester, or nylon. These materials are designed to resist fading, moisture, and mildew, which is essential in Georgia’s humid climate.
    • Prioritize Safety and Maintenance: Use a non-slip pad underneath your rug to prevent it from sliding, especially on smooth deck surfaces. Regular cleaning, such as sweeping and occasional hosing down, will prevent dirt and mildew buildup and extend its life.
    • Use Rugs to Define Zones: On a large, open deck, use different but complementary rugs to create distinct "rooms." A neutral, natural-fiber-look rug could define a lounging area, while a bolder, colorful rug marks the dining space, adding visual interest.

    7. Outdoor Accent Furniture and Accessories

    While large seating and dining sets create the foundation of your deck, it's the carefully chosen accent furniture and accessories that inject personality and complete the space. These smaller pieces are essential deck decorating ideas that add layers of style, texture, and functionality. Items like side tables, ottomans, and planters transform a functional area into a truly finished and personalized outdoor retreat.

    The power of accent furniture lies in its ability to fill gaps both visually and practically. A well-placed side table provides a convenient spot for a cool drink or a book, while a collection of planters introduces life and vibrant color. These elements allow you to easily refresh your deck's look seasonally or as your tastes change, without committing to a complete furniture overhaul.

    How to Implement This Idea:

    To effectively use accent pieces, think of them as the finishing touches that tie everything together:

    • Mix Materials and Textures: Create visual interest by combining different materials. Pair a smooth metal side table with a woven rattan ottoman or contrast sleek modern planters with the rustic grain of your wood deck. This textural variety adds depth and a professionally designed feel.
    • Layer with Purpose: Arrange accessories to create balanced, appealing compositions. A common design principle is to group items in odd numbers, such as a cluster of three planters of varying heights. This creates a more natural and dynamic look than symmetrical pairings.
    • Balance Form and Function: Select pieces that are both beautiful and useful. An outdoor-safe pouf can serve as an extra seat, a footrest, or even a temporary table with the addition of a tray. This dual-purpose approach is especially valuable for smaller decks where every square foot counts.
    • Choose Durable Pieces: Just like your main furniture, accessories must withstand North Georgia's sun and humidity. Invest in planters, tables, and textiles made from weather-resistant materials to ensure they remain beautiful and functional for many seasons.

    8. Vertical Gardens and Planters

    One of the most resourceful deck decorating ideas, especially for those with limited square footage, is to grow upwards with vertical gardens. This approach utilizes wall-mounted planters, trellises with climbing vines, and tiered plant stands to introduce lush greenery without sacrificing valuable floor space. It effectively turns bare walls or railings into vibrant living art, adding color, texture, and a sense of natural enclosure.

    A detailed sketch illustrates a a modern vertical garden with various plants, a bench, and decking.

    The primary advantage is maximizing your garden's potential in a compact footprint. A living wall can serve as a beautiful privacy screen, obscure an unappealing view, or even function as a convenient kitchen garden for fresh herbs. Tiered planters can create a stunning focal point in a corner, while hanging baskets add dimension and charm to the deck's perimeter. This strategy allows you to surround yourself with plants even on a small balcony or patio.

    How to Implement This Idea:

    To create a thriving vertical garden on your deck, consider these practical steps:

    • Select Appropriate Plants: Choose plants that suit your deck’s specific sun exposure. In Georgia's climate, heat-tolerant options like petunias, sweet potato vines, and hardy herbs (rosemary, thyme) thrive. For shady spots, consider ferns, heuchera, or impatiens.
    • Use Lightweight Containers: When mounting planters on walls or railings, opt for lightweight materials like resin or high-quality plastic to reduce the structural load. Ensure any mounting hardware is securely fastened.
    • Ensure Proper Drainage: Good drainage is critical to prevent root rot and protect your deck's surface from water damage. Look for containers with built-in drainage holes or add them yourself. A small saucer can catch excess water.
    • Plan for Easy Watering: Vertical gardens can dry out quickly. Consider installing a simple drip irrigation system or using self-watering planters to ensure your plants receive consistent moisture, especially during hot Georgia summers.
    • Create Visual Interest: Arrange plants with varying heights, textures, and colors. Mix flowering annuals with trailing ivy and functional herbs to create a dynamic and appealing display that adds depth to your outdoor space.

    9. Outdoor Entertainment Systems and Features

    To truly elevate your deck into an all-season destination, consider integrating outdoor entertainment systems. This deck decorating idea goes beyond simple furniture by incorporating modern technology like built-in speakers, weatherproof televisions, and projection setups. These features transform your deck from a simple seating area into a complete hub for movie nights, sports viewing, and outdoor parties with friends and family.

    The primary advantage is creating a multifunctional space that caters to how we live and entertain today. A weather-resistant TV mounted under a covered porch turns your deck into a prime spot for the big game. Similarly, a projector system with a portable outdoor screen can create unique movie nights under the stars, offering an experience a living room can't replicate.

    How to Implement This Idea:

    To add an entertainment system to your deck, consider these practical steps:

    • Plan Power and Placement: Before you buy any equipment, identify where you will install it. Ensure you have access to GFCI-protected outdoor electrical outlets. Position screens to minimize glare and direct sun reflection, which can wash out the picture and damage electronics.
    • Choose Weather-Appropriate Tech: Standard indoor electronics are not built to withstand Georgia’s humidity, heat, or rain. Invest in TVs, speakers, and projectors specifically rated for outdoor use. Look for features like high-brightness screens (often 1500+ nits for TVs) to ensure visibility in daylight.
    • Optimize Your Audio: For sound, consider a system of small, strategically placed outdoor speakers instead of one large source. This provides even sound distribution without disturbing your neighbors. You can mount them on deck railings, under eaves, or even disguise them as landscape rocks.
    • Protect Your Investment: Even weatherproof electronics benefit from extra protection. Use high-quality covers when the system is not in use and try to install TVs or projectors in a covered or partially shaded area of your deck to prolong their lifespan.

    10. Color and Theme Coordination with Weather-Resistant Fabrics

    One of the most impactful deck decorating ideas is to establish a cohesive color palette and theme. Using weather-resistant outdoor fabrics to coordinate your furniture, cushions, rugs, and pillows transforms a collection of separate items into a harmonious, thoughtfully designed space. A deliberate color scheme elevates your deck from a simple outdoor area to a sophisticated extension of your home's interior style.

    This approach provides a framework for all your decorating choices, making decisions easier and ensuring the final look is polished and intentional. For example, a coastal theme could use a base of whites and sandy neutrals accented with navy blue and seafoam green pillows. A modern minimalist deck might rely on a monochrome palette of gray, black, and white with clean lines and subtle textures. The key is using durable, fade-resistant fabrics to maintain the color story through Georgia’s sunny seasons.

    How to Implement This Idea:

    To create a unified theme on your deck, follow these practical steps:

    • Start with a Neutral Base: Choose major furniture pieces like sofas or dining sets in neutral colors such as gray, beige, or white. This provides a versatile foundation that allows you to easily swap out accent colors with accessories.
    • Select a Cohesive Palette: Pick two to three accent colors to layer on top of your neutral base. You can draw inspiration from your home's interior decor for a seamless indoor-outdoor flow or from the natural landscape surrounding your deck.
    • Prioritize Performance Fabrics: Invest in high-quality, weather-resistant fabrics designed for outdoor use. Materials like solution-dyed acrylics are engineered to resist fading, moisture, and mildew, ensuring your colors stay vibrant.
    • Layer Colors and Textures: Mix solid-colored cushions with patterned throw pillows and a coordinating outdoor rug. This creates visual depth and interest while reinforcing your chosen theme. For instance, pair solid navy cushions with pillows featuring a subtle white geometric pattern.
    • Plan for Seasonal Updates: Your neutral base makes it simple to refresh your deck's look. Swap in terracotta and gold pillows in the fall or bright coral and turquoise for the summer to keep the space feeling fresh without replacing major items.

    Deck Decorating Ideas — 10-Point Comparison

    Item Implementation complexity Resource requirements Expected outcomes Ideal use cases Key advantages
    Outdoor Sectional Seating Arrangements Medium — assembly and layout planning High space; moderate–high cost; weather-resistant materials Defined gathering zones; increased seating and comfort Large decks, entertaining, lounging areas Modular/customizable; maximizes seating; comfortable for groups
    Deck Lighting and String Lights Low–Medium — DIY to hardwired pros Low–medium cost; electrical or solar options; durable fixtures Extended evening use; improved safety; enhanced ambiance Evening entertaining; pathways; mood lighting Extends hours; creates atmosphere; energy-efficient options
    Outdoor Dining Sets and Table Arrangements Low–Medium — placement and occasional assembly Moderate space; medium–high cost; durable materials Dedicated dining area; encourages outdoor meals and entertaining Alfresco dining, family meals, formal outdoor dining Functional dining zones; flexible sizing; variety of styles
    Fire Pits and Outdoor Heating Elements Medium–High — safety, fuel, possible permits Significant space; fuel/maintenance costs; possible permits Warmth and ambiance; extended season use; focal point Cooler evenings, social gatherings, centerpiece seating areas Adds warmth; creates focal gathering; extends usable season
    Shade Solutions: Pergolas, Umbrellas, and Awnings Medium–High — pergolas need pros; umbrellas easy Variable space; medium–high cost; possible structural work Sun protection; improved comfort; architectural interest Hot climates, daytime use, protecting furniture Effective UV protection; extends daytime usability; aesthetic upgrade
    Outdoor Rugs and Floor Coverings Low — simple placement Low cost; various sizes; periodic cleaning Defines zones; adds comfort, color, and surface protection Anchoring seating/dining areas; adding visual interest Affordable; easy to update; protects deck surface
    Outdoor Accent Furniture and Accessories Low — simple styling and placement Low cost; small pieces; seasonal storage Adds function and personality; fills gaps Styling updates, casual entertaining, convenience surfaces Flexible; affordable; easy seasonal refresh
    Vertical Gardens and Planters Medium — mounting, irrigation, plant care Low floor footprint; moderate maintenance and water needs Adds greenery, privacy, and vertical interest Small decks, privacy screening, herb/flower displays Space-efficient; adds privacy; improves air quality
    Outdoor Entertainment Systems and Features High — electrical work and professional install High cost; power, weatherproof hardware; mounting Outdoor media experiences; enhanced gatherings Movie nights, sports viewing, large parties Immersive entertainment; smart integration; durable outdoor tech
    Color and Theme Coordination with Weather-Resistant Fabrics Medium — design planning and sourcing Low–medium cost; replaceable fabrics; fade-resistant materials Cohesive, curated aesthetic; unified outdoor look Full design refresh; unifying mixed furniture pieces Creates polished look; easy seasonal updates; protects furniture

    Bringing Your Vision to Life

    Transforming an empty or underutilized deck from a simple wooden platform into a vibrant, functional outdoor living area is a journey of thoughtful choices. The most successful deck decorating ideas are not just about aesthetics; they are about creating a space that seamlessly extends your home's comfort and personality into the great outdoors. This process involves a strategic blend of planning, creativity, and selecting the right elements to suit your specific needs and the unique climate of North Georgia.

    The core takeaway from this guide is the power of zoning and purpose. Your deck can be a multi-functional oasis if you define its purpose. Is it a lively hub for family dinners, a tranquil retreat for morning coffee, or a great spot for weekend entertaining? By establishing clear zones for dining, lounging, and conversation, you create a natural flow that makes the space feel larger and more organized. A well-placed outdoor sectional can anchor a social area, while a dedicated dining set under a pergola carves out a distinct space for meals.

    From Inspiration to Implementation

    Moving from a list of ideas to a tangible plan requires a focus on layering and texture. This is where a good design truly comes to life. Remember the impact of layering different elements:

    • Foundation First: Start with your largest pieces, like a durable outdoor dining set or a comfortable deep-seating collection. These items form the backbone of your deck's functionality.
    • Soften the Surfaces: Introduce outdoor rugs to define zones and add a layer of comfort underfoot. A rug can visually connect disparate furniture pieces and introduce color and pattern.
    • Layer the Light: A single porch light is rarely enough. Combine ambient string lights for a warm glow, task lighting over a grill or dining area, and accent lights to highlight planters or architectural features. This creates depth and mood, allowing you to use the space long after the sun sets.
    • Add Textiles and Greenery: Weather-resistant throw pillows, cushions, and blankets are the final touches that inject personality and comfort. Complement these with planters and vertical gardens to bring life, color, and a natural softness to the hardscape of your deck.

    An effective outdoor space is one that anticipates your needs. It provides shade on a hot day, warmth on a cool evening, and comfortable seating for one person or ten. Each element, from the fire pit to the privacy screen, should solve a problem and enhance your enjoyment.

    Mastering these deck decorating ideas empowers you to create more than just a beautiful space; it allows you to build a personal sanctuary. It's about crafting an environment that encourages you to step outside, relax, and connect with family and friends. By investing in durable, weather-resistant materials and a thoughtful layout, you ensure your deck remains a cherished part of your home for many years, capable of adapting to different seasons and occasions. Your deck is a blank canvas, and with these strategies, you have the tools to create something that reflects your lifestyle and brings you daily joy.


    Ready to find the perfect pieces to complete your outdoor vision? Seeing and feeling the quality of outdoor furniture in person can make all the difference in your decision. We invite you to visit a Woodstock Furniture & Mattress Outlet showroom to explore our collection of outdoor seating, dining sets, and accessories and get helpful advice from our knowledgeable team.

  • How to Arrange Patio Furniture for a Functional Outdoor Retreat

    How to Arrange Patio Furniture for a Functional Outdoor Retreat

    Figuring out how to arrange your patio furniture shouldn't start with a workout. The key is to map everything out before you even think about lifting a single chair. Take a few minutes to define your patio's main purpose and measure your space—this simple first step will save you a ton of hassle and ensure your layout is actually usable and inviting from day one.

    Your Blueprint for a Functional and Inviting Patio

    A common mistake is treating patio furniture arrangement as an afterthought. A truly great outdoor space doesn't just happen; it starts with a vision. You need a clear idea of what you want your oasis to be, long before you place the first chair. A bit of planning now prevents the frustration of ending up with a cluttered, awkward, or—worst of all—an unused patio.

    Hand-drawn patio furniture arrangement blueprint on a napkin with seating, dining, and fire pit areas.

    Start with a Simple Sketch

    You don't need any fancy design software. Just grab a piece of paper (a napkin works in a pinch!) and draw the basic shape of your patio, deck, or balcony.

    • Measure Everything: Use a tape measure to get the exact dimensions. Jot down the length and width right on your sketch.
    • Mark Key Features: Pencil in any permanent fixtures—things like doors, windows, stairs, support columns, or a built-in grill. Knowing where these are is essential for creating good traffic flow.
    • Note Utilities: Make a note of where your outdoor outlets or water spigots are. This is important if you're planning on adding string lights, speakers, or need easy hose access.

    This quick map is now your guide. It helps you see the actual real estate you're working with, which is the best way to avoid the classic blunder of buying furniture that's way too big or comically small for the area.

    Define Your Patio’s Purpose

    Next, ask yourself the most important question of all: “How am I actually going to use this space?” Your answer here will drive every other decision you make. Is your patio going to be for:

    • Morning Coffee and Solitude? A simple bistro set or a single, comfortable armchair might be all you need.
    • Family Dinners and Barbecues? Then a large dining table and a full set of chairs need to be the main event.
    • Evening Cocktails with Friends? Think conversation. A sectional sofa or a circle of club chairs around a coffee table is ideal for that.
    • Poolside Lounging? Chaise lounges are the priority here, with a few small accent tables for drinks and sunscreen.

    A patio without a clear purpose often becomes a space that serves no function well. By defining its primary role, you create a destination with intent, making it far more likely to be used and enjoyed.

    Identify Your Focal Point

    Every well-designed room, whether it's inside or out, has a focal point that anchors the entire layout. It’s the first thing that catches your eye and the spot where furniture arrangements just naturally make sense. Your patio might already have one.

    Common outdoor focal points include things like:

    • A stunning view of your garden or the landscape beyond
    • A fire pit or an outdoor fireplace
    • A swimming pool or a trickling water feature
    • An interesting architectural detail, like a beautiful stone wall

    If you don’t have a natural focal point, you can create one. A large statement planter, a bold outdoor rug, or a unique piece of furniture can do the trick. Arranging your main seating around this point instantly gives the whole space a sense of order and pulls it all together.

    Of course, before you get to the fun of arranging furniture, you need a solid foundation. If you're starting from scratch, consider an expert patio paver installation to create that durable groundwork for your outdoor space.

    Creating Comfortable Flow with Smart Zoning

    Have you ever been to a party where everyone’s crammed into one corner, making the whole space feel awkward and tight? That's usually a classic sign of poor flow. A well-designed patio, on the other hand, guides people naturally, making the whole area feel bigger and more inviting.

    The secret is to stop thinking of your patio as one single slab of concrete. Instead, picture it as several distinct "rooms" without any walls.

    Hand-drawn floor plan sketch showing conversation, dining, and relaxation areas with furniture layout.

    This simple but powerful idea is called zoning. It's all about creating dedicated spots for different activities—like chatting with friends, sharing a meal, or just kicking your feet up with a good book. When you give each part of your patio a specific purpose, every piece of furniture has a clear job, which cuts down on clutter and makes the space feel intentional.

    Divide Your Space by Function

    First, figure out what you actually do on your patio. You don't need to plan for every possible activity, just the ones that fit your lifestyle. For most people, a great patio layout includes at least two of these core zones:

    • The Conversation Zone: This is your outdoor living room. It's built for connecting with people, usually centered around a coffee table or a fire pit. Think comfy seating like a sofa, a sectional, or a cozy grouping of club chairs.
    • The Dining Zone: Whether you’re hosting big family dinners at a full-sized table or just enjoying morning coffee at a small bistro set for two, this area is all about the food. It’s a good idea to place this zone close to the kitchen door to make carrying dishes back and forth a breeze.
    • The Relaxation Zone: This is your personal escape. It could be a pair of chaise lounges for soaking up the sun, a hanging chair tucked into a shady corner, or even just a single, plush armchair that’s perfect for reading.

    By creating these separate areas, you build a patio that can handle multiple things at once. Guests can mingle, move between groups, and feel at ease without getting in anyone's way.

    Prioritize Pathways and Traffic Flow

    Once your zones are mapped out, the next critical piece of the puzzle is traffic flow. People need to be able to move around without bumping into furniture or cutting through a conversation. This is where clear, obvious pathways are a game-changer.

    It all starts with proper spacing. As a rule of thumb, leave at least 18-24 inches between seating and tables so people can get in and out easily. For the main walkways between your zones, aim for a width of at least 36 inches. This single guideline prevents that cramped, bottlenecked feeling that can shrink a space in a hurry.

    Making the most of the space you have is a real challenge for many; some reports even show that nearly 70% of urban patio owners struggle with it. Thoughtful furniture arranging is more important than ever, especially with the growing trend of seamless indoor-outdoor living. You can learn more about the latest trends by checking out outdoor furniture market projections on Statista.com.

    A helpful tip: resist the urge to line up all your furniture against the house or railings. Pulling pieces away from the walls and grouping them within a zone—often anchored with an outdoor rug—instantly creates a more polished, intimate vibe and seriously improves the flow around the whole area.

    At the end of the day, smart zoning and clear traffic flow are what turn a random collection of furniture into a truly functional and welcoming outdoor retreat.

    Selecting Furniture That Fits Your Space and Lifestyle

    Once you’ve mapped out your patio’s zones and flow, the next step is choosing the furniture. But this is about more than just picking a style you like; it’s about getting the scale and material right.

    The goal is to find pieces that feel like they were made for your space. Get it right, and your patio will feel balanced and inviting. Get it wrong, and even a large patio can feel cramped, or a small one will just look cluttered.

    Think about it this way: a massive, deep-seating sectional might look incredible in a showroom, but it could completely swallow a modest-sized deck, leaving you with no room to walk. On the flip side, a tiny bistro set can look lost and out of place on a sprawling stone patio.

    Tailoring Furniture to Your Patio Size

    Breaking down your space into small, medium, or large can simplify your choices. Each size brings its own opportunities and challenges.

    For small patios or balconies, the focus is on verticality and versatility. Look for smart pieces that can pull double duty, like a storage ottoman that works as a seat or a coffee table. Taller, slender planters are also a useful trick—they draw the eye upward, making the space feel bigger without eating up precious floor real estate.

    Medium-sized patios are where you have some real flexibility. This is where a classic layout shines, like a sofa and two chairs arranged around a coffee table. You’ve got enough room for a dedicated conversation zone and maybe even a separate small dining set without everything feeling on top of each other.

    With a large patio, the main hurdle is often avoiding an empty, disconnected feeling. This is the perfect spot for a substantial L-shaped or U-shaped sectional to anchor your main hangout zone. From there, you can build out secondary areas, like a full dining set or a pair of chaise lounges, to fill out the space and give every corner a purpose.

    A common problem homeowners face is pushing their furniture against the walls of a large patio. It creates a "dance floor" effect in the middle and makes it difficult to have a decent conversation. Instead, pull your seating arrangements in to create more intimate, usable spaces.

    Choosing Materials for Your Local Climate

    The material your furniture is made from is just as crucial as its size, especially in a place with weather like we have here in Georgia. The combination of intense sun, high humidity, and surprise downpours can be brutal on outdoor furniture. Picking materials built to handle those conditions is key to making sure your investment lasts.

    Here are a few popular recommendations:

    • All-Weather Wicker (Resin Wicker): This synthetic material is a fantastic, worry-free choice for our climate. It resists fading from UV rays, won't crack or peel when it gets wet, and it’s lightweight, so rearranging is a breeze.
    • Aluminum: Powder-coated aluminum is another workhorse. It’s completely rustproof—a must-have in our humid environment—and light enough to move around whenever you feel like changing things up.
    • Teak: It’s a classic for a reason. While teak requires a bit more upkeep, its natural oils make it incredibly resistant to water and pests. It will weather to a beautiful silvery-gray patina over time, but you can treat it to maintain its original honey color.

    Patio Layout Ideas by Size

    Sometimes a quick visual guide is all you need to get the ideas flowing. Here’s a simple table to help you match your patio’s square footage with the right kind of furniture and layout.

    Patio Size Best For Key Furniture Pieces Arrangement Tip
    Small Cozy conversations, morning coffee Bistro set, two armchairs, small loveseat Use multi-functional pieces like a storage ottoman. Keep it simple.
    Medium Small gatherings, family lounging Sofa & chair set, 4-person dining table, fire pit Create a distinct conversation zone. Ensure clear pathways between areas.
    Large Entertaining, multiple activity zones L-shaped sectional, 6+ person dining set, chaises Anchor the space with a large seating group, then add secondary zones.

    This table is just a starting point, of course. Feel free to mix and match based on how you personally want to use your space.

    By thinking through both the scale of your furniture and the materials it's made from, you’re setting yourself up for a beautiful, functional, and long-lasting outdoor retreat. It’s a good idea to visit a showroom to see and feel these different materials in person—it can make all the difference in getting a true sense of scale before you buy.

    Making Your Patio Perfect for Conversation and Dining

    A patio's real value isn’t just in the pavers or the plants, but in the memories you make there. Getting the layout right can turn a simple outdoor space into a favorite spot for connection.

    Let's dig into the two most common ways people use their patios: for great conversation and for memorable meals. These are the layouts that encourage friends and family to settle in, relax, and stay a while.

    When people are gathering, the goal is to make conversation feel completely natural. Nobody should have to crane their neck or shout across a huge empty space. This is where classic arrangements really shine, creating a sense of intimacy that brings everyone together.

    Crafting a Welcoming Conversation Zone

    The best layouts for chatting naturally draw people closer. One popular choice is the U-shaped arrangement, which you can easily create with a big sectional sofa or by placing a sofa directly opposite two comfy armchairs. This setup is fantastic for larger groups because it defines a clear social hub, usually centered around a fire pit or a coffee table.

    Another effective option is the L-shaped layout, often made with a sectional or by pairing a sofa with a loveseat. This works well for defining a corner of a patio because it leaves plenty of room for people to walk around while still creating a cozy nook that feels both open and private.

    No matter which shape you choose, the key is what some call the "conversational triangle"—making sure everyone is close enough to chat comfortably without feeling crammed in.

    Here's a simple rule of thumb: try to keep seating pieces within about 8 feet of each other. Any further, and conversation starts to feel forced and disconnected. The idea is to close that distance and create a shared, comfortable space.

    Designing a Functional Dining Space

    When it comes to outdoor dining, function is just as important as style. Your main goal here is to give guests enough clearance to sit down and get up from the table without anyone having to do that awkward shuffle. It’s a small detail, but it makes a huge difference in how comfortable your guests feel.

    To achieve this, plan for at least 36 to 48 inches of open space between the edge of your dining table and any wall, railing, or other obstacle. This gives everyone plenty of room to pull their chair out and lets others walk behind a seated guest without a problem.

    There's some interesting science behind this, too. Arranging your patio furniture with ergonomic sightlines can actually boost enjoyment by as much as 45%. It's a big reason the outdoor furniture market is growing, with projections showing it'll grow from $54.7 billion in 2025 to $98.8 billion by 2035. When you nail the details—like keeping seat heights around 17-19 inches and spacing major pieces 48-60 inches apart—you create an environment that just feels right. Find out more about the trends driving the outdoor furniture market.

    Adding Style and Function with Finishing Touches

    With your main furniture pieces placed, it’s time for the final layers that transform a functional layout into a truly personal and inviting retreat. These are the details that inject personality, boost comfort, and make your outdoor space usable long after the sun goes down.

    An outdoor rug is one of the quickest ways to anchor a seating area. It visually defines a conversation or dining zone, instantly making the space feel more like a deliberate, finished room. Beyond just looking good, it adds a layer of comfort underfoot, which is a welcome break from the hardscape of a concrete or paver patio.

    Introduce Color, Texture, and Greenery

    You'd be surprised how much of a difference the small details can make. Accent tables, for instance, are essential in my book. They’re necessary for holding drinks, a good book, or a plate of snacks, ensuring every seat has a convenient spot to set things down.

    Planters are another one of my favorite tools for bringing a patio to life. You can use them to:

    • Add vibrant color: Pack them with seasonal flowers to really brighten things up.
    • Create texture: Get creative by mixing different leaf shapes and plant types for visual interest.
    • Enhance privacy: A row of tall planters can create a natural, beautiful screen from the neighbors.

    If you want to elevate the look and lean into natural elements, you can explore some unique and stunning succulent garden design ideas. They can add a sculptural, low-maintenance touch that complements almost any patio style.

    Set the Mood with Outdoor Lighting

    The right lighting is what makes a patio just as welcoming at night as it is during the day. This isn't just about being able to see; it's about creating a whole vibe.

    Don't underestimate the power of layered lighting. A combination of ambient, task, and accent lighting can completely change the mood of your patio, making it feel cozy, festive, or serene depending on the occasion.

    A simple strand of string lights hung over a dining or seating area adds instant charm and a warm, ambient glow. For pathways, solar-powered stake lights are an easy, no-fuss way to ensure safe navigation in the dark. Finally, lanterns—whether they're solar-powered or filled with flameless LED candles—can be placed on tables or on the ground to add a soft, flickering accent light that really dials up the cozy factor.

    This concept map breaks down some common layout goals to help you visualize what might work for your own space.

    A concept map displaying patio layout ideas for conversation and dining, including various furniture arrangements.

    As you can see, conversation layouts prioritize easy interaction, while dining layouts are all about comfortable spacing and flow. Getting these arrangements right is a key reason the global outdoor furniture market is projected to grow from $50.89 billion in 2024 to $86.65 billion by 2033. It’s clear that more and more homeowners are looking to extend their indoor comfort to the outside.

    Still Have Questions About Arranging Your Patio Furniture?

    Even with a solid plan, a few specific questions always seem to pop up right when you start moving furniture around. Don't worry, it happens to everyone.

    We've gathered some of the most common challenges we see homeowners run into. Let's get them cleared up so you can feel confident in your final layout.

    How Much Space Should I Leave Between Patio Furniture?

    This is probably the single most important question. Getting the spacing right is the secret to making a patio feel comfortable and easy to move around in, not cramped and awkward.

    As a general rule, aim to leave 30 to 36 inches between major seating pieces, like a sofa and a couple of accent chairs. This gives enough personal space while still keeping things close enough for conversation.

    For legroom, you'll want at least 18 inches between the edge of your sofa or chairs and your coffee table. But the most critical measurement is for your main pathways—keep those at least 36 inches wide so people aren't constantly bumping into things.

    How Should I Arrange Furniture on a Small Balcony?

    When you're dealing with a small patio or balcony, you have to think smart. This means going vertical and picking pieces that can pull double duty.

    A compact bistro set is a classic choice for a reason—it gives you a spot for coffee or a meal without eating up the whole floor. A loveseat almost always works better than a full-sized sofa. And don't underestimate a good storage ottoman! It can be a footrest, extra seating, and the perfect place to stash cushions or blankets.

    One of the most helpful tricks for small spaces is to push your largest furniture pieces—like the loveseat—up against a wall or railing. It's a simple move that instantly opens up the floor and makes the entire area feel bigger.

    Can I Mix Different Styles of Outdoor Furniture?

    Absolutely. In fact, mixing furniture styles is how you create a patio that feels personal and unique, not like you bought a showroom floor. The key to making it look intentional is to find a common thread that ties it all together.

    Here are a few ways to do that:

    • Stick with one material. You could use all-teak or all-aluminum pieces, for instance, even if the actual designs are very different.
    • Use a consistent color palette. Maybe your furniture frames are all neutral grays and blacks. You can then pull everything together with pillows, an outdoor rug, and planters in a cohesive color scheme, like navy and coral.
    • Choose a similar design vibe. Keep all the pieces in the same family, whether that's clean and modern or more rustic and traditional.

    This approach ensures your patio looks thoughtfully curated, not like a random collection of stuff.

    How Do I Arrange Seating Around a Fire Pit?

    When a fire pit is involved, safety and conversation are your top priorities.

    Always place chairs and sofas at least 3 to 4 feet away from the fire feature. This creates a safe buffer from the heat and keeps everyone clear of any stray sparks.

    To make the space feel inviting, arrange your seating in a circle or a U-shape. This is the classic campfire setup for a reason—it gives everyone a great view of the flames and makes it easy for guests to chat with each other. Lastly, double-check that you have a clear, wide path for people to get in and out of the seating area safely.


    Bringing your outdoor vision to life starts with finding the right pieces. Here at Woodstock Furniture & Mattress Outlet, our team has spent years helping North Georgia homeowners discover furniture that fits their space, style, and the way they live.

    To see some of these concepts in person and explore a great selection of outdoor options, come see us or check out our collections at woodstockoutlet.com.

  • How to Organize a Home Office: Create a Productive, Clutter-Free Space

    How to Organize a Home Office: Create a Productive, Clutter-Free Space

    If you've ever felt like your home office is working against you, you're not alone. The secret to transforming it from a source of stress into a hub of productivity isn't complicated. It really boils down to a simple, practical flow: first, define your space and declutter with intention, then create a functional layout with smart work zones, and finally, select furniture and systems that solve your specific problems.

    Your Blueprint for a Productive Home Office

    A detailed top-down sketch illustrating an organized home office layout with desk, chair, shelves, and natural light.

    Having a well-organized home office has shifted from a "nice-to-have" to a necessity for focus and well-being. With so many of us in remote or hybrid roles, carving out an effective workspace at home is a common challenge. In fact, it's projected that by 2025, over 32.6 million people will be working remotely, making dedicated, organized spaces more crucial than ever.

    The stakes are higher than you might think. Some studies even suggest that disorganized environments can reduce focus by as much as 40%, directly impacting your daily output and mental clarity. This guide is designed to move you beyond just tidying up. We're going to tackle the core issues of clutter, distraction, and discomfort that drain your energy, step-by-step. Before you start, it’s worth understanding the profound importance of a dedicated work-from-home space.

    This isn't about chasing a sterile, picture-perfect office. It’s about building a practical workspace that genuinely supports how you work.

    The 5 Pillars of Home Office Organization

    To give you a clear roadmap, we've broken down the process into five foundational pillars. Think of this as your game plan. Each step logically builds on the last, helping you create a comprehensive system for lasting organization and a more productive workday.

    Pillar Primary Goal Key Action
    Planning & Decluttering Create a clean slate and clear vision. Sort items into keep, donate, or discard piles.
    Layout & Zoning Design a workflow-friendly space. Assign specific areas for tasks like computer work, supplies, and reference.
    Furniture Selection Solve problems with functional pieces. Choose a desk, chair, and storage that fit your needs and space.
    Systems & Ergonomics Enhance comfort and efficiency. Manage cables and adjust your setup for proper posture.
    Styling & Maintenance Personalize and sustain your setup. Add decor and establish simple daily/weekly tidying routines.

    With these pillars as our guide, let's dive in and start building an office that truly works for you.

    Clearing the Clutter Before You Build

    Illustration of three labeled bins: 'KEEP' with papers, 'DONATE' with electronics, and 'DISCARD' with a coffee mug, demonstrating organization.

    Before you can even think about new desks or storage solutions, you have to address what’s already in the room. Trying to set up a functional office around piles of existing clutter is a recipe for failure—it’s like trying to paint over a cracked wall. You’re just hiding the problem, not fixing it.

    The most important first step is a thorough decluttering session. This isn't just about tidying up; it's about making deliberate decisions to create a clean slate. Getting a handle on this process is key, and there's actually a practical guide on how to declutter your home that breaks it down well.

    To start, grab three boxes or bins and label them: Keep, Donate, and Discard.

    The Three-Bin Sorting Method

    As you pick up every single item in your office—from pens to paperwork to that unused gadget you bought three years ago—you have to make a call right then and there. No "maybe" pile. That's just procrastination in disguise.

    • Keep: This pile is only for things you use regularly and are essential for your work. Your main laptop, your go-to notebook, critical documents. If it directly helps you get things done, it can stay.

    • Donate: What's still perfectly good but you just don’t need? That old monitor, extra binders you never opened, or business books you've already read. These items can find a new life somewhere else.

    • Discard: Now for the satisfying part. This is for the broken electronics, the collection of dried-up pens, and outdated paperwork that needs to be shredded. It's time to reclaim your space.

    A useful rule of thumb: if you haven't touched an item in the past year, it's a prime candidate for the donate or discard pile. This helps you detach emotionally and makes it much easier to let things go.

    Don't Forget the Digital and Paper Clutter

    Your physical space is only half the battle. Digital clutter can be just as distracting. A desktop covered in random files or an inbox with thousands of unread emails creates mental noise. Set aside an hour to create a logical folder system and clean up your digital world. A tidy screen leads to a focused mind.

    And then there's the paper. Stacks of it can feel suffocating. Many people have found freedom by going paperless—scanning important documents and saving them digitally. Not only does this clear off your desk, but finding what you need becomes much faster. For the hard copies you absolutely have to keep, a simple filing cabinet is essential.

    Once you’ve cleared everything out, the trick is to keep it that way. The “one-touch rule” for anything new that comes into the office is a helpful habit. Deal with mail, notes, and files the moment they cross your desk—file it, scan it, or toss it. This small change transforms organization from a huge project into a simple, sustainable daily habit.

    Designing a Smarter Layout with Work Zones

    Okay, you’ve cleared the clutter, and now you have a blank canvas. This is where the process becomes more creative. The goal now is to put things back in a way that actually makes your workday easier, not just prettier. A great way to do this is by thinking of the office not as one big room, but as a collection of work zones.

    This is a technique professional organizers use, and it’s a game-changer. It’s all about dedicating specific areas to specific types of tasks. Even if your "office" is just a small corner of the living room, you can still mentally (or even physically) divide the space to create a much better workflow. This simple shift in how you see the space is a cornerstone of learning how to organize a home office that works for you, not against you.

    Identify Your Core Zones

    Most home offices boil down to three main zones. Of course, you can tweak this based on what you do for a living, but this framework is a solid starting point for almost everyone.

    • The Primary Work Zone: This is your command center. We’re talking about your desk, your chair, your computer, and anything else you touch constantly all day long. This spot should be the most comfortable and easiest to get to in the entire room.

    • The Reference Zone: Think of this as your office library. It’s where you keep things you need, but not every five minutes. This could be your filing cabinet, bookshelves holding manuals or project binders, or storage for long-term client materials. You want it close enough to grab what you need without a hassle, but not so close that it’s crowding your main desk area.

    • The Supply Zone: This is mission control for all your office supplies—your printer, scanner, extra paper, pens, paper clips, you name it. Keeping all these items together means you’re not digging through three different drawers just to find a sticky note. It's a good practice to place this zone slightly out of the main path you walk through the room.

    Pro Tip: Before you start moving furniture around, sketch out your ideas. Grab a piece of paper or use a simple online room planner. This lets you experiment with different layouts and see how your zones fit together without breaking your back. It's a small step that saves a lot of time and frustration later.

    Practical Tips for Arranging Your Space

    Once you know what your zones are, placing them strategically can make a huge difference in your focus and productivity. You want to create a layout that just feels right, removing any little annoyances that pull you out of your work.

    Think about the natural flow of the room itself. If you can, place your desk where it gets good natural light, but be mindful of glare on your screen. Numerous studies show that natural light can boost your mood and productivity.

    Also, consider the "work triangle" concept, just like in a kitchen. The path between your main desk (work zone), your filing cabinet (reference zone), and your printer (supply zone) should be short and clear. This kind of logical setup means fewer wasted steps and less time getting distracted, which helps the whole day feel more organized and less chaotic.

    Choosing Furniture That Truly Solves Problems

    Alright, you've decluttered, you've measured, and you have a solid layout in mind. Now it's time to select the furniture. This isn't just about filling the space. The goal is to choose pieces that actively solve your workflow problems.

    Think of your furniture as the essential tools for your trade. You wouldn't use a wrench to hammer a nail, so why use a stiff dining chair for an eight-hour workday? Using the wrong tools leads to frustration, discomfort, and a messy process—exactly what we're trying to fix. The right desk, a truly supportive chair, and smart storage are the three pillars that will make or break your new home office.

    Finding the Right Desk and Chair

    Your desk is command central, so its size and shape need to align with how you actually work. Do you need to spread out blueprints and paperwork next to your dual monitors? An L-shaped desk could be a game-changer. If you’re working with a smaller footprint or want the health benefits of changing positions, a standing desk or a simple, compact writing desk might be a good fit.

    The chair, however, is even more critical to your day-to-day well-being. Think about it: many office workers spend thousands of hours sitting every single year. From that perspective, an ergonomic chair isn't a luxury; it's a practical investment in your own health. Be sure to look for features like adjustable height, proper lumbar support, and armrests that can be set to the same height as your desk. A good chair doesn't just feel comfortable—it actively reduces strain and helps you stay focused.

    Your home office furniture should be a solution, not a compromise. If your current chair causes back pain or your desk feels constantly cramped, it’s actively working against you. Investing in pieces designed for the work you do is an investment in your own productivity and comfort.

    Smart Storage Is More Than Just Shelves

    Good storage isn't just about stashing your stuff; it's about making things orderly and easy to find. Open shelving is great for books, binders, and a few decorative pieces you want to display. But for the less-sightly essentials—like reams of paper, extra cables, or ink cartridges—a cabinet with doors is helpful for hiding the chaos. And if you handle any important physical documents, a filing cabinet is still a must-have.

    This little flowchart can help you think through how your specific work zone should influence your furniture choices.

    A flowchart guiding users to choose a suitable work zone based on available space, privacy, and quiet needs.

    As you can see, whether you have a whole dedicated room or just a corner of the living room will point you toward different solutions. A dedicated space lets you prioritize function, while a shared zone means you need to be smarter about the footprint.

    Also, don't forget to think vertically! Tall bookcases or modular shelving units are brilliant for maximizing storage without eating up precious floor space. They also draw the eye upward, which can make a smaller room feel bigger.

    To help you get a clearer picture of what's out there, we've broken down a few common storage solutions and the problems they solve.

    Home Office Storage Solutions Compared

    Storage Type Best For Space Consideration
    Filing Cabinets Keeping important documents, client files, and sensitive paperwork organized and secure. Can be bulky; look for under-desk models or low-profile lateral files to save floor space.
    Bookcases Displaying books, binders, and decor. Keeping frequently used reference materials within arm's reach. Tall, narrow designs are perfect for smaller rooms and making the most of vertical space.
    Credenzas/Buffets Hiding bulky items like printers and scanners, plus stashing office supplies behind closed doors. Offers a large, useful surface for extra workspace or display area. A very versatile piece.
    Cube Organizers Highly flexible storage for supplies, project bins, books, or just about anything else. Extremely customizable with fabric bins and inserts. They fit well in almost any space.

    By focusing on function first, you'll end up with a workspace that not only looks great but, more importantly, feels great to work in day after day. This is the final piece of the puzzle to creating an organized and productive home office.

    Taming Cables and Mastering Ergonomics

    Detailed sketch demonstrating ergonomic computer workstation setup and correct body posture.

    Okay, let's talk about the two issues that can undermine even the most perfectly planned home office: the cable mess under your desk and the slow-burn discomfort of bad posture.

    You can have a beautiful desk and the perfect layout, but a messy web of cords makes a space feel unfinished and attracts dust. Worse yet, an improper ergonomic setup can lead to nagging neck, back, and wrist pain that completely drains your focus.

    The good news? Fixing both of these problems is easier than you think and makes a massive difference in how your office feels and functions every single day.

    Conquering Cable Chaos

    That nest of wires lurking under your desk is more than just an eyesore. It’s a pain every time you need to unplug something and makes cleaning difficult. Taking just 30 minutes to wrangle them will make your whole workspace feel cleaner and more intentional.

    Here are a few go-to tools for the job:

    • Cable Ties or Velcro Straps: The simplest first step. Grouping related cords—like everything for your monitor—instantly calms the chaos.
    • Cable Sleeves: These are fantastic. They’re basically fabric tubes that wrap around a whole bundle of cords, creating one clean channel from your desk to the outlet.
    • Adhesive Cable Clips: These are great for running individual cords along the back edge of a desk or down a table leg. It keeps them completely invisible.
    • Under-Desk Cable Tray: This is an excellent solution. It’s a small metal basket that screws to the underside of your desk, getting power strips and chunky adapters up off the floor entirely.

    Just start by unplugging everything, perhaps labeling each cord so you know what's what, and then neatly route them back using one of these solutions. You'll be amazed at how much calmer the space feels.

    Setting Up an Ergonomic Workstation

    Ergonomics isn't some fancy buzzword that requires expensive gear. It’s simply about arranging your workspace to fit your body's natural posture, not forcing your body to fit your workspace. Many people deal with the consequences of poor ergonomics, and small tweaks can prevent long-term strain.

    The goal here is to create a “neutral” body position, where your joints are all naturally aligned and not stressed.

    A well-adjusted workspace reduces physical stress, which in turn frees up mental energy for your actual work. Think of it as removing a constant, low-level distraction you might not even realize is there.

    Run through this quick checklist to get your setup dialed in for comfort:

    • Monitor Height: The top of your screen should be at or just a smidge below eye level. You shouldn’t have to look up or crane your neck down to see. If it's too low, a monitor stand or even a stack of sturdy books works wonders.
    • Chair Position: Sit all the way back in your chair so your lower back is supported. Your feet should be flat on the floor with your knees at roughly a 90-degree angle. Adjust your chair height until your elbows are also at a 90-degree angle when your hands are on the keyboard.
    • Keyboard and Mouse: Keep them close. You should be able to use them with relaxed shoulders and your elbows near your body. If you're reaching way forward, you’re creating tension in your neck and shoulders that will build up over the day.

    Making these small, intentional adjustments can completely change how you feel at the end of the workday. It transforms your office from just a place you work into a space that genuinely supports your well-being.

    Keeping Your Newly Organized Workspace Tidy for the Long Haul

    Let's be honest, organizing your home office is one thing. Keeping it that way is a whole different ballgame. The real victory isn't just the big initial purge—it's stopping that sneaky clutter from creeping back in.

    The secret is to build a few simple, consistent habits that prevent those paper piles and tangled cords from ever taking root. You don't need to block off a whole Saturday every month for a massive overhaul. Instead, a few minutes each day combined with a quick weekly tune-up is all it takes to maintain that calm, productive space you worked so hard to create.

    Nail the End-of-Day Reset

    The single most effective habit you can build is the 5-minute end-of-day reset. Before you shut down your computer and officially clock out, take just a few moments to return your workspace to a clean slate.

    • Clear Your Surfaces: Put away pens, notebooks, and any stray papers that have landed on your desk.
    • Wipe It Down: A quick swipe removes dust and coffee rings.
    • Sort the In-Tray: If you have a designated spot for incoming mail or notes, give it a quick sort.
    • Straighten Up: Push in your chair, tidy your keyboard and mouse. It’s a small detail that makes a big difference.

    This little ritual takes almost no time but pays off significantly. Walking into a clean, ready-to-go workspace in the morning can completely eliminate that feeling of starting the day already behind schedule.

    Consistency is so much more important than perfection here. The goal isn't a sterile, magazine-shoot office; it's a functional space that requires minimal effort to keep up because you're tackling small messes before they can become big problems.

    Carve Out Time for a Weekly Review

    To back up your daily reset, schedule a short 15-minute weekly review. Think of this as your chance to handle the things that pile up over a few days, like filing new documents or restocking your printer paper.

    Use this time to shred unnecessary paperwork, file away anything you've scanned, and just make sure your supply zone is prepped for the week ahead. By making these little routines a non-negotiable part of your schedule, you'll find that staying organized stops being a chore and simply becomes part of how you work.

    Still Have Questions? Common Considerations for Home Offices

    Even after you've got a game plan, a few questions can pop up right when you think you're finished. That's totally normal. Let's tackle a couple of the most common home office considerations.

    How Can I Organize a Small Home Office Corner?

    When you’re short on square footage, the only way to go is up. Think vertically.

    Wall-mounted shelves, floating desks, and tall, skinny bookcases can give you tons of storage without eating up precious floor space. Then, for the desk itself, use organizers and drawer dividers to make sure every single inch is working for you.

    What Are Some Budget-Friendly Organization Tips?

    Getting organized doesn’t have to drain your wallet. Some of the best solutions are things you might already have.

    Repurpose old jars or mugs to hold pens, scissors, and other supplies. You can find simple pegboards that give you a huge amount of flexible vertical storage. Even basic filing boxes can work wonders for stray papers. The real secret isn't buying expensive containers—it's creating a system that works for you.

    Remember, the whole point of getting organized is to make your life easier and your work more efficient. It's not just about aesthetics; a tidy space genuinely makes you more productive. In fact, proven systems like '5S'—Sort, Set in order, Shine, Standardize, Sustain—have been shown to deliver 20-50% efficiency gains, a principle that works just as well at home. You can dig into more stats about how organization impacts remote work on yomly.com.


    From figuring out the layout to picking a desk and chair, putting together a home office that you love to work in can be a really satisfying project.

    If you hit a snag or just need some help finding the right furniture to solve your unique workspace challenges, our team at Woodstock Furniture & Mattress Outlet is here to help. Come on down to one of our showrooms and let's find the perfect home office solutions for you.

  • Your Guide to 8 Seater Dining Table Dimensions

    Your Guide to 8 Seater Dining Table Dimensions

    So, what are the go-to dimensions for an 8-seater dining table? Generally, you’re looking at 72 to 96 inches long for a classic rectangular table. If you prefer a round table, the standard is about 60 to 72 inches in diameter. These numbers aren't random; they're the sweet spot for seating eight adults comfortably without anyone bumping elbows.

    Finding the Perfect Fit for Your Gatherings

    Picking out an 8-seater dining table is a significant decision. It’s not just another piece of furniture—it’s destined to become the heart of your home, the place for family dinners, holiday feasts, and late-night talks. But getting the size right can feel like threading a needle.

    Go too big, and your dining room suddenly feels cramped and hard to navigate. Go too small, and your guests will feel like they're packed in sardines. The real goal here is to strike that perfect balance between having plenty of seating and maintaining a comfortable, functional room. Getting a handle on the standard dimensions is the first step to making that happen.

    Standard Dimensions by Table Shape

    The shape of your table is a game-changer. It dictates the table's footprint and how it feels in your space. Rectangular tables are a popular choice for most formal dining rooms, while round or square tables can foster a more cozy, conversational atmosphere.

    To make things easier, here’s a visual breakdown of the typical dimensions you’ll find for each of the main 8-seater table shapes. Think of it as your starting point.

    Diagram illustrates dimensions and area for 8-seater rectangular, round, and square dining tables.

    As you can see, rectangular and oval tables use their length to make room for more people. On the other hand, round and square tables need a much wider footprint to fit the same number of chairs around the perimeter.

    Here's a quick reference chart to pull all that info together.

    8 Seater Dining Table Dimensions at a Glance

    Table Shape Standard Dimensions (Inches) Minimum Room Size (Feet)
    Rectangular 72" to 96" L x 36" to 42" W 12' x 9.5' to 14' x 10'
    Oval 72" to 96" L x 42" to 48" W 12' x 10' to 14' x 10.5'
    Round 60" to 72" Diameter 11' x 11' to 12' x 12'
    Square 60" to 72" L & W 11' x 11' to 12' x 12'

    This table gives you a ballpark idea of the space you'll need, making it easier to measure your room and see what shape works best for you before you start shopping.

    There’s a good reason why these numbers are so consistent across the furniture world. It all comes down to a simple, time-tested rule of thumb: give each person about 24 inches of table space. This ensures everyone has enough elbow room to eat comfortably. It’s why you’ll often see larger rectangular tables at 96 inches long, 42-48 inches wide, and a standard 30 inches high—designed for a spacious 12×12-foot dining room.

    If you’re planning a larger home project, understanding how these measurements work together is key. For instance, this helpful guide to standard cabinet dimensions can give you a better sense of how to create a cohesive, functional space throughout your home.

    Why Accurate Table Dimensions Matter

    Diagram showing rectangular, round, and square dining table dimensions with minimum room space requirements.

    Shopping for an 8-seater dining table is about so much more than just picking a style you love. It’s really about crafting a space that flows with your everyday life, and getting the dimensions right is the invisible key to making it all work. When the measurements are off, you feel it almost immediately—even if you can't quite put your finger on why.

    It usually shows up as a series of small, daily frustrations. Ever walked into a dining room that just felt "tight," forcing guests to do that awkward shuffle to squeeze past each other? Maybe you’ve sat at a table where pulling your chair out meant banging into the wall or a nearby buffet. These common headaches almost always trace back to a mismatch between the table's size and the room's proportions.

    A table that’s too big for the room can throw off the entire flow of your home, creating bottlenecks and making the space feel cluttered and small. On the flip side, a table that’s too small for eight people makes every meal feel cramped and impersonal, leaving no room for serving dishes or comfortable conversation.

    Creating a Functional and Inviting Space

    The real goal is to find a table that doesn't just fit in your room, but actually enhances it. The right measurements can transform a simple dining area into the true heart of your home. When everyone has enough elbow room and can easily slide their chair back, the whole atmosphere becomes more relaxed and welcoming.

    An accurately sized table ensures your dining room is a place of comfort, not compromise. It’s the difference between a room that feels chaotic and one that feels harmonious, supporting everything from quiet family dinners to lively holiday celebrations.

    Think of it this way: you're setting the stage for future memories. The right 8 seater dining table dimensions make everyday life effortless, whether it's kids spreading out homework, friends gathering for game night, or the whole family coming together for a special occasion.

    Solving Common Frustrations with Smart Planning

    By focusing on the numbers first, you can get ahead of the most common issues homeowners face with their dining rooms. Here’s how a little bit of measuring goes a long way:

    • Eliminates Crowding: Ensuring you have enough clearance—typically 36 to 48 inches—around the table creates clear walkways for people to move around, even when others are seated.
    • Ensures Chair Comfort: You can rest easy knowing every chair can be pulled out fully without hitting a wall, a credenza, or another piece of furniture.
    • Promotes Better Conversation: A well-proportioned table lets guests interact easily, without feeling like they're shouting across a vast expanse or sitting in each other's laps.
    • Balances the Room’s Scale: Your new table will look like it was made for the room, anchoring the design instead of overwhelming it or getting lost in the space.

    Ultimately, taking the time to measure your space and understand the ideal dimensions is the single most important step. It ensures that the beautiful table you bring home will serve your family for years to come, making your dining room everyone’s favorite gathering spot. Seeing these sizes in person can give you a much better feel for how they’ll fit in a real-world setting.

    Dimensions for Rectangular and Oval Tables

    If you're looking to seat eight people, rectangular and oval tables are probably the first shapes that come to mind. It's for good reason. Their long, elegant shape makes them a practical fit for most dining rooms, letting you host a crowd without needing a super wide room.

    The key is a simple rule of thumb: every person needs about 24 inches of elbow room to eat without bumping their neighbor. Rectangular and oval tables accommodate this well. The standard layout is three people on each long side, with one person at each end. It just feels balanced, organized, and ready for anything from a large holiday feast to a casual Tuesday night dinner.

    Sizing a Rectangular 8-Seater Table

    Rectangular tables are a classic. They have a way of anchoring a dining room with their strong, clean lines that remain a popular choice. When you're looking for one that seats eight, you’ll want to consider a specific size range to make sure it’s comfortable and functional.

    Typically, a rectangular table for eight will run somewhere between 78 to 96 inches long and 36 to 40 inches wide. These dimensions aren't random; they're designed to give each of those three people along the sides their 24 inches of space. As furniture experts explain in guides on standard dining table dimensions, this setup avoids discomfort.

    That length is the key to giving everyone breathing room. The width is just as important, though—it ensures there’s plenty of space for plates and glasses on both sides, plus a nice, wide channel down the middle for passing serving dishes or setting out a centerpiece.

    The Benefits of an Oval 8-Seater Table

    What if you love the seating capacity of a rectangle but want something a bit softer? Enter the oval table. It offers the best of both worlds, blending a rectangle's functional length with a round table's cozy, intimate vibe. They share similar dimensions with rectangular tables but swap the sharp corners for gentle curves.

    That one little change—rounding the corners—makes a huge difference in how a room feels and functions.

    • Easier to Navigate: Those curved edges make walking around the table a breeze. This is a massive advantage in tighter dining areas or in spaces where the dining table is in a main traffic path.
    • A Lighter Look: An oval table just feels less bulky. Without the hard corners, it creates a softer, more inviting look that can make a room feel more open.
    • More Inclusive Conversations: Even though people are seated in a line, the curved ends help the people at the head of the table feel more connected to the conversation happening along the sides. No one feels left out.

    For an 8-seater oval table, you'll be looking at dimensions of 72 to 96 inches long by 42 to 48 inches wide. You’ll notice they can be a tad wider than their rectangular cousins. That extra width helps make up for the tapered ends, so everyone still has plenty of surface area for their meal.

    Choosing Between Rectangular and Oval
    Your final decision will probably come down to the layout of your room and your own personal taste. A rectangular table makes a bold, formal statement that’s a great fit for a dedicated dining room. But if you need more flexibility for an eat-in kitchen or a multi-purpose room where people are always walking through, an oval table is a fantastic, flow-friendly solution.

    At the end of the day, both shapes are excellent choices for an 8-seater dining table. They offer a comfortable, practical setup for larger gatherings while bringing their own unique style to the table. By understanding their dimensions and how they’ll live in your space, you can pick a great centerpiece for years of family memories. Of course, there's no substitute for seeing them in person to get a true feel for their scale.

    Dimensions for Round and Square Tables

    While rectangular and oval tables are fantastic for how efficiently they use space, round and square tables bring a completely different energy to a dining room. Their symmetrical design creates this uniquely social and intimate atmosphere, which is why they are so appealing to many families and frequent hosts.

    Unlike their longer cousins, these tables place every single guest an equal distance from the center and from each other. That simple geometric shift makes for a much more communal dining experience where nobody feels like they’re stuck at the far end. Conversations just seem to flow more naturally, and everyone feels included.

    Top-down view of an 8-seater dining table, showing dimensions, serving area, and 24-inch spacing.

    Finding the Right Size for a Round Table

    A round 8-seater table is a beautiful statement piece, perfect for creating a cozy, cafe-like vibe right in your own home. But to comfortably sit eight people, you’re going to need a table with a pretty substantial diameter.

    The ideal range for an 8-seater round dining table is typically 60 to 72 inches in diameter. A 60-inch table is the absolute minimum you’ll want to consider for eight chairs, and it will be a snug fit. For a more spacious and comfortable setup where guests have plenty of elbow room, a 72-inch diameter table is a much better bet.

    Just keep in mind that as the diameter gets bigger, the distance across the center of the table grows significantly. This can make it a bit of a reach to pass the potatoes, which is why a lazy Susan is such a popular and practical add-on for larger round tables. The key is striking that perfect balance between comfortable seating and functional serving.

    Sizing a Square 8-Seater Table

    Square tables offer a similar communal feel to round ones but with a more modern, structured look. They provide a generous, balanced surface and work exceptionally well in square-shaped dining rooms, creating a wonderful sense of symmetry and order.

    For a square table to seat eight people—that’s two on each side—you will need a fairly large size. Look for dimensions in the range of 60 to 70 inches per side. A 60-inch by 60-inch square table is a common starting point, but bumping that up closer to 70 inches will give everyone a more relaxed dining experience and prevent guests from feeling crowded.

    Much like big round tables, the generous surface area means the center can be hard to reach. This makes them great for family-style meals with large platters, but it's something to think about as you plan.

    A Note on Footprint and Flow
    Both large round and square tables require a significant amount of floor space. Because their width is equal to their length, they often have a larger overall footprint than a rectangular table that seats the same number of people. This makes them a much better fit for open-plan areas or dedicated square dining rooms rather than long, narrow spaces.

    The Social Advantage vs. The Practical Tradeoffs

    Choosing a round or square table is really a decision that balances social dynamics with the practicalities of your space. The inclusive, conversational atmosphere they create is a huge draw. But, you have to weigh that against the realities of your room and your lifestyle.

    Here are the key points to consider:

    • Benefit: Conversation. Everyone faces inward, making it easy for all your guests to chat with one another.
    • Tradeoff: Footprint. These shapes need a wider room to accommodate their dimensions and the necessary clearance space around them.
    • Benefit: No "Head of the Table". The egalitarian seating arrangement feels more casual and less formal.
    • Tradeoff: Reaching for Food. The center of a large round or square table can be tough to access without standing up or asking for help.

    If your top priority is creating a warm, engaging, and social hub for dining, and you have the right-shaped room to support it, a round or square 8-seater table can be a truly wonderful centerpiece for your home. It can be especially helpful to get a real-world sense of their scale and presence in a room before you buy.

    How to Measure Your Room for a New Table

    It’s easy to fall in love with a gorgeous 8-seater dining table on a showroom floor. But before you get too attached, you’ve got to make sure it will actually work in your dining room. This is about more than just the table’s footprint; it’s about keeping your dining space comfortable, functional, and easy to walk through. A few careful measurements now will save you from the headache of a beautiful table that completely overwhelms the room.

    The single most important thing to consider is clearance space—the empty area around your table. Think of it as your room’s breathing space. It’s the gap that lets people pull out their chairs without bumping into a wall, walk behind someone who is already seated, and move around the room without feeling like they're navigating a maze.

    The Golden Rule of Clearance Space

    A well-planned dining room has one simple, non-negotiable rule. You need a bare minimum of 36 inches of clearance on all sides of your table, measured from the tabletop's edge to the nearest wall or another piece of furniture.

    • 36 Inches (3 feet): This is the standard minimum. It gives you just enough room to slide a chair out and sit down. Someone can also just shimmy past behind them if they need to.
    • 48 Inches (4 feet): This is really the ideal clearance, especially if the dining room is a high-traffic area. This much more generous space allows people to walk comfortably behind seated guests without anyone having to suck in or turn sideways.

    Keep this rule in your head while you measure. It’s the difference between a dining room that feels inviting and functional, and one that feels like an obstacle course. You’re looking for a table that fits beautifully within these boundaries.

    A Step-by-Step Measurement Guide

    Ready to figure this out? Grab a tape measure and a notepad. Following these quick steps will ensure you account for everything, not just the open floor.

    1. Measure the Room's Full Dimensions: First thing's first, measure the total length and width of your dining room, from wall to wall. Jot these numbers down. This is your absolute maximum space.

    2. Account for Existing Furniture: Already have a buffet, sideboard, or china cabinet in the room? Measure how far it sticks out from the wall (its depth) and subtract that from your room’s total measurement. The real available space is now the distance from that piece of furniture to the opposite wall.

    3. Factor in Doorways and Walkways: Take a look at where your doorways and major traffic paths are. For instance, if your dining room connects the kitchen to the living room, you’ll want to protect that walkway. For these high-traffic lanes, you should aim for that more generous 48 inches of clearance if you can swing it.

    Once you have your final numbers, you can figure out your maximum table size. As a general rule of thumb, an 8-seater dining table usually runs somewhere between 80-92 inches long, 36-40 inches wide, and 29-30 inches high. That 30-inch table height is a key ergonomic detail, as it’s the most comfortable for the seated posture of most adults. For a deeper dive into this, you can find more great info on table sizes and ergonomics at BassettFurniture.com.

    A Practical Tip: Visualize the Space

    Sometimes numbers on a piece of paper just don’t cut it. A useful trick is to use painter's tape to mark the dimensions of a potential table right on your floor. This gives you a true feel for its scale and how much walking room is left. You can even pull up your existing chairs to the taped-off area to see how it all feels together.

    Knowing how a big piece like an 8-seater table will fit is even more critical if you're planning a big move, like moving furniture across country. Proper planning ensures your new centerpiece will work just as well in your new home. By taking these steps, you can shop with confidence, knowing exactly what 8 seater dining table dimensions will create the perfect gathering spot for your family.

    Considering Chairs, Benches, and Table Height

    Top-down sketch of an 8-seater dining room layout, showing table dimensions, chair clearances, and room measurements.

    Okay, so you've nailed down your 8 seater dining table dimensions. That's a huge step, but the journey to the perfect dining room isn't quite over. Now we need to think about what goes with the table—from the chairs you sit in to the very height of the table itself.

    The relationship between your table and chairs is a big deal. Get it wrong, and you'll either feel like a kid with your chin on the table or find yourself hunching over just to eat. Getting this pairing right is the secret to making every meal a comfortable, relaxing experience.

    Standard Table Height and Chair Pairing

    You'll find that most dining tables stick to a standard height of 28 to 30 inches from the floor to the tabletop. This isn't just a random number; it's the industry standard designed to work perfectly with typical dining chairs, which have a seat height of about 17 to 19 inches.

    This combination creates a gap of roughly 10 to 12 inches between the chair seat and the table surface. This little pocket of space is the sweet spot. It gives you plenty of legroom without feeling cramped and keeps your arms at a natural height for eating.

    The most important measurement isn't just the table's height or the chair's height, but the distance between the two. Aiming for that 10-12 inch gap is the key to creating an ergonomically sound and comfortable dining setup for family and guests of all sizes.

    When you're shopping, always check both measurements. It’s a simple step that can save you from the disappointment of bringing home a beautiful set that’s just not comfortable for everyday life.

    The Smart Solution of a Dining Bench

    For a lot of homes, especially those with eat-in kitchens or dining areas on the narrow side, a dining bench can be a game-changer. Benches bring a few key benefits to the table (pun intended).

    • Space Efficiency: When you're done eating, a bench can be tucked completely under the table. This instantly opens up floor space and makes it easier to walk around the room.
    • Flexible Seating: Benches are fantastic for families. Need to squeeze in one more kid or a last-minute guest? A bench makes it easy.
    • A Casual Aesthetic: Swapping chairs for a bench on one or both sides can give your dining area a more relaxed, communal, and modern feel.

    Just a quick tip: when you're picking a bench, make sure it’s a bit shorter than the distance between the table legs. That way, it'll slide underneath smoothly with no issues.

    Completing the Dining Space

    With your table and seating sorted out, it's the final touches that really pull a room together. An area rug, for instance, can do wonders for defining the dining space, especially in an open-concept layout. The rule of thumb here is to get a rug large enough so that the chair legs stay on the rug even when they’re pulled out from the table.

    Similarly, the light fixture you hang above the table should be scaled to the table, not the entire room. A chandelier or pendant light that's about two-thirds the width of your table will look balanced and give you the perfect lighting for your meals.

    Ultimately, creating the perfect dining space is about seeing how all these different pieces—the table, chairs, rug, and lighting—work together. Taking a moment to consider each element ensures your new 8-seater table becomes the true heart of a warm, welcoming, and functional room. The best way to get a feel for it all? Come see for yourself. We invite you to visit one of our North Georgia showrooms to sit at a few tables and see how different combinations look and feel in person.

    Frequently Asked Questions

    After digging into all the numbers and measurements for 8-seater dining tables, you might still have a few lingering questions. Don't worry, that's perfectly normal! Below, we've tackled some of the most common concerns we hear from shoppers to help you feel totally confident in your choice.

    What Is the Smallest Room an 8 Seater Table Can Fit In?

    This is a great question, and the answer really hinges on the shape of the table. For a more compact rectangular table, say around 78 inches long by 36 inches wide, the absolute tightest you could go is a room measuring 12.5 feet by 9 feet.

    That number accounts for the bare-minimum 36 inches of clearance you need on all sides just to slide chairs out and squeeze by. Likewise, a 60-inch round table would need an 11-foot by 11-foot room, at a minimum. But keep in mind, these are very snug fits.

    To give yourself comfortable walking space and a much better flow, we strongly recommend aiming for a room size of at least 14 by 11 feet for most 8-seater tables.

    Can I Use a Bench to Save Space with an 8 Seater Table?

    Absolutely! Using a dining bench is one of the savviest space-saving tricks in the book. A bench can slide completely under the table when you're not eating, which can instantly free up an invaluable 1 to 2 feet of floor space on one side.

    This is a game-changer in narrower dining rooms, breakfast nooks, or eat-in kitchens where every inch really does count. Plus, it's a wonderfully flexible solution that also happens to be a huge hit with families that have young kids.

    Just one pro tip: when you pick out a bench, double-check that its length is just a tad shorter than the distance between the table legs. That ensures it can tuck away cleanly without any bumps, maximizing your open floor space.

    How Do I Choose Between a Rectangular and a Round 8 Seater Table?

    The classic showdown: rectangular vs. round! The best choice really comes down to your room’s shape and how you live and entertain.

    • Rectangular tables are the go-to for traditional, long, and narrow dining rooms. They’re fantastic for hosting bigger dinner parties because they give you tons of room for serving dishes down the middle and create a more formal, structured atmosphere.

    • Round tables are a perfect match for square-shaped rooms. They’re known for creating a much more intimate, conversational vibe where everyone can easily see and chat with each other. This makes every meal feel more connected and casual.

    Think about what you’ll be doing most. If formal holiday dinners are your thing, a rectangular table is probably your best bet. But if you're all about cozy family meals and lively conversation, a round table could be the perfect heart of your home.


    At Woodstock Furniture & Mattress Outlet, our knowledgeable team is always ready to help you walk through these decisions in person. Sometimes, seeing how different 8-seater dining table dimensions actually feel in a room can make all the difference. Visit one of our North Georgia showrooms to find the perfect fit for your home.

  • A Practical Dining Table Size Guide for Your Home

    A Practical Dining Table Size Guide for Your Home

    We’ve all been there. You see a dining table you fall in love with, but the secret to a happy, functional dining room isn't just about style—it starts with size. This dining table size guide is here to take the guesswork out of the equation so you can find a table that doesn't just look great, but actually fits your room and your life.

    It's about making a subtle but important shift in thinking, from "which table is the prettiest?" to "which table will make my home better?"

    How to Find the Right Dining Table Size

    One of the most common issues shoppers encounter is choosing a table that's either too big or too small for their space. This usually leads to a room that feels either cramped and claustrophobic or awkward and empty. It's a real Goldilocks problem.

    But when you get the size just right? It completely changes the flow of your home, makes conversation easier, and turns every meal into a more pleasant experience. The goal here is to create a sense of balance—a space that feels welcoming and put together on purpose.

    This guide is your roadmap to finding that balance. We'll walk you through three core ideas that will give you the confidence to pick a table that feels like it was made for your home.

    The Three Pillars of Proper Sizing

    Think of finding the right table as a simple three-step process. Each step builds on the last, guiding you toward a choice that just plain works for your space and how you live in it.

    • Measure Your Room's True Usable Space: This is more than just measuring from wall to wall. You've got to think about doorways, other furniture like buffets or hutches, and the natural pathways people use to walk through the room.
    • Plan for Comfortable Seating: Everyone at the table needs enough elbow room to eat without bumping into their neighbor. There’s a simple rule of thumb that can put an end to the "elbow wars" at your dinner table for good.
    • Ensure Proper Clearance for Movement: This is probably the most important—and most often forgotten—step. You need enough "breathing room" around the entire table for folks to easily pull out their chairs and for others to walk behind them without having to turn sideways and squeeze by.

    Top-down sketch illustrating dining room layout with a rectangular table, chairs, and critical dimensions for measure, seating, and clearance.

    By focusing on these three elements—space, seating, and clearance—you’re doing more than just filling a room with furniture. You’re actively designing a better experience for your family and guests, making sure every gathering is comfortable and memorable.

    This practical approach takes the anxiety out of the decision. Instead of just guessing and hoping for the best, you’ll have a clear framework you can use to size up any dining table, whether you're browsing online or walking through a showroom. It’s all about empowering you to make a smart, lasting investment in your home.

    Here at Woodstock Furniture & Mattress Outlet, our team has helped countless North Georgia families figure this out, and we've seen firsthand how getting the size right can completely transform a room.

    Measuring Your Dining Space for a Perfect Fit

    Before you even think about browsing for a new dining table, the very first thing you need to do is get to know your room. I'm not talking about a quick length-and-width measurement. I mean really understanding the room's usable footprint. You have to account for every single thing that takes up floor space or gets in the way of walking around.

    This means you need to measure the space around doorways, windows that stretch to the floor, and any furniture you already have, like a buffet, sideboard, or china cabinet. These pieces effectively shrink your dining area's boundaries. It’s a classic mistake to ignore them, and it always leads to a cramped, frustrating room. The goal here is simple: find the absolute biggest table your room can handle without making it impossible to move.

    The Critical 36-48 Inch Clearance Rule

    For a dining area that feels comfortable and inviting instead of just… tight, designers live by one core guideline: the 36 to 48-inch clearance rule. This is all about the open space you need to leave between the edge of your table and the nearest wall or piece of furniture.

    Think of this clearance as your room’s “breathing space.” Without it, everything feels claustrophobic.

    • 36 Inches (Minimum Clearance): This is the bare minimum you need for someone to shimmy behind a pulled-out chair without having to turn sideways. It works, but it's a snug fit best reserved for smaller rooms where you're fighting for every inch.
    • 42-48 Inches (Comfortable Clearance): Now this is the sweet spot. With this much room, someone can easily walk past the table even while others are seated and eating. It makes for a much more relaxed, uncrowded vibe.

    Key Takeaway: The 36-48 inch rule is pretty much non-negotiable for a dining space that actually works. If you measure your room and then subtract this clearance from all sides, you'll know the maximum dimensions for your new table.

    A Step-by-Step Guide to Mapping Your Space

    Ready to figure out your room's perfect table size? Grab a tape measure and a notepad. Following these quick steps will take all the guesswork out of the process, leaving you with exact numbers to guide your search.

    1. Measure the Room's Full Dimensions: First up, measure the total length and width of your dining room, wall to wall. Jot these numbers down. Let's say your room is 12 feet by 15 feet.

    2. Identify and Measure Obstructions: Next, look for any other furniture that will be sharing the space—a buffet, a bar cart, a console table. Measure how far these pieces stick out from the wall. If your buffet is 18 inches deep, you have to factor that in.

    3. Calculate Your Usable Footprint: Now for some simple math. Subtract the depth of your furniture and your desired clearance from the room's total dimensions. Using our example:

      • Room Width: 12 feet (144 inches)
      • Subtract Clearance: 144 inches – 36 inches (wall side) – 36 inches (walkway side) = 72 inches of maximum table width.
      • Room Length: 15 feet (180 inches)
      • Subtract Furniture & Clearance: 180 inches – 18 inches (buffet) – 36 inches (clearance) = 126 inches of maximum table length.

    Based on that quick calculation, the absolute largest table this room could handle would be 72 inches wide by 126 inches long. And while you're carefully measuring your dining space for the perfect table, don't forget to also figure out what size area rug for dining room will best anchor the space. Getting this right ensures all the chair legs stay on the rug, even when people are getting up from the table. It’s this complete approach that makes a room feel truly put together.

    Choosing a Table Shape for Your Room and Lifestyle

    Once you’ve got the maximum table dimensions your room can handle, the next big decision is the shape. This choice is about more than just what fits; the shape of your dining table sets the tone for the entire space. It influences the flow of traffic, the vibe of your dinner conversations, and how open and airy the room feels.

    Each of the four main shapes—rectangular, round, square, and oval—brings something different to the table, literally. Let's break down their strengths so you can find the match for your home and lifestyle.

    Rectangular: The Timeless Classic

    There’s a reason rectangular tables are a popular choice. Their straight lines are a natural fit for most dining rooms, making them an easy, intuitive option. If you’ve got a big family or love hosting holiday dinners, a rectangular table is your friend for seating a crowd.

    The long sides easily accommodate a number of chairs, while the ends create distinct "head of the table" spots. This classic layout is perfect for long, narrow rooms. Just run the table parallel to the longest wall, and you'll maximize the walking space on either side.

    In fact, rectangular tables still hold a significant portion of the market, accounting for 45% of the global market share. While this classic isn't going anywhere, industry reports also show that oval tables are gaining popularity, all thanks to their space-savvy, corner-free design. You can discover more insights on dining table trends from Mordor Intelligence if you want to explore the data.

    Round: The Social Hub

    If you’re all about creating a cozy, conversational atmosphere, a round table is a fantastic choice. With no head of the table, everyone faces each other, making it easy for conversations to flow naturally between all your guests. This setup is perfect for smaller families, breakfast nooks, or eat-in kitchens where intimacy is key.

    The lack of sharp corners is also a huge plus in smaller or square-shaped rooms. People can move around them without bumping into corners, which makes the whole space feel more open and less cramped. A helpful tip: look for a round table with a pedestal base. It gets rid of the corner legs and gives everyone maximum legroom.

    Square: Modern Symmetry

    Square tables bring a clean, modern sense of balance to a room, especially if your dining space is also square. Much like round tables, they foster an intimate dining experience by seating guests close together, making conversation a breeze. It’s a look that feels both structured and inviting.

    But that symmetry can become a challenge with larger tables. As a square table gets bigger, the distance across the middle grows, and suddenly it’s tough to chat with the person across from you. Because of this, square tables are usually best for seating up to eight people.

    Oval: The Flexible Hybrid

    Can’t decide between rectangular and round? An oval table gives you the benefits of both worlds. It has the generous length of a rectangular table—great for serving dishes and seating more people—but with the soft, curved corners of a round one.

    This unique shape is a lifesaver in narrower rooms or spaces that double as a walkway. Those rounded ends make it so much easier for people to squeeze by without hitting a sharp corner. It’s also a great safety feature if you have little ones running around the house.

    The simple flowchart below shows just how important it is to think about your room, your walkways, and your table all at once.

    A flowchart titled 'Room Clearance Process' shows steps from 'Room' to 'Walkway', then to another 'Walkway', and finally to 'Table'.

    It’s a great reminder that your table fits into the space that’s left over after you’ve accounted for the crucial pathways you need to move around comfortably.

    Balancing Everyday Use with Special Occasions

    For most of us, a dining table has to wear at least two hats. It’s the command center for quiet weekday breakfasts and homework sessions, but it also needs to be ready for bustling holiday dinners and birthday celebrations. The key is finding a table that adapts to your life, not the other way around.

    That’s really the core challenge when choosing the right dining table size. You need something that feels right for your daily routine without making your space feel empty, but it also has to accommodate extra guests when the occasion calls for it. This is where versatile and adaptable furniture truly shines.

    It’s no surprise that the global dining table market is growing, valued at USD 8.68 billion and projected to hit USD 13.71 billion by 2032. This trend is closely tied to urbanization, as more people in new apartments and homes need compact, flexible furniture like extendable tables. You can read the full research about dining table market trends to see how homeowners are adapting to modern living spaces.

    The Rule of Personal Space

    Before we get into adaptable tables, let’s cover the most important rule for comfortable seating. To avoid bumping elbows and making everyone feel squished, the golden rule is to allow approximately 24 inches of table width per person.

    Think of this as each guest's personal bubble. A 72-inch long rectangular table, for instance, can comfortably fit three people on each side (3 x 24 = 72 inches). This simple guideline is the foundation of any good dining table size guide and ensures everyone has enough room to eat and chat without feeling squeezed.

    This 24-inch rule isn't just about comfort; it's about hospitality. Giving each guest their own space shows consideration and makes the whole dining experience more relaxed and enjoyable for everyone.

    Extendable Tables: Your Secret Weapon for Flexibility

    An extendable table is the perfect fix for this balancing act. These tables have hidden sections, called leaves, that you can add to increase the table's length, giving you extra seating capacity on demand.

    They come with a few different mechanisms, each with its own pros:

    • Traditional Leaves: These are separate panels you manually insert into the center of the table after pulling the two ends apart. They often offer the most extension but do require a place to store the leaves when you're not using them.
    • Butterfly Leaf: This clever design features a hinged leaf that’s stored right inside the table. You just pull the table ends apart, and the leaf unfolds from the center like wings. It's self-storing, which means no more hunting for leaves in a closet!
    • Drop-Leaf: This style has hinged sections on the sides of the table that can be lifted up and supported by a gateleg or bracket. Drop-leaf tables are incredibly space-efficient, making them perfect for small apartments or multi-functional rooms where the table might be pushed against a wall for daily use.

    Choosing the Right Extension Type

    So, which mechanism is best for you? It really boils down to your storage space and how often you plan to entertain.

    • For frequent entertainers: A butterfly leaf is incredibly convenient because it's always ready to go.
    • For those with ample storage: Traditional leaves often allow for the longest possible extension, perfect for those once-a-year mega-gatherings.
    • For small-space living: A drop-leaf or a console table that extends offers maximum versatility, serving as a small surface day-to-day and a full dining table when you need it.

    By choosing a table that can grow with your needs, you invest in a piece of furniture that's truly functional. It respects the scale of your room for everyday life while ensuring you're always ready to welcome more people to your table. Visiting a showroom is a great way to test these mechanisms in person and see which feels most intuitive for you.

    Visualizing Your New Dining Room Layout

    Two hand-drawn architectural sketches illustrate different dining room layouts, table sizes, and clearance dimensions.

    All the rules of thumb and measurements are great, but the real magic happens when you can actually see it all come together. Let’s shift from theory to practice and look at how different tables fit into a couple of common room sizes. Seeing it on paper (or on screen) makes it so much easier to apply the same logic to your own home and avoid that sinking feeling of a costly mistake.

    Once you’ve mapped out your perfect dining space, it’s a good idea to think ahead about delivery day. Taking a look at a few basic furniture moving tips can save you a lot of headache when your new pieces arrive.

    Layout Example 1: The Cozy 10' x 12' Dining Nook

    A smaller dining space, say around 10-by-12 feet, is all about making smart choices to avoid feeling boxed in. The goal here is simple: fit the family without tripping over chairs.

    • The Room: A compact 10' x 12' (or 120" x 144") space. You see these a lot in apartments or as breakfast nooks in open-concept floor plans.
    • The Challenge: Seat everyone for daily meals while leaving enough elbow room and clear walking paths.
    • The Solution: A 48-inch round table is a great choice here, especially one with a pedestal base. No corners means better traffic flow, and a single pedestal frees up legroom for chairs. This size is perfect for seating four people comfortably.
    • The Math: In a 120-inch wide room, a 48-inch table leaves you with 36 inches of clearance on each side (120" – 48" = 72" / 2 = 36"). That hits our minimum clearance sweet spot for a comfortable walkway.

    This is a perfect example of why round tables are superstars in smaller, squarish rooms. They encourage conversation and make the whole area feel bigger by keeping those pathways open.

    Layout Example 2: The Standard 12' x 15' Dining Room

    For a more traditional dining room, something in the neighborhood of 12-by-15 feet, you’ve got a lot more breathing room. This gives you more flexibility for a larger table and even some extra storage furniture, like a buffet.

    • The Room: A dedicated 12' x 15' (or 144" x 180") dining room.
    • The Challenge: Find a table that’s great for dinner parties but also plays nicely with a sideboard or china cabinet.
    • The Solution: A 42" wide by 72" long rectangular table is a fantastic choice. It comfortably seats six to eight people. By placing it parallel to the longer 15-foot wall, you’re working with the room's natural flow and keeping traffic lanes clear.
    • The Math:
      • Width-wise: A 42-inch table in a 144-inch wide room gives you a generous 51 inches of clearance on each side. Plenty of room!
      • Length-wise: Let's add an 18-inch deep buffet against one of the short walls. Even with a 72-inch table, you’ll still have 42 inches of clearance on the buffet side and a roomy 48 inches at the main entryway (180" – 18" buffet – 72" table – 42" clearance = 48").

    Hopefully, seeing these examples brings all the numbers and rules to life. It shows how the right table shape and size can work in harmony with your room’s layout to create a space that’s not just beautiful, but also a true functional hub of your home.

    Your Final Pre-Purchase Checklist

    Alright, you’ve put in the work. You’ve measured your space, considered all the shapes, and have a good idea of what you’re looking for. Before you make a final decision, running through one last mental checklist is the best way to make sure you’ve covered all your bases. This isn't about second-guessing yourself; it's about locking in the confidence that you've made a choice you'll be happy with for a long, long time.

    Think of it as the final walkthrough. It’s a simple, practical step to ensure the table that looks perfect on paper (or on your screen) will feel just as perfect in your home.

    Confirming the Practical Details

    First things first, let’s revisit the numbers and tools. A tiny oversight here is an easy fix now, but a huge headache after delivery day.

    • Double-Check Your Measurements: We can’t say it enough. Grab that tape measure one more time. Confirm your room’s dimensions, the clearance space you’ve planned for, and the absolute maximum table size that will fit. It's the simplest step and prevents the most common sizing mistake.

    • Map It Out on the Floor: This is a helpful trick. Use painter's tape or even break down some cardboard boxes to create a life-size footprint of the table right on your floor. This is a great way to feel the table’s scale in your room and to physically test your walkways.

    Don't Forget the Chairs and Lighting

    A dining table doesn't live on an island. How well it works depends entirely on the pieces around it, especially the chairs you'll be tucking in and the light fixture hanging above.

    Be sure to consider these crucial companions:

    • Chair Dimensions: Got your chairs already? Perfect. Check their arm height. You want to be absolutely sure the arms can slide cleanly under the table’s apron. If they can’t, your chairs will stick out, eating up precious walkway space when they’re not in use.

    • Overhead Lighting: Now, look up. Is your chandelier or pendant light hanging right where the center of your new table will be? An off-center light fixture can throw off the balance of the whole room. Moving a fixture now is a lot easier than realizing it's wrong after your beautiful new table is in place.

    A Final Thought: Numbers and measurements are critical, but they don't tell the whole story. Nothing can replace seeing a table in person to truly get a feel for its scale, weight, and presence in a room. Some things you just have to experience firsthand.

    We designed this entire guide to give you the knowledge to shop with confidence. But if you want to see these concepts in action and get some friendly, hands-on advice, we’d love for you to stop by one of our showrooms. Our team is always here to help you finalize your choice and find a great fit for your home.

    Got Questions? We’ve Got Answers.

    By now, you’ve probably got a pretty good handle on dining table sizing. But just in case, here are a few quick answers to the most common questions our furniture experts get from shoppers every single day.

    How Much Space Should I Leave Between My Dining Table and the Wall?

    The golden rule is to leave at least 36 inches of clearance between your dining table and any walls or other large furniture. That's enough room for someone to comfortably walk behind a seated person without having to turn sideways.

    However, if you want a more spacious and relaxed feel, especially for busy family dinners or holiday gatherings, aim for 42 to 48 inches. This extra breathing room makes it much easier for guests to get in and out of their seats without bumping elbows or asking others to scoot in.

    What's a Good Dining Table Shape for a Small Room?

    When space is tight, round and oval tables are your friends. Since they don't have sharp corners, they make it much easier to navigate a cramped room and create a better sense of flow. Visually, they just make the space feel bigger and less cluttered.

    A round table with a pedestal base is a true small-space superstar. By getting rid of the corner legs, it opens up a ton of legroom and makes it way easier to squeeze in an extra chair when company drops by.

    It’s a clever design that really maximizes what you can do with a limited footprint.

    Should My Dining Chairs Tuck All the Way Under the Table?

    Absolutely, yes. For the sake of clear walkways and keeping the room tidy, your chairs should be able to slide completely under the table when you’re not using them. This small detail makes a huge difference in how functional and uncluttered your dining area feels.

    Before you fall in love with a set of chairs, be sure to measure the height from the floor to the table’s apron—that’s the wood panel right under the tabletop. If you’re eyeing chairs with arms, you’ll need to make sure the arm height is lower than the apron so they can slide underneath without getting stuck.


    Feeling ready to take the next step? Now that you've got your measurements, it's time for the fun part—seeing how different sizes and styles look and feel in person. The friendly team at Woodstock Furniture & Mattress Outlet is always here to answer any other questions and guide you to a table for your home. Come on down and explore our selection. Find your nearest showroom here

  • A Guide to Designing a Living Room Layout That Works

    A Guide to Designing a Living Room Layout That Works

    Before you think about pinning living room ideas or shopping for a new sofa, there's a critical first step that separates a functional space from a frustrating one: creating a floor plan.

    This isn't just for architects or designers. Think of it as your personal blueprint, a practical map that ensures every piece you choose will not only fit but will also contribute to a room that feels comfortable, intentional, and easy to live in. Skipping this part is a common challenge, often leading to that sinking feeling when a new sofa arrives and it overwhelms the space or blocks a natural walkway.

    Your Blueprint For A Better Living Room

    Detailed architectural floor plan illustrating a living room layout with furniture, dimensions, and movement paths.

    The goal here is simple: to create a detailed map of your living room before you move a single thing. This process takes the guesswork out of the equation. It empowers you to make thoughtful, confident decisions about furniture scale and placement, turning an abstract idea into a concrete, workable plan.

    Start with Accurate Measurements

    First, grab a tape measure, a notepad, and a pencil. Precision is helpful here—eyeballing it now can lead to headaches later.

    Start with the basics: the length and width of the room. Jot those down. Next, measure the ceiling height. This might seem minor, but it has a significant impact on the scale of everything from tall bookcases to pendant lights.

    Now, let’s get into the details. You need to account for all the fixed architectural features you’ll have to work around.

    • Doors and Windows: Measure the width and height of each one, and also measure their distance from the nearest corner.
    • Fireplace or Built-Ins: Note the full dimensions of the hearth, mantel, and any shelving that's part of the structure.
    • Outlets and Switches: Walk the room and mark the location of every electrical outlet, light switch, and connection point. Knowing this now is a game-changer for planning where your lamps, TV, and sound system will go.

    Identify Natural Traffic Patterns

    Every room has invisible lanes—the paths people naturally take to move from the doorway to the sofa, or from the living area to an adjoining room. Defining these "traffic patterns" is the secret to a layout that flows instead of feeling like an obstacle course.

    Think about how you actually use the space. Where do you enter? Where do you exit? Is there a direct line to the back door or the hallway?

    A useful rule of thumb is to keep these main walkways clear. As a benchmark, you’ll want to allow for at least 30 to 36 inches of clear space for major traffic routes. This ensures movement feels effortless and the room doesn't feel cramped.

    Placing a chair or an oversized coffee table right in the middle of a natural pathway is a common layout blunder. It can instantly make a room feel poorly planned and difficult to navigate.

    Sketch Your Floor Plan

    Alright, you have your measurements and you know where people walk. Now it’s time to bring it all together and create your blueprint. You don’t need any specialized software or drafting skills.

    A simple sheet of graph paper works well. You can let each square represent 6 inches or a foot, which helps you keep everything to scale. If you're more comfortable working digitally, there are many free, easy-to-use room planner tools online that let you drag and drop elements.

    Start by drawing the outline of your room. Carefully add in the windows, doors, fireplace, and all those other fixed elements you measured. Then, use dotted lines to mark out the main traffic lanes you identified. This visual map is now a powerful tool for arranging and rearranging furniture without the heavy lifting.

    Whether you're planning a complete overhaul or just staging your space to sell, getting the layout right is fundamental. For more on creating that picture-perfect look, you can find helpful information in guides like these Top 10 Staging Tips for Selling Your Home. Your floor plan is the essential first step to achieving a professional, polished result.

    Carve Out Functional Zones in Your Space

    Top-down sketch of two living room layouts: a conversation area and a reading nook.

    Modern living rooms are often multitasking spaces. One minute they're hosting a family movie night, the next they're a quiet spot for reading, a conversation area for guests, or a play space for kids. A helpful way to bring a sense of order to this activity is to think in terms of functional zones—creating distinct areas for different activities within the same room.

    This technique, which designers call "zoning," is about giving your layout purpose. Instead of a single, sprawling space, you’re creating smaller, intentional environments that support the way your family lives. The trick isn't to put up walls, but to use your furniture, rugs, and lighting as visual cues to gently separate one area from another.

    Figure Out Your Primary Zones

    Before you start shifting furniture, take a minute to think about what happens in your living room. What are the most common activities? Your daily and weekly routines will tell you exactly which zones you need to create.

    For most people, it boils down to a few core functions:

    • The Conversation Zone: This is often the social heart of the home. It’s usually built around your main sofa and a couple of chairs, arranged to make conversation easy. The goal is to create a setup where people can chat comfortably.
    • The Media/Entertainment Zone: This area is focused on the screen—be it a TV or a projector. Here, furniture placement is focused on clear sightlines and comfortable seating.
    • The Reading Nook: This can be a personal escape. It's often a smaller zone tucked into a quiet corner, featuring a single chair, a small side table, and a dedicated task light.
    • The Play Area: This can be a great addition for families with young children. This space can be as simple as a soft rug and some low, easy-to-access toy storage to help contain the fun.

    Use Furniture to Create Smart Separation

    An easy way to carve out your zones is by strategically placing your furniture. By grouping pieces together, you naturally create visual boundaries. A common technique is to float a sofa in the middle of a large room; its back acts like a low-slung wall, clearly dividing the main seating area from a walkway or dining space.

    To enhance this, an open-backed bookcase or a sleek console table behind a floating sofa reinforces that division. It defines the zone while adding surface and storage space—all without blocking the view.

    This isn't just for big pieces, either. An armchair angled just right in a corner, paired with an ottoman and a floor lamp, instantly suggests a "cozy reading spot." You're essentially creating little "rooms within a room" that tell people how to use the space without saying a word.

    The Defining Power of Rugs and Lighting

    Furniture does the heavy lifting, but rugs and lighting are effective tools for defining your zones. An area rug works like a visual anchor, grounding a cluster of furniture and clearly marking its territory. A common designer approach is to place at least the front legs of your sofa and chairs on the rug—it instantly pulls the conversation area together, making it feel deliberate and cohesive.

    Lighting is just as powerful for sculpting your space. Think in layers:

    1. Ambient Lighting: A central chandelier or ceiling fixture can define the primary conversation hub.
    2. Task Lighting: A focused floor lamp or wall sconce can put a spotlight on your reading nook, making it feel distinct and inviting.
    3. Accent Lighting: Putting the lights in your media zone on a dimmer switch can create a theater-like vibe for movie night.

    By layering different light sources, you can highlight each zone on its own, changing the mood and function of the entire room with the flip of a switch. This combination of furniture, rugs, and lighting transforms a single room into a truly versatile space.

    Choosing Your Anchor Piece and Getting the Scale Just Right

    Now that you’ve mapped out your zones, it's time to talk about the most influential player in a living room layout: the anchor furniture. In many cases, this is your sofa or sectional. It’s often the largest piece in the room, the one that sets the tone for everything else. When you get this choice right, the rest of the puzzle pieces can fall into place more easily.

    This foundational piece does more than just offer a place to sit. It establishes the scale, the style, and the function of your living space. A large, deep-seated sectional can suggest "casual comfort and movie nights." A more upright, tailored sofa, on the other hand, might suggest a space geared more toward conversation. The trick is to pick something that not only physically fits but also aligns with what you do in that room.

    Your Sofa Is the North Star of Your Layout

    Think of your sofa as the sun, and other furniture—chairs, tables, lamps—are planets orbiting around it. Its placement dictates where accent chairs will live, where the coffee table will land, and how people will move through the space. In many layouts, the sofa's position can determine a significant portion of the room's functional flow.

    It’s no wonder sofas and sectionals are a large part of the home furnishings world. Their central role in our homes is a major driver of market trends. If you're interested in the data behind this, you can explore insights on the household furniture market here.

    Before you settle on a sofa, think about where it will go. Will you face it toward the fireplace to create a cozy, traditional focal point? Or will its back create a soft "wall," dividing the living and dining areas in an open-concept home? Each decision creates a completely different experience.

    Getting the Scale Just Right

    One of the most common problems people encounter is getting the scale wrong. A sofa can look perfectly normal in a large showroom but feel too large in a smaller living room. The flip side is also true—a small loveseat can feel lost in a huge room with vaulted ceilings.

    What you're aiming for is visual balance. Your main piece needs to be substantial enough to ground the room, but not so big that it suffocates it.

    A Helpful Tip: Before you decide, grab some painter's tape and mark the exact dimensions of the sofa or sectional on your floor. Live with this "ghost" furniture for a day or two. Can you walk around it easily? Is there still room for a side table? This simple trick gives you a real-world feel for the piece's footprint and can help you avoid a costly mistake.

    Also, consider visual weight, not just physical size. A sofa on tall, skinny legs will feel much lighter and less imposing than a blocky one sitting right on the floor, even if they have the same length and depth.

    Sectional Configurations for Different Spaces

    Sectionals are popular because they offer a lot of seating, but their specific shape means you have to choose wisely. Not every sectional works in every room.

    Here’s a quick rundown of common options:

    • L-Shaped Sectionals: A classic choice. These are great for tucking into a corner to save floor space in small or medium-sized rooms. You can also "float" one in a larger room to neatly define your main conversation area.
    • U-Shaped Sectionals: These are often used for large family rooms or dedicated media rooms. A U-shaped sectional creates an instant, cozy conversation pit that’s very social, but you need the square footage to pull it off without feeling boxed in.
    • Sectionals with a Chaise: This can be a good compromise for smaller spaces where a full L-shape is too much. The chaise gives you that spot to stretch out and relax, but without the visual bulk of a whole other corner piece. It helps keep the room feeling more open.

    Ultimately, picking your anchor piece is a balancing act between what you need and what your room can handle. By taking the time to nail the scale and placement, you're setting the stage for a living room that not only looks great but feels comfortable.

    Mastering Furniture Placement And Traffic Flow

    Once your anchor pieces are roughly in place, it’s time to bring in the rest of the furniture. This is a game of inches that separates a room that feels effortless from one that feels like an obstacle course. Getting the placement right is all about creating a natural flow that makes the room easy to move through and live in.

    The goal is simple: let people walk around without bumping into corners or squeezing past chairs. To do this, you have to think as much about the empty areas between your furniture as the furniture itself. When you nail it, the layout just works. Conversations are easier, and the whole space feels balanced.

    This little graphic breaks down the core process. Know your space, pick your main piece, then test the flow. It’s a simple but effective way to think.

    A three-step infographic outlining the sofa selection process: measuring space, picking a sofa, and checking room flow.

    Following this keeps you focused on how everything works together, helping you sidestep common layout mistakes from the get-go.

    Key Spacing And Clearance Rules

    Think of these as reliable guidelines, not rigid laws. They’re based on how people actually move and use a space, making your living room comfortable and functional.

    To make things easier, here's a quick cheat sheet for the most common clearances you'll need to think about.

    Living Room Clearance And Spacing Guide

    Placement Area Recommended Distance Why It Matters
    Sofa to Coffee Table 16 to 18 inches Close enough to reach your drink, but far enough to walk through easily. This is the sweet spot for functionality.
    Main Walkways 30 to 36 inches This is your main artery. Keeping it this wide prevents bottlenecks and makes the room feel open and accessible.
    Seating Apart 3.5 to 10 feet Keeps people close enough for a natural conversation without shouting, but still gives everyone their personal space.
    Side Table to Seat 2 to 3 inches Just enough space so it doesn't look crammed, but still close enough to be a convenient landing spot for a book or lamp.

    These measurements aren't arbitrary; they’re tried-and-true distances that help create a space that feels considered and is a breeze to use every day.

    Navigating Traffic And Focal Points

    A well-designed living room respects the natural pathways people take. The routes from the door to the sofa, or from one room to the next, need to stay clear. This is where your floor plan sketch becomes your friend.

    The most important rule? Keep your main walkways at least 30 to 36 inches wide. For smaller paths, like the space between your coffee table and TV stand, you can get away with about 24 inches.

    If your room has a built-in focal point like a fireplace or a large window, lean into it. Arrange your main seating to face it. This gives the room an immediate sense of purpose. No obvious focal point? You can create one with a large piece of art or even the TV.

    Speaking of the TV, a question people often ask is how far away the sofa should be. A good rule of thumb is to start at about 7 feet from the screen. This usually provides a comfortable viewing angle without straining your eyes or neck.

    Getting your traffic flow right is one of the biggest upgrades you can make to your room. It's not just about looks; a well-planned layout can genuinely reduce daily frustration. As our living spaces become more fluid and less formal, these principles are more important than ever.

    Putting It All Together: A Practical Example

    Let’s walk through a common scenario. Imagine a rectangular living room. You have a fireplace on one of the short walls and the main doorway on the wall opposite it.

    • Place the Anchor: The sofa goes down first, facing the fireplace to establish that focal point. Pulling it 4 inches or so off the back wall gives it a little breathing room—it makes a surprising difference.

    • Create the Zone: Two accent chairs are placed across from the sofa, forming a U-shaped conversation area centered on the fireplace. This setup feels intimate and keeps the view of the fire open.

    • Ground the Space: A coffee table sits in the middle, about 18 inches from the sofa and chairs. It ties the whole seating group together.

    • Define the Flow: This is crucial. A clear 36-inch walkway is left open from the entryway, running behind the accent chairs to the rest of the house. Now, nobody has to cut through the middle of a conversation just to get by.

    By applying these spacing and placement ideas, you’ve taken a collection of furniture and turned it into a cohesive, comfortable, and livable space.

    Now that your main furniture pieces are in place and you can walk through the room without tripping, the foundation is solid. But right now, it’s just a functional space. Let's add the layers that make it feel like home.

    These finishing touches—the right rug, a smart lighting plan, and well-chosen decor—are what will bring your living room to life. They aren't just afterthoughts; they’re the essential elements that pull everything together, creating a space that’s cozy, complete, and full of personality.

    Ground Your Space with the Right Area Rug

    Think of an area rug as the visual anchor for a seating area. It’s one of the most effective tools you have for defining a specific zone and making it feel cohesive. A common mistake is choosing a rug that’s too small for the space.

    When a small rug is just floating in the middle of the room, it can make all the furniture around it feel disconnected and can even shrink the room visually. The fix is simple, though.

    Your area rug should be large enough for at least the front legs of your sofa and accent chairs to sit on it. This one rule instantly ties all the pieces together, creating a unified and grounded conversation area.

    If you’re working with a larger living room, you might even be able to get all the furniture legs onto the rug. Just make sure to leave some of the floor showing around the edges—aim for about 18 to 24 inches of bare floor between the rug and the walls. This keeps it from looking like wall-to-wall carpet that doesn't quite fit.

    Illuminate with a Layered Lighting Plan

    Good lighting can completely transform the vibe of a room. The key is to think in layers. If you're only relying on one overhead light, you're likely casting harsh shadows and creating a flat, uninviting atmosphere. A better approach is to combine three different types of light.

    • Ambient Light: This is your room's general illumination. It usually comes from a central ceiling fixture, like a chandelier or flush-mount light, or recessed lighting. Its job is to provide a comfortable, even level of brightness.
    • Task Light: This is all about function. It’s the focused light you need for specific activities. Think of a floor lamp next to your reading chair or a table lamp on an end table. It makes things like reading or doing a puzzle easier on the eyes.
    • Accent Light: This is where you can add flair. Accent lighting is used to highlight features you love, whether it’s a piece of art, an architectural detail, or a plant. Wall sconces and picture lights are perfect examples.

    When you combine these three layers, you get a lighting scheme that’s both dynamic and flexible. You can adjust the mood for any occasion, from a bright family game night to a softly lit, relaxing evening.

    Accessorize with Intention

    Now for the final, personal touches. This is where you bring in things like side tables, plants, artwork, and throw pillows. The goal here is curation, not clutter. Every accessory should complement the layout you've worked so hard on, not compete with it.

    Side tables need to be practical. Place them within easy reach of a sofa or chair—just 2 to 3 inches away is a good guideline. Try to match the height of the table to the height of the chair’s armrest.

    Plants are fantastic for adding life, color, and texture to a room. If you love the look of greenery but don't have a lot of time for care, there are many beautiful low maintenance indoor plants that can add vibrancy.

    Finally, when it’s time to hang artwork, a good rule of thumb is to place it at a comfortable eye level. The center of the piece should be about 57 to 60 inches from the floor. This ensures it feels integrated into the room's design instead of floating too high or sitting too low.

    Common Questions About Living Room Layouts

    Even with well-laid plans, things can get a little tricky when real furniture starts entering the room. It’s normal to hit a snag or two. Let's walk through some of the most common layout challenges people ask about.

    How Do I Handle an L-Shaped Room?

    An L-shape can feel like a puzzle, but it’s actually an advantage. A common mistake is trying to treat it as one single, continuous space. Instead, lean into the architecture. The shape gives you a natural, built-in way to create different zones.

    Think of the larger, longer part of the "L" as your main event. This is an ideal spot for your primary seating area, where you’ll put your sofa, coffee table, and maybe a couple of chairs for conversation or watching TV.

    The shorter leg of the "L" then becomes your secondary space. It's the perfect corner for something more specific. Some ideas include:

    • A quiet reading nook with a comfy armchair, an ottoman, and a good floor lamp.
    • A small, dedicated workspace with a slim desk and a chair that can be tucked away.
    • A designated play area for kids, defined with a soft rug and some low-profile toy storage.

    To make this work, using an area rug in each zone can be helpful. It’s a simple trick that visually separates the two functions and makes the whole room feel more intentional and pulled-together.

    Can I Mix Different Furniture Styles?

    Absolutely. A room where every piece matches perfectly can sometimes feel a bit impersonal. Mixing styles is what can give a space soul, personality, and a collected-over-time vibe. That said, there's a fine line between "eclectic" and "chaotic."

    The secret to making different styles work together is to find a common thread that connects them. This unifying element creates a sense of harmony, even if the pieces themselves are from different eras or aesthetics.

    So, what kind of common thread are we talking about?

    • A Consistent Color Palette: If your color scheme is tight, a traditional rolled-arm sofa and a sleek, modern accent chair can live in harmony.
    • Repeating Materials: Using the same wood tone or metal finish across several different pieces helps tie everything together. Think a walnut coffee table, walnut legs on a chair, and a walnut-framed mirror.
    • Similar Scale: Make sure your furniture has a similar visual weight. A huge, overstuffed traditional armchair might overpower a delicate, minimalist side table. Balance is key.

    Our advice is to start with your biggest, most important piece—usually the sofa. Once that's in place, you can slowly bring in other items, always asking yourself if they complement the main piece or compete with it.

    Should I Get a Sectional or a Sofa and Loveseat?

    This is one of the top questions we hear, and there's no single right answer. It comes down to your room's size, your lifestyle, and what you’re trying to achieve with the space.

    A sectional might be a good fit if:

    • You have a large, open-concept family room and you want to carve out a cozy, defined zone for lounging.
    • Your main goal is to maximize casual seating for movie nights and family get-togethers.
    • You need to create a visual divider in a large room. The back of a sectional can work like a low "wall" to separate the living area from a dining area.

    A separate sofa and loveseat (or a pair of chairs) is often a better option if:

    • You're working with a smaller or more formal living room. Separate pieces give you more flexibility in how you arrange them.
    • You like to switch things up. A traditional layout is much easier to rearrange when you want a change.
    • Your room has a lot of doorways or awkward traffic paths that a large, immovable sectional might block.

    Here’s a helpful tip: Before you commit, grab some painter's tape and outline the footprint of each option on your floor. Seeing it in your actual space will give you a much better feel for how it impacts traffic flow and the overall scale of the room.


    Working through these details is part of the process. If you'd rather see these options in person and get some hands-on advice from knowledgeable staff, we invite you to visit one of our showrooms. Here at Woodstock Furniture & Mattress Outlet, we’re ready to help you find pieces to make your vision a reality. Come see what we have to offer at https://woodstockoutlet.com.

  • 8 Smart Decorating Tips for Small Living Room Layouts

    8 Smart Decorating Tips for Small Living Room Layouts

    A small living room presents a unique design challenge: how do you create a space that’s functional, comfortable, and stylish without feeling cramped? It’s not about having less, but about being more intentional with every choice. The key is to solve common problems like limited floor space, visual clutter, and poor traffic flow with smart, strategic decisions that maximize both form and function. This guide moves beyond generic advice to provide practical, actionable decorating tips for a small living room, helping you transform your compact area into an inviting and efficient hub for relaxation and daily life.

    We will explore how furniture scale, color, light, and organization work together to create an illusion of greater space and a genuine atmosphere of comfort. For further inspiration on crafting an atmosphere of warmth and personal comfort in any space, explore various cozy home decor ideas. The goal of this article is to equip you with specific strategies, from utilizing vertical space to selecting multi-functional pieces, so you can make informed decisions that reflect your lifestyle. Ultimately, these tips will help you make your small living room work harder and smarter for you, proving that great design isn't about the size of the room, but the ingenuity behind it.

    1. Embrace Multi-Functional Furniture to Maximize Utility

    In a compact living room, every square inch counts. One of the most effective decorating tips for a small living room is to select furniture that does more than one job. Multi-functional pieces maximize your room's utility without consuming precious floor space. Instead of a standard coffee table, consider one with built-in drawers or a lift-top that reveals hidden storage. This approach ensures that each item earns its place, contributing to both the room's style and its overall function.

    This strategy isn't about compromise; it's about smart design. A storage ottoman can provide extra seating for guests, a comfortable footrest, and a concealed home for blankets or board games. Similarly, a sectional sofa with a storage chaise keeps your living area tidy by hiding away seasonal decor or extra pillows, eliminating the need for a separate bulky cabinet. By choosing pieces that serve dual or even triple purposes, you create a space that feels larger, more organized, and perfectly suited to your lifestyle.

    A detailed sketch of multi-functional furniture, including a sofa with a lift-top chaise and nesting tables for small spaces.

    How to Choose the Right Multi-Functional Pieces

    Selecting the right multi-use furniture involves more than just finding an item with a hidden compartment. It requires a thoughtful assessment of your daily needs and long-term goals for the space.

    • Prioritize Primary Use: A sofa bed must first and foremost be a comfortable sofa. Test its cushions and construction for daily use. The guest bed function is secondary, so don't sacrifice everyday comfort for a feature you'll only use occasionally.
    • Measure Everything: Before purchasing, measure not only the space where the furniture will go but also your doorways, hallways, and stairwells. This ensures a smooth delivery and prevents the disappointment of a piece that won't fit through the door.
    • Evaluate Storage Capacity: Think about what you plan to store. A lift-top coffee table is ideal for smaller items like remotes and magazines, while a storage chaise offers deeper space for bulky blankets or pillows.
    • Consider Construction Quality: Multi-functional furniture often has moving parts like hinges, lifts, or pull-out mechanisms. Look for pieces with durable components that can withstand regular use. Our knowledgeable team can help you understand the differences between various options and find well-built pieces that offer lasting value.

    2. Utilize Vertical Space to Draw the Eye Upward

    When floor space is limited, the most overlooked asset in your small living room is the walls. A key decorating tip is to draw the eye upward, creating an illusion of height and openness. Utilizing vertical space means using walls for storage, decor, and functional elements rather than cluttering the floor. This shifts the room's focus from its small footprint to its full height, making the entire area feel more expansive and thoughtfully designed.

    This strategy is about reclaiming unused territory. Instead of a wide, low media console, consider a wall-mounted TV with floating shelves above and below. Floor-to-ceiling bookcases that flank a doorway or fireplace create a grand, built-in look while offering immense storage. By encouraging an upward gaze, you make the room feel airier and more dynamic, transforming empty walls into stylish, functional assets.

    How to Effectively Use Vertical Space

    Implementing this concept correctly involves more than just hanging a few shelves. It requires a balanced approach to ensure the walls feel curated and intentional, not crowded.

    • Choose Tall, Slender Furniture: Opt for tall, narrow bookcases and étagères instead of short, wide ones. These pieces naturally guide the eye upward and occupy a smaller footprint.
    • Mount Shelving Strategically: Floating shelves are a great choice for small living rooms because they provide storage without the visual weight of a traditional cabinet. Install them above a sofa or desk to display books and decor.
    • Create a Vertical Gallery Wall: Arrange artwork and photos in a vertical orientation. This grouping pulls the eye up and can make a low ceiling feel higher than it actually is.
    • Balance Open and Closed Storage: To avoid a cluttered look, mix open shelving with closed, wall-mounted cabinets. This allows you to display your favorite items while hiding everyday essentials from view. We can help you find pieces that offer this blend of style and practicality.

    3. Light and Neutral Color Palettes

    Color has a profound impact on how we perceive the size of a room. One of the most classic decorating tips for a small living room is to use a light and neutral color palette. Shades of white, cream, soft gray, and beige reflect light, creating an open, airy feeling that makes the space seem larger and more expansive than it actually is. This foundation of light colors serves as a canvas, tricking the eye into seeing a brighter, less cluttered environment.

    This approach is about creating visual harmony, not a boring, sterile room. A neutral backdrop allows architectural details and carefully chosen furniture to stand out. Imagine light gray walls paired with white trim and warm, natural wood floors; the combination feels both spacious and inviting. By establishing a bright, cohesive base, you set the stage for a room that feels calm, organized, and elegantly styled.

    Hand-drawn sketch of a living room with a large mirror, potted plant, window, and armchair.

    How to Implement a Light and Neutral Palette

    Successfully using neutrals is a balancing act between creating space and adding personality. The key is to layer textures and subtle variations in tone to build depth and warmth.

    • Layer Tones for Depth: Instead of using one single shade of white or beige, layer several. Combine an off-white sofa with cream-colored pillows and a slightly darker taupe rug. This monochromatic layering adds sophisticated dimension without overwhelming the space.
    • Introduce Texture: Prevent a neutral room from feeling flat by incorporating a variety of textures. Think of a chunky knit throw, a woven jute rug, linen curtains, or a distressed wood coffee table. These elements create visual interest and a cozy, lived-in feel.
    • Use Accents Strategically: Pops of color are useful for personality. Reserve bold hues like emerald green or deep navy for smaller, easily swappable items such as accent pillows, artwork, or a single statement chair. This maintains the room's airy quality while adding a focal point.
    • Balance with Warmth: To keep a light-colored room from feeling cold or clinical, ground it with warm elements. Natural wood tones, brass or gold metallic accents, and leather pieces introduce richness and warmth, making the space feel more inviting and balanced.

    4. Strategic Mirror Placement

    Among the most classic decorating tips for a small living room, strategic mirror placement remains one of the most effective. Mirrors are powerful tools that do more than just reflect your image; they reflect light and create the illusion of depth, visually expanding the dimensions of your room. A well-placed mirror can bounce both natural and artificial light around the space, instantly making it feel brighter, larger, and more open.

    A detailed sketch of a living room showcasing various lighting options and a sofa.

    This technique works by tricking the eye into perceiving more space than actually exists. By reflecting a view or an open area, a mirror adds a new visual plane to the room, preventing walls from feeling like they are closing in. Whether you opt for a large, statement-making floor mirror or a gallery wall of smaller decorative pieces, incorporating mirrors is a simple yet transformative way to enhance a compact living area without sacrificing any floor space.

    How to Position Mirrors for Maximum Impact

    Effective mirror placement is an art that requires considering sightlines, light sources, and what you want to reflect. The goal is to amplify the best features of your room while minimizing any sense of confinement.

    • Reflect Natural Light: The most impactful placement is often opposite a window. This captures the maximum amount of daylight and scatters it throughout the room, creating a bright and airy atmosphere that combats the shadows common in small spaces.
    • Create a Focal Point: Use an oversized or ornately framed mirror as a piece of art. Placing a large mirror above a fireplace, console table, or sofa anchors the space and draws the eye, making the room feel more intentional and grand.
    • Double Your View: Position a mirror to reflect something you love, like a favorite piece of art, a beautiful light fixture, or a glimpse into an adjacent room. Be mindful to avoid reflecting cluttered areas, as this will only amplify the sense of disorganization.
    • Lean, Don't Hang: For an effortless and renter-friendly option, lean a large floor mirror against a wall. This adds a casual, modern touch and avoids the need for installation while still providing a significant space-expanding effect. You can find a variety of mirror styles to complement any decor in our showrooms.

    5. Smart Storage Solutions and Organization

    A small living room can quickly feel cluttered and chaotic, but strategic storage is a powerful decorating tip to reclaim your space. The key is to hide clutter and maximize usable areas while maintaining visual openness. Smart storage solutions go beyond simple containers; they integrate seamlessly into your decor, ensuring items are accessible when needed but concealed from view to create a serene, organized environment. This approach transforms potential clutter zones into functional and stylish parts of the room.

    From built-in cabinetry flanking a fireplace to a sleek TV stand with closed doors, the goal is to create a home for everything. A storage bench under a window can hold seasonal blankets, while a chic ottoman with a removable top can hide away toys or magazines. By thoughtfully selecting pieces that conceal items, you reduce visual noise and make the room feel significantly larger and more intentional. To implement these solutions effectively, consider exploring proven small living room storage ideas that maximize space without compromising style.

    How to Implement Smart Storage and Organization

    Choosing the right storage involves more than just buying bins. It's about creating a system that works for your lifestyle and enhances your room's aesthetic.

    • Prioritize Closed Storage: For items you don't use daily, such as extra cables or seasonal decor, closed cabinetry is ideal. This keeps surfaces clear and maintains a clean, uncluttered look.
    • Utilize Vertical Space: Don't forget your walls. Floating shelves or tall, narrow bookcases draw the eye upward and provide valuable storage without taking up floor space.
    • Establish Zones: Group similar items together. Designate one cabinet for media and electronics, a basket for blankets, and a drawer for remotes and chargers. This makes finding things effortless.
    • Choose Storage that Complements Your Decor: Look for storage pieces that match your room's style. Woven baskets add a natural, textured look, while a sleek, modern media unit can become a sophisticated focal point. The right furniture can add both function and beauty.

    6. Choose Scaled and Low-Profile Furniture

    When decorating a small living room, the size and shape of your furniture can either create an open, airy feel or make the space feel cluttered and cramped. Appropriately scaled furniture is proportionate to the room's dimensions, ensuring that each piece fits comfortably without overwhelming the area. Opting for low-profile designs with clean lines and exposed legs is one of the most effective decorating tips for a small living room because it creates a sense of spaciousness and light.

    This approach is about visual weight. A bulky, oversized sectional with a high back and thick, rolled arms can dominate a room and block sightlines. In contrast, a slim-armed sofa or a compact loveseat with visible wooden legs allows light and air to flow underneath, making the floor appear more expansive. This simple trick draws the eye upward and gives the illusion of higher ceilings and more open space, proving that smart furniture selection is as crucial as layout.

    How to Select Scaled Furniture

    Choosing the right pieces requires a keen eye for proportion and a clear understanding of your room's limitations. Focus on furniture that offers comfort and style without consuming unnecessary visual or physical space.

    • Prioritize Visible Legs: Furniture with exposed legs, like a mid-century modern sofa or a floating media console, instantly makes a room feel larger. This design maintains open sightlines to the floor and walls, preventing the room from feeling boxed in.
    • Opt for Slim Silhouettes: Look for sofas and chairs with straight, slim arms rather than bulky rolled or pillow-top arms. Seating with lower backs also helps maintain an unobstructed view across the room, which is especially important if it faces a window.
    • Measure Before You Buy: Take precise measurements of your living room, including ceiling height and doorways. Bring these dimensions with you when you shop to avoid purchasing a piece that's too large. Our team can help you find options that fit your specific measurements.
    • Test for Comfort: Scaled-down furniture should never mean sacrificing comfort. Sit on sofas and chairs in the showroom to ensure they provide adequate support. Quality construction is key to getting both a compact footprint and lasting usability.

    7. Layered Lighting Design

    One of the most transformative decorating tips for a small living room involves moving beyond a single overhead light. A layered lighting design uses multiple sources to create depth, ambiance, and functionality, preventing the harsh shadows and dark corners that can make a space feel cramped. This approach combines three types of light: ambient (overall illumination), task (focused light for activities), and accent (light that highlights specific features).

    By strategically placing different fixtures at various heights, you draw the eye around the room and create a sense of spaciousness. For instance, a central ceiling fixture provides general ambient light, a floor lamp in a corner offers task lighting for reading, and a small accent lamp on a bookshelf highlights your favorite decor. This multi-source strategy not only makes the room feel larger and more inviting but also adds a layer of visual interest and sophistication that a single light source cannot achieve.

    How to Implement a Layered Lighting Scheme

    Creating an effective layered lighting plan requires thinking about how you use your living room throughout the day. The goal is to build a flexible system that can adapt to different moods and activities.

    • Start with Ambient Light: Your base layer should provide soft, general illumination. This can be a stylish flush-mount ceiling light, a chandelier, or recessed lighting. Installing a dimmer switch is a great option, as it allows you to adjust the overall brightness from bright and energetic to soft and relaxing.
    • Add Task Lighting: Identify areas where you perform specific activities. Place a reading lamp next to your favorite armchair or sofa. If you have a desk in your living room, a focused table lamp is essential. This ensures you have adequate light where you need it most without illuminating the entire room.
    • Incorporate Accent Lights: Use accent lighting to create focal points and add character. Wall sconces can frame a piece of art or a mirror, while track lighting can be aimed at architectural details or a gallery wall. Even small, battery-operated picture lights can make a big impact.
    • Vary Fixture Heights: A key to successful layering is placing lights at different levels. Combine a floor lamp (high), with table lamps (medium), and perhaps uplighting behind a plant (low). This distribution guides the eye vertically and horizontally, enhancing the perception of space.

    8. Minimalist Décor and Intentional Accessorizing

    In a small living room, clutter is the enemy of spaciousness. Adopting a minimalist approach to décor is one of the most transformative decorating tips for a small living room, focusing on quality over quantity and ensuring every item has a purpose. This philosophy encourages you to eliminate unnecessary objects and instead curate a collection of accessories that are either functional or deeply meaningful. The result is a clean, uncluttered, and personalized environment.

    This strategy is about making deliberate choices, not about creating a sterile, empty room. By being intentional with your accessories, you allow each piece to stand out and contribute to the overall aesthetic without overwhelming the space. For example, instead of a busy gallery wall, a single, impactful piece of artwork can serve as a stunning focal point. This approach creates visual breathing room, making the entire living area feel more open, serene, and thoughtfully designed.

    How to Curate Your Décor Intentionally

    Editing your accessories requires a mindset shift from filling empty surfaces to celebrating open space. It's about personalizing your room with items that add value, not just volume.

    • Edit with Purpose: Regularly review your décor. Ask yourself if an item brings you joy, serves a function, or holds sentimental value. If it doesn't, consider storing it or letting it go. The "one in, one out" rule can be helpful; when you bring a new item home, an old one must leave.
    • Create Visual Groupings: When arranging accessories on a shelf or coffee table, group them in odd numbers like three or five. This is a classic design principle that creates a more dynamic and visually appealing composition than even-numbered groupings.
    • Embrace Negative Space: Don't feel the need to cover every surface. Leaving empty space around objects allows them to be appreciated individually and prevents a cluttered look. Treat this "negative space" as a key element of your design.
    • Prioritize Quality and Meaning: Choose décor that you genuinely love and that reflects your personality. A handcrafted vase, a book from a favorite author, or a single beautiful plant can have more impact than a dozen generic, mass-produced items. Our accessory collections offer unique pieces that can help you tell your story.

    8-Tip Comparison for Small Living Room Decor

    Strategy Implementation complexity Resource requirements Expected outcomes Ideal use cases Key advantages
    Multi-Functional Furniture Medium — choose and fit combined pieces Moderate — purchase specialty furniture, delivery/assembly More functions per footprint; added hidden storage and guest capacity Studios, multifunction rooms, tight floor plans Saves floor space, consolidates functions, cost-efficient vs separate items
    Vertical Space Utilization Medium — planning and secure wall mounting Low–Moderate — shelving, brackets, bookcases, possible pro install Frees floor area; creates vertical interest and perceived height Small rooms with limited floor area or high walls Maximizes storage, enhances height perception, customizable
    Light and Neutral Color Palettes Low — paint and textile selection Low — paint, fabrics, accessories Brighter, airier feel; visually larger rooms Any small room needing visual expansion or staging Enhances light, timeless backdrop, versatile for decor changes
    Strategic Mirror Placement Low–Medium — selecting size and secure hanging Low — mirrors and mounting hardware Increased brightness and depth; illusion of space Dark rooms, spaces with windows, staging situations Cost-effective, immediate visual impact, portable
    Smart Storage Solutions and Organization Medium — planning, zoning, and setup Moderate — built-ins, storage furniture, bins Clutter reduced; efficient, accessible storage Homes with many items, families, organized lifestyles Hides clutter, maximizes usable space, improves order
    Scaled and Low-Profile Furniture Low — measurement and selection Moderate — purchase of appropriately sized pieces Maintains sightlines; rooms feel less crowded Narrow rooms, low ceilings, minimalist schemes Visual lightness, better traffic flow, easier arrangement
    Layered Lighting Design Medium–High — fixture planning, wiring, placement Moderate–High — multiple fixtures, dimmers, possible electrician Flexible moods, reduced shadows, perceived depth and space Rooms with poor natural light or multiple activities Improves function and ambiance, highlights features, adjustable
    Minimalist Décor and Intentional Accessorizing Low — editing and curation Low — fewer, higher-quality items Calm, uncluttered environment; focal points emphasized Small modern apartments, low-maintenance lifestyles Maximizes visual space, easier upkeep, emphasizes quality

    Bringing It All Together in Your Home

    Decorating a small living room can feel like a complex puzzle, but with the right approach, it becomes a rewarding opportunity to create a space that is both stylish and highly functional. Moving beyond generic advice, we’ve explored a range of practical, actionable decorating tips for a small living room, focusing on the core principles that make a tangible difference: maximizing light, optimizing your layout, and choosing furniture that works smarter, not just harder.

    The key takeaway is that a successful small space design isn't about restriction; it's about intention. Every piece of furniture, every color choice, and every accessory should serve a purpose. By embracing multi-functional furniture like storage ottomans and sleeper sofas, you reclaim valuable floor space. By drawing the eye upward with vertical storage and tall curtains, you create an illusion of height and openness. These aren't just tricks; they are proven design strategies that directly address the common pain points of a compact living area, transforming a room that feels cramped into one that feels curated and comfortable.

    Your Actionable Path Forward

    Think of these tips not as rigid rules but as a flexible framework for experimentation. The true test of any design is how it functions in your daily life. Start by identifying your biggest challenge: is it clutter, a lack of seating, or poor lighting?

    • For Clutter & Storage Issues: Revisit the sections on smart storage solutions and multi-functional furniture. A single, well-chosen media console or a set of floating shelves can completely change your room's organization.
    • For Layout & Flow Problems: Focus on scaled furniture and strategic placement. Use painter's tape to map out potential furniture footprints on your floor before committing. This simple step can prevent costly mistakes.
    • For a Dark or Cramped Feeling: Prioritize layered lighting and the strategic use of mirrors. Combining ambient, task, and accent lighting gives you ultimate control over the mood and perceived size of your space.

    Ultimately, the most effective decorating tips for a small living room are the ones that resonate with your personal style and support your lifestyle. The goal is to build a haven that feels uniquely yours, a space that is not defined by its square footage but by its thoughtfulness and charm. Seeing and feeling furniture in person is often the final, crucial step in this process. It allows you to verify the scale, test the comfort, and truly visualize how a piece will fit into your home, removing the guesswork and building confidence in your decisions.


    Ready to put these ideas into practice? Seeing appropriately scaled furniture in person can make all the difference. Visit any of our North Georgia showrooms to explore a great selection of sofas, accent chairs, and smart storage solutions perfect for smaller spaces, and let our experienced team at Woodstock Furniture & Mattress Outlet help you find the right pieces for your home.