Building a patio can be broken down into four main stages: thoughtful planning, prepping a solid base, installing your surface, and adding the finishing touches. Success really hinges on getting the upfront work right—choosing a good site, excavating and compacting properly, and being meticulous during the install. Get these right, and you'll have an outdoor space that lasts for years.
Planning Your Perfect Patio Before You Dig
A great patio project starts long before you ever pick up a shovel. A good, thoughtful plan is an incredibly valuable tool. It's what helps prevent costly mistakes and ensures the final result is exactly what you envisioned.
Rushing this stage can lead to patios that are too small, in an awkward spot, or have a constant puddle in the middle. Taking the time now to consider every detail can save a lot of frustration and expense later on.
Finding the Ideal Location
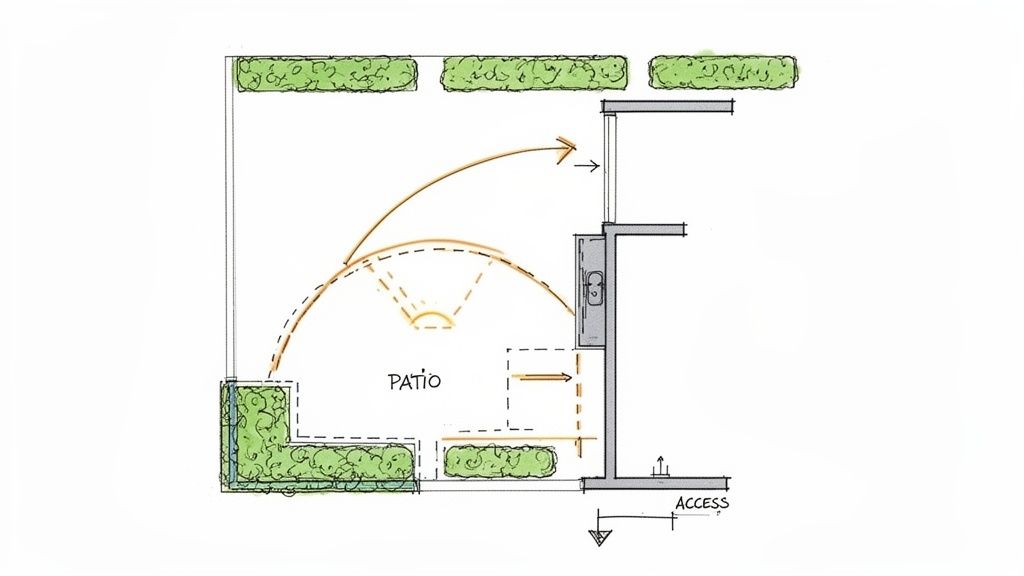
First things first, where is this patio going to live? This is a key initial decision. You need to think about how you actually want to use the space. Is this for sipping coffee in the morning sun? Family dinners in the evening? Or is it your personal sunbathing deck? The spot you pick will dictate how useful it is throughout the day.
When you're scouting your yard, keep these key factors in mind:
- Sun and Shade: Pay attention to how the sun moves across your property. An east-facing patio is pleasant for morning people, but a west-facing one can get very hot in the afternoon. Look for spots where mature trees or the house itself can offer some much-needed shade.
- Privacy: How much do you want to feel like you’re in your own private space? Take a look around. Can your neighbors see everything from their windows? Fences, hedges, or even some large planters can work wonders for creating a more intimate vibe.
- Accessibility: Your patio should feel connected to your home, not like a separate island. A spot right off the kitchen or living room is convenient for carrying out food and drinks. Think about the flow—will you be navigating stairs or tight corners every time you go outside?
Measuring and Marking Your Territory
Okay, you’ve picked your spot. Now it's time to map out the footprint. This is a crucial step for getting an accurate estimate on materials. Grab some stakes and string to create a simple outline of the patio area.
Now, live with it for a few days. Seriously. Drag your current outdoor furniture into the outlined space to get a real feel for the size. Is there enough room to pull out chairs and walk around the table? Is there space for the grill and a conversation area? It’s a lot easier to move some string than it is to realize you needed another two feet of pavers after they're already laid.
One of the most common regrets homeowners have is building their patio too small. A good rule of thumb is to allow for at least a 3-foot-wide pathway around your furniture for people to move around comfortably.
Checking Local Codes and Permits
Before you dig that first shovelful of dirt, you absolutely must check with your local city or homeowners' association (HOA). I can't stress this enough. Skipping this step can lead to fines or, even worse, being forced to tear out all your hard work.
Many areas have specific rules about:
- Permit Requirements: Patios over a certain size or built from certain materials (like poured concrete) often require a building permit.
- Setbacks: There are usually regulations dictating how close your patio can be to your property lines, wells, or septic systems.
- Impervious Surface Limits: Some towns limit how much of your lot can be covered by non-porous surfaces to help manage stormwater runoff.
A quick call or visit to your local building department’s website is all it takes. It's a small task that ensures your project is above board from the get-go.
Creating a Realistic Project Budget
With your plan in hand, you can finally put together a real-world budget. A well-built patio is an investment, and knowing the costs upfront is the best way to avoid sticker shock later. Your budget should cover everything from materials and tool rentals to any help you might hire.
Break your costs down into categories: base materials (gravel, sand), the surface itself (pavers, concrete), edging, and finishing touches like polymeric sand or sealer. And don't forget to budget for renting heavy equipment like a plate compactor—it's non-negotiable for a stable, long-lasting base. It's often recommended to set aside a 10-15% contingency fund to handle any surprises that pop up along the way.
Choosing the Right Patio Material for Your Home
Picking the material for your patio is a huge decision. It does more than just look good—it sets the entire tone for your outdoor space, dictates your maintenance routine for years, and can impact the project's difficulty. This is where the fun really begins and your vision starts to become a reality.
Every option has its own set of real-world pros and cons. Let's break down the differences in cost, toughness, and how much sweat equity is involved. Getting a handle on these details now will help you pick a material that fits your budget, your DIY skills, and how you want to enjoy your backyard down the road.
Interlocking Pavers: The Flexible and Forgiving Choice
There's a good reason why interlocking concrete pavers are so popular. They come in a staggering variety of colors, shapes, and textures, which lets you get creative with patterns like classic herringbone or a simple running bond. That design flexibility makes it a whole lot easier to match your patio to your home's existing style.
But the real advantage of pavers is how easy they are to fix. Life happens. A paver gets a nasty oil stain, a tree root pushes up a section, or one cracks under pressure. With pavers, you can just lift out the problem pieces, fix the base underneath, and pop in new ones. That’s a massive advantage compared to a solid slab, where a single crack can mean a much bigger, more complicated repair.
Homeowners are increasingly looking for durable, personalized outdoor living spaces, and paver patios fit the bill perfectly. They're a huge piece of the global patio installation market, which was around $15 billion in 2025. In the U.S. alone, deck and patio construction pulled in $1.3 billion in revenue in 2025, with pavers leading the way for residential projects because of their looks and toughness.
Poured Concrete: The Durable, Blank-Canvas Option
For a solid, no-fuss patio, poured concrete is a reliable choice. When it's done right, you get a seamless, ultra-durable surface that will last for decades with very little upkeep. It’s a straightforward, functional workhorse that can handle heavy patio furniture and tons of foot traffic without batting an eye.
Don't mistake "simple" for "boring," though. Modern techniques can turn a basic concrete slab into something special. Stamped concrete can be made to look just like stone, brick, or even wood planks. You can also add stains and dyes to give the surface rich, permanent color. If you're on the fence, it's worth exploring the benefits of a paver patio over concrete to see which better fits your long-term goals.
The biggest challenge with concrete? Repairs. Cracks are almost inevitable, especially in places with dramatic temperature swings. You can patch them, but the repair will likely always be visible and rarely matches the original color and texture perfectly.
Natural Flagstone: For a Truly Organic Look
If you're dreaming of a patio that looks like it grew right out of the landscape, flagstone is your answer. These are flat slabs of quarried stone—like slate, bluestone, or limestone—and every single piece is unique in its shape, color, and texture. This creates a stunning, one-of-a-kind surface with an organic feel that blends right into a garden setting.
You have two main ways to install flagstone:
- Dry-laid: This method involves setting the stones on a base of gravel and sand, much like pavers. You then fill the gaps with more sand, fine gravel, or even a groundcover plant.
- Mortared: For a more solid, permanent patio, the flagstones are set onto a concrete slab and joined together with mortar.
Keep in mind, laying flagstone is like putting together a giant, heavy puzzle. Because of the irregular shapes, it takes a lot more time and patience to fit the pieces together in a way that looks natural and feels stable. This can drive up labor costs if you hire a pro or demand a lot more of your time if you DIY.
Flagstone is also usually pricier than pavers or a basic concrete slab. But for anyone who values that natural, high-end look, the character and timeless durability of real stone is often well worth the extra investment.
Patio Material Comparison Guide
Choosing the right material is a balancing act between cost, effort, and aesthetics. This table breaks down the key differences to help you decide which path is right for your backyard project.
| Material | Average Cost (Per Sq. Ft.) | DIY Difficulty | Durability & Maintenance | Best For |
|---|---|---|---|---|
| Interlocking Pavers | $8 – $25 | Moderate | Excellent; easy to repair individual stones. Needs occasional sweeping and weeding. | Homeowners wanting creative design flexibility and simple repairs. |
| Poured Concrete | $6 – $15 | High | Very durable but difficult to repair cracks seamlessly. Needs sealing every few years. | Budget-conscious projects and those looking for a modern, seamless surface. |
| Natural Flagstone | $15 – $35+ | High | Extremely durable and long-lasting. Mortared joints may need occasional repair. | Creating a natural, rustic, or high-end look that blends with the landscape. |
Ultimately, whether you choose the design freedom of pavers, the solid simplicity of concrete, or the natural beauty of flagstone, the best material is the one that you'll be happy to live with for many seasons to come.
Building a Solid Foundation for Your Patio
Let’s be honest, this is the part of the project where the real work happens. A beautiful, long-lasting patio is only as strong as what lies beneath it. The base is the unseen hero of your entire project, the critical element that prevents sinking, shifting, and cracking down the road.
This is absolutely the most labor-intensive part of building a patio, and cutting corners here is a mistake that will show up later. Getting this foundation right involves digging, layering materials, and compacting them into a stable, interlocking mass. Think of it like the foundation of your house; without a solid one, everything built on top is at risk.
How Deep Should You Dig Your Patio Base?
First things first, you have to excavate. The depth you need to dig depends entirely on your local climate and the patio material you've chosen. The goal is simple: get rid of all the soft topsoil and organic stuff until you hit the firm subsoil underneath.
Here are some general guidelines to get you started:
- For Paver Patios: A typical paver installation needs a hole 6 to 8 inches deep. This accounts for 4-6 inches of compacted gravel, a 1-inch bed of sand, and the height of the paver itself.
- For Colder Climates: If you live somewhere with heavy freeze-thaw cycles, you’ll want to go deeper. To combat frost heave, you might need to excavate up to 10-12 inches to make room for a thicker, more stable base.
- For Natural Stone: Since flagstones can be irregularly thick, you may need a slightly deeper base just to accommodate their size and still get a perfectly level final surface.
Once you’ve marked out your patio’s perimeter, start digging. Try to get the bottom of the excavated area as level as you can, but make sure to build in a slight, consistent slope for drainage. More on that in a minute.
The All-Important Compacted Gravel Sub-Base
With the area dug out, it's time to build the sub-base, which is the real load-bearing layer of your foundation. You’ll want to use crushed angular gravel for this, often called crusher run or ¾” minus gravel. The key is that the stones are angular—their sharp edges lock together tightly when compacted, creating an incredibly stable platform.
Here's a helpful tip: add the gravel in layers, or "lifts." It's far more effective to add 2-3 inches of gravel, compact it thoroughly, and then add the next layer. If you try to dump in a thick 6-inch layer and compact it all at once, you’ll only compact the top, leaving the bottom loose and prone to settling.
The single most important tool for this stage is a plate compactor. You can rent one from any home improvement store. While it might be tempting to just tamp the gravel by hand, only a machine can provide the necessary force to properly interlock the aggregate and remove air pockets. This is what keeps your patio from settling later.
Add Geotextile Fabric for Extra Stability
For an even more robust foundation, it's a good practice to lay down a layer of geotextile fabric at the bottom of your excavated area before adding any gravel. This permeable fabric acts as a barrier between your gravel base and the soil below.
This simple step does two things. First, it stops the gravel from mixing with the subsoil over time, which would weaken your base. Second, it helps stop weeds from growing up from below, saving you a headache later. It's a cheap addition that adds serious durability to your project.
Creating the Perfect Slope for Drainage
Proper water management is non-negotiable. A patio that pools water is a nightmare—it can damage the surface, create a slipping hazard, and even put pressure on your home's foundation. The industry standard is to create a slope that drops 1/4 inch for every one foot of distance, angled away from your house.
The easiest way to set this slope is with stakes and string lines. Place stakes at opposite ends of the patio and run a line between them. Use a line level to get the string perfectly horizontal, then lower the string on the "downhill" side by the required amount. For example, on a 12-foot-wide patio, you would lower the string by 3 inches (12 feet x 1/4 inch). This string becomes your perfect guide for grading both the gravel and sand layers.
The Final Sand Setting Bed
After your gravel sub-base is fully compacted and graded to the right slope, the very last layer before the pavers go down is the setting bed. This is just a 1-inch thick layer of coarse sand. Its job isn't structural; it just provides a smooth, easily workable surface to set the pavers into and helps accommodate any minor differences in their thickness.
To get this layer perfectly flat, use a technique called "screeding." Lay two pipes or straight rails on top of your compacted base, making sure they’re set to the right height and slope. Pour sand between them, then pull a straight 2×4 across the tops of the rails to screed off the excess. You'll be left with a perfectly smooth bed. Carefully remove the rails and fill in the gaps with a little more sand.
If you opt for poured concrete, the foundation process is pretty similar. Building a concrete patio often starts with excavating 6-8 inches and installing a 4-inch compacted gravel base. Forms are set, and adding wire mesh reinforcement can cut the risk of cracking by 50%. That same slight slope of 1/4 inch per foot is also crucial to avoid the puddles that can plague flat concrete pours. You can discover more insights about this process on datainsightsmarket.com.
Installing Your Patio Surface Like a Pro
Now for the fun part. With your foundation perfectly prepped and ready to go, you've hit the most rewarding stage of the whole project—installing the patio surface. This is where your vision finally starts looking like a real patio, whether you're laying beautiful pavers one by one or smoothing out a fresh slab of concrete.
Taking your time here is what separates an okay job from a professional one. The techniques are different depending on your material, but the core idea is the same: work methodically, check your levels constantly, and don't rush the details. Every stone you set is a tangible reward for all that digging and hauling.
Laying Pavers With Precision
Think of laying pavers like putting together a heavy, interlocking puzzle. It’s a systematic process where every single piece has to be perfectly seated to get that clean, uniform look.
First up is the sand bed. Once you've spread your sand, you need to create a perfectly flat surface for the pavers to sit on. The technique for this is called screeding. You'll lay two parallel pipes across your compacted gravel base, making sure they're set to the exact slope you need for drainage. Then, you just pull a straight 2×4 across the tops of those pipes, scraping away any excess sand. What's left is a flawless, smooth bed.
With that done, you're ready to start laying pavers.
- Pick Your Pattern: For beginners, a classic running bond is a good starting point. If you're feeling a bit more ambitious, a herringbone pattern not only looks fantastic but also provides a stronger structural interlock.
- Start From a Fixed Edge: Always begin laying your pavers against a hard, straight edge, like the foundation of your house or the side of your driveway. Work your way out from there.
- Place, Don't Slide: This is a big one. Gently place each paver straight down into the sand. If you slide them into place, you'll mess up the smooth bed you just worked so hard to screed.
- Tap and Check: Give each paver a gentle tap with a rubber mallet to set it firmly into the sand. Keep a level handy and check your work constantly—both along individual pavers and across larger sections.
This diagram shows the crucial foundation work that has to happen before you even think about laying that first paver.
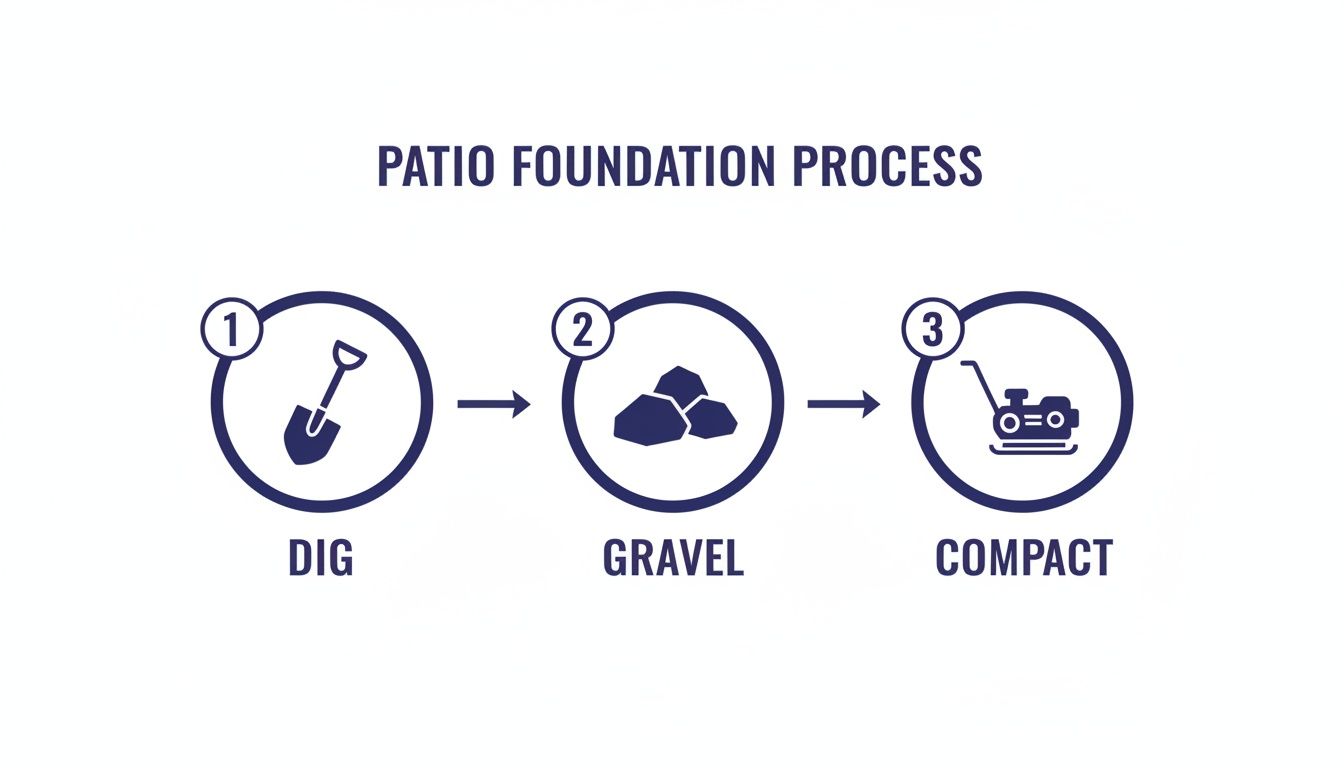
Getting these base layers right is what ensures the pavers you're laying now will stay put for years to come, without sinking or shifting.
Installing Edge Restraints to Lock It All In
Edge restraints are the unsung heroes of a long-lasting paver patio. They create a rigid border that stops the outside pavers from creeping outward under the pressure of foot traffic and freeze-thaw cycles. Seriously, don't skip this step.
These plastic or metal strips get installed around the entire perimeter of your patio. You'll want to drive long landscape spikes through them and down into the compacted gravel base to secure them. Once the restraints are in, your whole paver system is locked together, creating a strong, unified surface that won't go anywhere.
Pouring and Finishing a Concrete Patio
Decided on a poured concrete patio instead? The process is totally different but requires just as much attention to detail. Once your forms and gravel base are in place, it's time to add some muscle. Laying a grid of wire mesh or rebar inside the form is absolutely critical. It gives the slab massive tensile strength and is your best defense against major cracking down the road.
When it's time to pour, you need to work fast, so make sure you have a few extra sets of hands ready to help. Get the concrete spread evenly throughout the forms as quickly as you can.
The real craft comes in the finishing stages:
- Screeding: Right after the pour, use a long, straight 2×4 to level the concrete. Rest the board on top of your forms and pull it toward you with a back-and-forth sawing motion.
- Floating: Next, use a bull float (or a smaller magnesium float for tight spots) to smooth the surface. This pushes the heavier aggregate down and brings the finer cement "cream" to the top, giving you a smoother canvas to work with.
- Broom Finish: Wait until the watery sheen disappears from the surface, then lightly drag a clean push broom across the slab in one direction. This creates a subtle texture that's essential for a non-slip finish.
A quick pro-tip: Proper curing is what gives concrete its long-term strength. After the patio has set up, you need to keep the surface damp for several days. Lightly misting it with a hose or covering it with plastic sheeting slows down the hydration process, resulting in a much tougher, more durable slab.
Applying the Finishing Touches to Your New Patio
Alright, the heavy lifting is done. Now it’s time for the final details that take your project from a construction site to a true outdoor living space. These last few steps are all about locking in your hard work, protecting your investment, and setting the stage for years of backyard enjoyment. This is where your vision really comes to life.
Think of this part as adding the professional polish. From securing the paver joints to sealing the surface, these actions ensure your brand-new patio is durable, low-maintenance, and ready for furniture.
Locking Pavers with Polymeric Sand
If you've built a paver patio, this step is an absolute must. Polymeric sand isn't just regular sand; it's a fine sand mixed with a special polymer that acts like a strong binding agent when you add water. It hardens up to create a firm, flexible joint that locks your pavers together, stops weeds from poking through, and prevents ants from making a home between the cracks.
Getting the application right is key:
- Start Bone-Dry: First and foremost, the pavers have to be completely dry. Any moisture on the surface can activate the sand too early, leaving a permanent, hazy film on your new pavers.
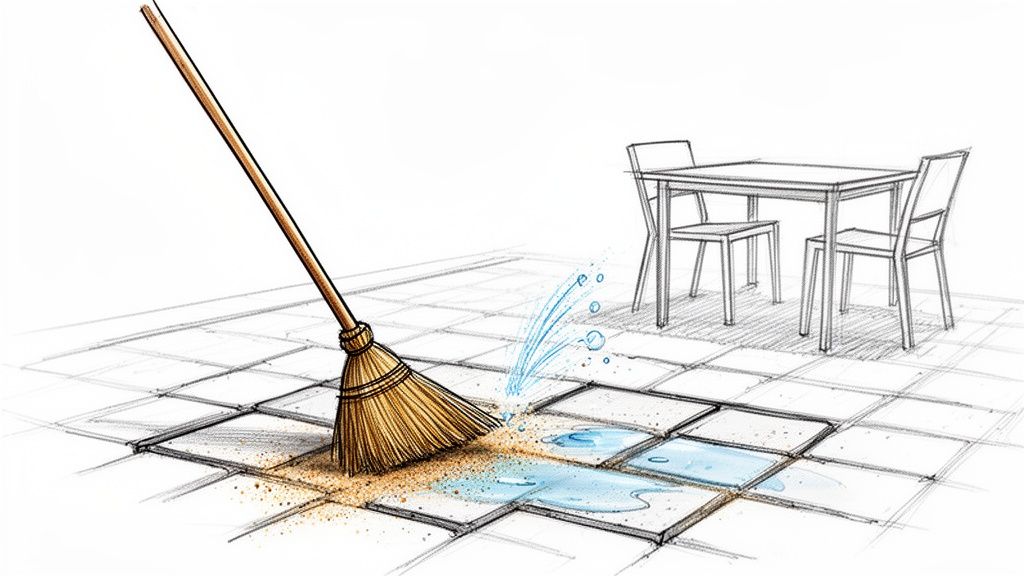
- Sweep It In: Pour the sand out and use a push broom to work it into every single joint. Make sure you sweep from a few different angles to get those joints packed tight all the way to the top.
- Compact & Refill: You'll want to run a plate compactor over the pavers one last time. This helps the sand settle deep into the joints. You'll likely see some gaps appear, so just sweep more sand in to top them off.
- Blow It Clean: Grab a leaf blower on its lowest setting and carefully clear off every last grain of sand from the paver surfaces. Be obsessive about this part—any sand left on top will stain when you add water.
- Gentle Shower: Finally, set your hose nozzle to a light "shower" setting. Gently mist the entire patio. You want the water to soak in and activate the polymers, not blast the sand out of the joints.
Polymeric sand is a strong defense against the most common paver patio annoyances. Taking the time to apply it correctly will save you hours of weeding and maintenance down the road, keeping your patio looking clean and stable.
Protecting Your Investment with a Sealer
Whether you went with pavers, concrete, or flagstone, applying a quality sealer is just plain smart. A good sealer protects the surface from stains (think spilled drinks or greasy food), deepens the color, and makes cleaning up a breeze. It also acts as a shield against moisture and UV rays, which are the main culprits behind fading and wear over time.
You'll need to be patient, though. Wait at least 30 to 60 days after installation before you seal anything. This allows any efflorescence (that chalky white stuff that can appear) to work its way out. As always, read and follow the manufacturer’s instructions to the letter, as every product is a little different.
Furnishing Your New Outdoor Room
Now for the fun part—turning that slab of stone or concrete into a true extension of your home. Choosing the right outdoor furniture is what makes the space both comfortable and truly usable. Start by thinking about how you plan to use the area. Is this your new spot for morning coffee, big family dinners, or just lounging with a good book?
You’ll want to look for durable materials like aluminum, teak, or all-weather wicker that can handle the Georgia climate without falling apart. When you visit us at the store, you can actually sit in the chairs, feel the fabrics, and see the quality for yourself. Our team can help you map out a layout that makes the most of your new space, whether you’re dreaming of a cozy sectional around a fire pit or a big dining table that’s ready for a party.
Common Questions About Building a Patio
Even the most detailed guide can't cover every single question that pops up during a big project like building a patio. Let's tackle some of the most common things homeowners ask when they're getting ready to transform their backyard. Think of this as a quick-fire round to give you confidence as you get started.
How Long Does It Take to Build a Patio Myself?
The timeline for a DIY patio really boils down to three things: the size of your patio, the material you’re using, and your own experience level.
For a pretty standard 200-square-foot paver patio, you should block off at least two full weekends of hard work. Don't underestimate the prep work; the first weekend is almost always eaten up by excavation and building the base. That's the most back-breaking part of the whole job.
Your second weekend will feel more rewarding as you get to the fun stuff: laying the pavers, making your cuts, locking it all in with edge restraints, and sweeping in the jointing sand. If you're new to this kind of project, I'd strongly suggest penciling in a third weekend. It's a smart buffer for any unexpected hiccups or a bout of bad weather.
What Is the Best Way to Ensure Proper Drainage?
Getting drainage right is absolutely non-negotiable for a patio that's built to last. It’s the single biggest factor in preventing water from pooling on top or, even worse, flowing back toward your house's foundation.
The secret is to build a very slight, consistent slope into the patio, directing water away from your home. The industry gold standard is a 1/4-inch drop for every one foot of distance. This grade is so subtle you'll never notice it when you're walking across the patio, but it's a game-changer for moving water effectively. You'll establish this slope when you're prepping the base, using string lines and a level to keep it consistent from one end to the other.
A properly graded patio is the number one defense against water issues. Taking the time to get the slope right during the foundation phase will prevent major headaches for years to come.
Can I Build a Patio on Uneven Ground?
Yes, you can absolutely build a stunning patio on a sloped or uneven yard, but it’s going to require more site prep. You can't just lay pavers down and follow the existing contours of a hill.
The right way to do it is to create a perfectly level and stable area by digging into the high side of the slope and using that soil to build up the low side. This technique is often called "cut and fill." For anything more than a gentle grade, this will almost always mean you need to build a small retaining wall on the downhill side. This wall is critical—it’s what holds all that base material in place and prevents your patio from sliding. It adds a bit of complexity, but the end result can be a gorgeous, functional terraced space.
What Are the Most Common DIY Patio Mistakes?
After seeing countless projects over the years, a few rookie mistakes pop up time and time again. By far, the most critical error is inadequate base preparation. Skimping on the depth of your gravel base or failing to compact it thoroughly is a recipe for disaster. It will lead to a patio that sinks and becomes a lumpy, uneven mess.
Another common slip-up is forgetting to build in that crucial slope for drainage, which leads to puddles and potential water damage. Lastly, many first-timers forget to install proper edge restraints around their paver patio. Without them, the pavers have nothing to push against, and they'll slowly spread apart, creating ugly gaps. If you focus your energy on getting these foundational steps right, you'll end up with a patio you can be proud of for decades.
Now that your patio is built, it's time for the best part: turning it into an inviting outdoor room for you and your family. At Woodstock Furniture & Mattress Outlet, our team can help you find outdoor furniture to match your style and make the most of your new space. Visit us to see our full selection of outdoor furniture in person.