It’s a classic story we hear from shoppers all the time. You find a piece of furniture you absolutely love, get it home, and… it just doesn't work. Maybe the sofa swallows the entire room, or the flow feels all wrong. It's a frustrating, and sometimes costly, mistake.
So, what's the key to getting it right the first time? It’s not about having a designer's eye. It’s about having a solid plan before you even think about shopping.
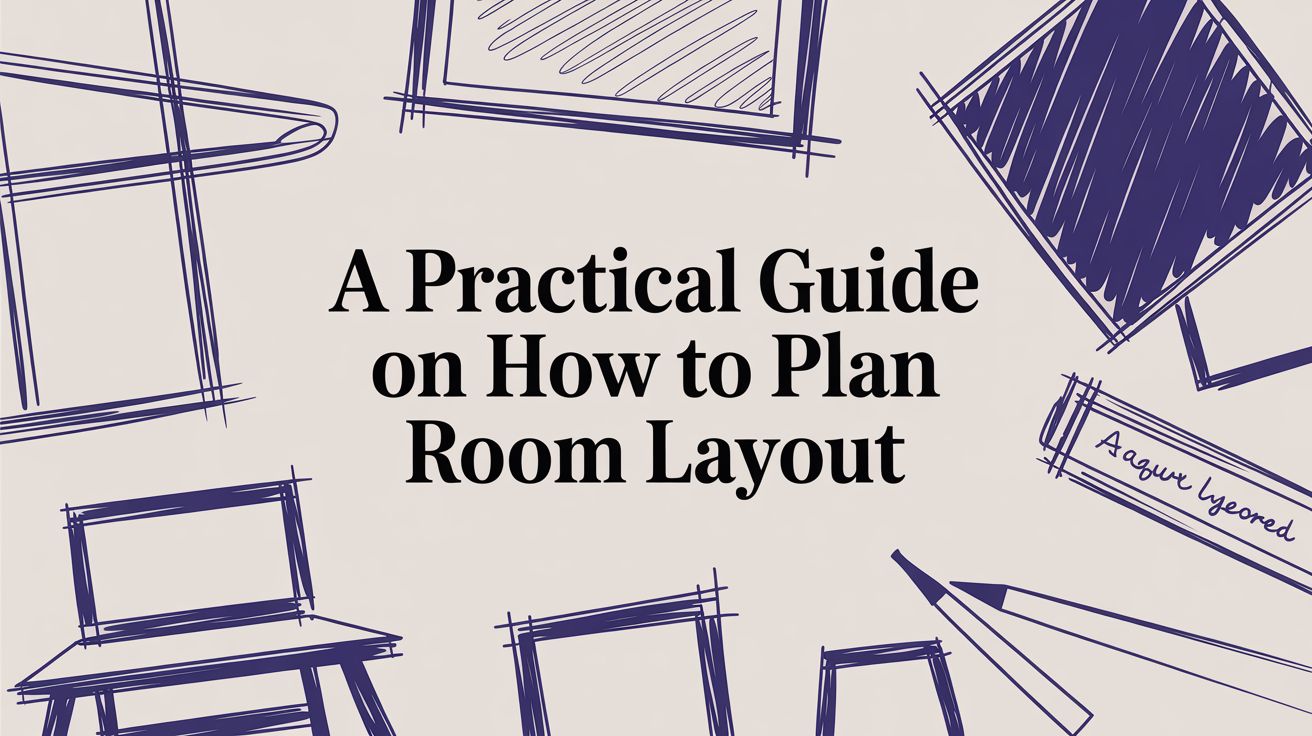
Why a Great Room Layout Starts with a Plan

Jumping straight into rearranging furniture without a blueprint is a recipe for a headache. A truly great room layout isn't just about looking good in a photo; it has to feel right and work for the way you actually live. The real value comes when you start thinking about function and flow long before you fall in love with a particular sofa or chair.
This little bit of prep work up front prevents those all-too-common layout blunders, like realizing your new sectional blocks the only convenient outlet, or creating dead zones you’re just not sure what to do with. It’s the difference between a room that serves you and a room you’re constantly fighting.
Start with Accurate Measurements
Before you do anything else, grab a tape measure. This is the single most important part of the process, and it goes way beyond just getting the length and width of the room. You'll want to sketch out a simple floor plan and get down to the nitty-gritty details.
- Doorways and Windows: Note their location and size. Just as important, measure how far they are from the corners of the room.
- Architectural Features: Got a fireplace, some built-in shelves, or an awkward support column? Put it on the map. These are your non-negotiables.
- Outlets and Switches: Mark every single electrical outlet, light switch, and data port. This is a game-changer for figuring out where lamps, TVs, and other electronics can realistically live.
- Ceiling Height: Don't forget to look up! Knowing your vertical space is crucial, especially if you're considering tall pieces like a bunk bed or an armoire.
Taking a few extra minutes for detailed measurements is the best insurance against buying furniture that simply won’t fit. It takes all the guesswork out of the equation and saves you from the hassle of returns.
Assess Your Lifestyle and Room Purpose
With your room's blueprint in hand, it’s time for an honest chat with yourself and your family. How is this space really going to be used every day? A room’s function should always, always dictate its form.
Ask yourself a few key questions to get to the heart of it:
- Who is this room for? Is it a family-wide free-for-all, a quiet retreat for adults, or a kids' play zone?
- What will you be doing in here? Binge-watching shows, hosting game nights, working from home, or curling up with a good book? Get specific.
- How many people need a seat at any given time? This will tell you whether you need a large sectional or if a more flexible setup with a sofa and accent chairs makes more sense.
A room has to feel right, not just look right. For some inspiration on blending function with a great look, you can explore some modern living design ideas to get the wheels turning.
Map Out Natural Traffic Flow
Last but not least, think about the invisible pathways people will use to walk through the room. We call this traffic flow. A good layout keeps these main walkways clear, making the room feel open and easy to move around in. As a rule of thumb, the primary path into and through a room should be about 30 to 36 inches wide.
Believe it or not, this is a principle borrowed from good retail design. Think about well-designed stores; they often use a clear layout to guide you on a path past everything. As noted in industry publications like Furniture World Magazine, this approach became popular in the 1990s because it improves the customer experience.
You can do the same at home. Simply sketch a line connecting the doorways and then looping around your main seating area. This ensures nobody has to do that awkward shuffle past a coffee table just to get to the other side of the room.
Defining Zones and Anchoring Your Space

Alright, you've got your measurements and you know what you want to do in the room. Now for the fun part: turning that empty box into a space that feels intentional, organized, and genuinely livable. This is where we stop looking at the room as a whole and start breaking it down into functional pieces.
It all starts with finding an anchor for your space and then carving out dedicated zones for all the activities on your list.
Find Your Room's Focal Point
Every well-designed room has a natural star of the show—a focal point that your eye is immediately drawn to. The good news? You probably don't have to invent one. Your room likely has an anchor already.
This focal point gives the room a sense of order and tells you where to start arranging furniture. In many homes, it’s a built-in architectural feature that commands attention.
Common examples include:
- A cozy fireplace.
- A large picture window with a great view.
- A set of handsome built-in bookshelves.
What if your room is more of a blank slate? No problem. You can easily create a focal point. A large piece of statement art, a stylish media console, or even a feature wall with bold paint or wallpaper works just as well.
Once you’ve found your star player, the goal is to arrange your main furniture to complement it, not compete with it.
Key Takeaway: Placing the bed on the wall furthest from the door is a classic design principle. It creates a sense of privacy and positions the bed as the room's clear focal point upon entry, making the space feel more intuitive and balanced.
This might mean pointing your sofa toward the fireplace to create a warm conversation area. Or, maybe you’ll position a pair of armchairs to soak up the natural light from that big window. This single decision anchors your entire layout.
Create Distinct Zones for Activities
For larger rooms or today’s popular open-concept layouts, just arranging furniture around one focal point isn't always enough. These spaces often have to wear many hats, and without a clear plan, they can end up feeling cluttered and confusing.
The solution is something we in the business call zoning.
Think of it as creating "rooms within a room." You might have a zone for watching TV, a separate one for conversation, and another small corner set up as a reading nook or a home-office spot. This is the secret to transforming a cavernous great room into a cozy, functional, multi-purpose living area.
Here are a few useful tools for defining zones:
- Area Rugs: An area rug is one of the most effective tools here. Placing a rug under your main seating group instantly creates a visual container for that conversation area, separating it from the rest of the room.
- Furniture Groupings: This one is pretty intuitive. Cluster furniture together based on its job. A sofa, coffee table, and two chairs scream "conversation zone." A desk, a good chair, and a small bookshelf clearly define a workspace.
- Lighting: You can also use different types of lighting to signal a change in function. A pendant light hanging over a dining table, a floor lamp tucked beside a reading chair, or track lighting aimed at a workspace all help to subtly mark out each area.
Using these simple techniques, you can craft a layout that supports all the different ways you actually use the room. It ensures every square foot has a purpose and makes the entire space feel harmonious and pulled-together.
Bringing It All Together: Arranging Furniture for Scale, Balance & Flow
Okay, you've got your zones mapped out. Now for the fun part—actually placing the furniture. This is where your room really starts to take shape.
Think of it less like a chore and more like an art form. Getting it right comes down to three key ideas we've seen work time and time again: scale, balance, and flow. Once you get a feel for these, you'll be arranging pieces with confidence.
Getting the Scale Right
Have you ever walked into a room and it just felt… off? Maybe a huge, overstuffed sofa was crammed into a tiny den, or a massive living room felt empty with furniture that was too small. That's a problem with scale.
Scale is all about making sure your furniture is the right size for the room and for the other pieces around it. The goal is to find that "just right" feeling.
- For a small room: Look for apartment-sized sofas and chairs. Pieces with visible legs are a great trick—they let you see the floor underneath, which creates an illusion of more space.
- For a large room: Don't be shy! Go for those substantial pieces. A big sectional, a long media console, or tall bookcases can anchor the room and keep it from feeling vacant.
And remember, your furniture needs to be in scale with itself. A massive coffee table next to a delicate loveseat will always look awkward. It's all about creating a cohesive family of furniture.
Creating Visual Balance
Balance is what makes a room feel calm and harmonious instead of lopsided. It’s all about how you distribute the "visual weight" of your furniture. You can approach this in a couple of ways.
Symmetrical Balance: This is the classic, more formal approach. Think of a mirror image. You might have a sofa centered on a fireplace, with two identical armchairs and matching end tables on either side. It’s orderly, predictable, and very calming.
Asymmetrical Balance: This approach is helpful for creating a more modern, lived-in feel. Instead of using matching pieces, you use different items that have a similar visual weight. For example, a large sofa on one wall can be balanced by two smaller chairs and a floor lamp on the opposite side. The pieces are different, but the overall composition feels complete.
The key takeaway here is that balance isn’t about everything matching perfectly. Asymmetrical layouts often have more personality and feel more natural and inviting.
Perfecting the Traffic Flow
We talked about pathways earlier, but it’s so important it deserves another look now that we're placing furniture. You have to be able to move through a room without weaving around corners or tripping over a coffee table.
Here are a few measurements to keep in mind:
- Main Walkways: You need at least 30 to 36 inches for any major path, like from the doorway to the sofa.
- Sofa to Coffee Table: The sweet spot is 14 to 18 inches. This is close enough to set down a glass but leaves enough legroom.
- Conversation Areas: For people to chat comfortably without shouting, keep seating no more than 8 feet apart.
Retail store designers have mastered this. In fact, behavioral data shows that creating clear paths and zones can make shoppers browse up to 35% longer. Your home isn't a store, but the principle is the same: a logical layout with clear pathways simply makes a space more enjoyable to be in.
When it comes to private spaces like bedrooms, getting the flow right is crucial for a relaxing atmosphere. For more specific tips, expert guides on how to arrange bedroom furniture for a perfect layout can be a huge help. Following these simple rules ensures your room feels both spacious and intuitive from the moment you walk in.
Visualize Your Layout Before You Lift a Finger
Before you start hauling heavy furniture around or, even worse, commit to a big purchase, it's absolutely crucial to test-drive your layout. Trust us, visualizing your plan first is a non-negotiable step that will save you time, effort, and a whole lot of back pain.
Luckily, you’ve got a bunch of great methods at your disposal, from high-tech apps to classic, hands-on techniques. This is the stage where your layout idea goes from a "what if" to a concrete possibility, letting you catch problems before they become frustrating realities.
Embracing Digital Room Planners
One of the most powerful tools available today is a digital room planner. Here at Woodstock Furniture & Mattress Outlet, we even offer our own complimentary Room Planner that lets you build a 2D or 3D model of your space right from your computer or tablet.
These apps are total game-changers for a few key reasons:
- Drag-and-Drop Simplicity: You can easily add furniture, play with different arrangements, and see how pieces work together without breaking a sweat.
- Confirming the Fit: Not sure if that gorgeous sectional will actually make it through your narrow hallway? A digital planner lets you check its measurements against your home's real-world dimensions.
- Risk-Free Experimentation: Go ahead and try out that bold idea or unconventional setup. You can test as many layouts as you want with zero consequences until you land on the perfect one.
Digital planners have changed how people furnish their homes. Retailers who use these tools often see that customers are more confident because they can visualize the exact size, color, and feel of a piece in their own space before they buy. That kind of confidence is valuable when you're planning your room.
Going Old-School With Hands-On Methods
If you’re more of a tactile person who prefers to see things in the actual room, don't worry. The tried-and-true methods are just as effective for visualizing your layout, and they only require a few simple household items.
This visual guide shows the core principles of scale, balance, and flow that you'll be applying, no matter which method you choose.

These traditional techniques help bring those principles to life right inside your home.
Graph Paper Floor Plans: Sometimes, a simple sheet of graph paper and a pencil are all you need. Use a scale (like one square equals one foot) to draw your room’s outline, making sure to include doors and windows. Then, cut out little paper shapes to represent your furniture and slide them around to test different arrangements.
Painter's Tape Outlines: This is a fantastic way to truly understand a piece of furniture's footprint. Use painter's tape to mark the dimensions of that new sofa or dining table directly on your floor. You’ll immediately see how much space it will occupy and how it affects your walkways.
Cardboard Box Mockups: For bulkier items like armchairs or cabinets, grab some empty cardboard boxes. You can stack them to simulate the height and depth of a potential piece. This gives you a real-world feel for how much visual space an item will take up, which a simple tape outline can't always convey.
Whether you use a cutting-edge app or a roll of tape, the goal is the same: to move forward with a layout plan you feel completely confident in. This step removes the anxiety and guesswork from the process.
Common Room Layout Mistakes and How to Avoid Them
We’ve all been there. You get all your furniture into a room, you arrange it, and then you stand back… and something just feels off. The space feels awkward, sterile, or just plain uncomfortable.
The good news is that most layout problems come from a few common mistakes. The even better news? Once you know what to look for, they are incredibly easy to fix. From our experience, knowing what not to do is just as important as having a plan. Let's walk through the most frequent blunders we see and how to get your room back on track.
The Waiting Room Effect
It’s almost a gut instinct to shove all your furniture flat against the walls. We think it will make the room feel bigger, but it usually does the exact opposite. This creates a cold, disconnected space that feels more like a doctor’s waiting room than a cozy home.
When your sofa and chairs are on opposite ends of the room, it kills any chance for real conversation. You end up with a big, empty "no man's land" in the middle that nobody wants to use.
The fix is simple: "float" your furniture. Pull your sofa and chairs away from the walls and group them together to create more intimate conversation areas. This one move instantly makes a space feel warmer and more inviting, encouraging people to actually gather and connect.
The Postage Stamp Rug
Think of an area rug as the foundation for a room's zone. But if that foundation is too small, the whole structure feels unstable. A tiny rug under a coffee table, with all the furniture sitting off of it, looks like a little island adrift at sea. It actually makes the room feel smaller and disjointed.
This is a mistake we see all the time. The rug feels like an afterthought rather than a core part of the layout.
Here’s the solution: choose a rug large enough for at least the front legs of your main furniture pieces (like your sofa and accent chairs) to rest on it. Ideally, all the furniture in that "zone" should sit comfortably on the rug. This visually ties everything together, creating a unified and cohesive look that anchors the space.
A properly sized rug acts like a frame for your furniture grouping. It connects everything and establishes a clear, grounded zone, which is especially important in open-concept spaces where you need to create "rooms within a room."
Overlooking the Lighting Plan
You can have the most perfectly arranged furniture, but if the lighting is bad, the whole room falls flat. Relying on a single, harsh overhead light—what designers sometimes call the "boob light"—casts unflattering shadows and adds zero warmth or dimension.
A great layout is a functional one, and bad lighting makes a room non-functional. That reading nook you planned is just a dark corner, and your conversation area has no ambiance.
Always think in layers of light. To create a balanced and inviting atmosphere, every room needs at least three sources of light working together:
- Ambient Lighting: This is your general, overall illumination, like a chandelier, flush mount, or recessed lighting.
- Task Lighting: This is focused light for specific activities. Think of a floor lamp by a reading chair or under-cabinet lighting in a home office.
- Accent Lighting: This is the fun stuff that adds drama and highlights your favorite things, like a spotlight on artwork or an uplight behind a plant.
The All-Matching Furniture Set
It's tempting. Walking into a showroom and buying a complete, matching living room set can feel like an easy solution. But the result is often a room that lacks personality and feels a bit… one-dimensional. When every piece has the same finish, fabric, and style, the space can feel like a page torn from a catalog.
A room that looks like it was collected over time always tells a more interesting story. It reflects your taste.
So, mix it up! Don't be afraid to pair a sleek, modern sofa with a vintage-inspired armchair. Put a rustic wood coffee table next to a metal end table. The trick to making it all work is to find a common thread to tie it together, like a consistent color palette, a similar leg style, or a similar scale.
Common Room Layout Mistakes and Their Solutions
Applying these principles looks a little different from room to room. To help you sidestep the most common errors we see for specific spaces, we've put together this quick-reference table. Think of it as your cheat sheet for a better layout.
| Common Mistake | Why It's a Problem | How to Fix It |
|---|---|---|
| Living Room: The TV is the only focal point. | This creates a "movie theater" layout that feels unsociable and ignores other ways you use the room. | Create a primary conversation zone with seating facing each other. Put the TV on a secondary wall so it doesn't dominate the space. |
| Bedroom: The bed is on the first wall you see when you walk in. | This can make the room feel smaller and less private. It removes the "wow" factor of seeing the bed as the star. | Place the bed on the wall farthest from the door. This creates a more welcoming entry and establishes a "commanding position." |
| Home Office: The desk faces a blank wall. | Staring at a wall can feel confining and uninspiring. It also creates a terrible background for all those video calls. | Position your desk so you can see the door. If possible, arrange it so a styled bookshelf or a clean wall is behind you for video calls. |
Hopefully, this table gives you a head start on troubleshooting your own layout. Fixing these common mistakes can completely change the feel of your home, making it more functional, comfortable, and stylish.
Your Room Layout Questions Answered
Even when you think you have a solid plan, a few lingering questions always seem to pop up once you start moving furniture. It's totally normal. From dealing with weird room shapes to just figuring out where to even begin, getting these last few details right can make or break your layout.
We get these kinds of questions all the time in our showrooms. To help you finish your project with confidence, here are the answers to some of the most common ones we hear.
How Much Space Should I Leave Around Furniture?
This is probably the single most important question. Getting the spacing right is the secret to a room that feels comfortable and functional, not like an obstacle course. While every room is a little different, these are the key measurements our designers swear by.
- Major Walkways: For any main path, like the one from the doorway into the room, you need at least 30 to 36 inches of clear space. This is the difference between walking comfortably and having to turn sideways to squeeze through.
- Between Seating and Tables: The sweet spot between your sofa's edge and your coffee table is 14 to 18 inches. It’s close enough to set down a drink without getting up, but still gives you plenty of legroom.
- Conversation Areas: For people to chat comfortably without raising their voices, try to keep seats no more than 8 feet apart. Any further than that, and the conversation just fizzles out.
What Should I Do If My Room Has an Awkward Shape?
First off, don't look at an odd-shaped room as a problem! Think of it as a feature. Rooms that are L-shaped or long and skinny are the perfect chance to use that "zoning" strategy we mentioned earlier. The key is to work with the room's architecture, not against it.
An L-shaped room, for instance, practically begs to be treated as two distinct but connected areas. Use the bigger part of the "L" for your main seating area, and the smaller alcove is perfect for a cozy reading nook or a compact home office. For a long, narrow room, the biggest mistake is lining up all your furniture against the walls like a bowling alley. Instead, break it up by creating a couple of smaller groupings and "float" the main pieces away from the walls. This creates a much better sense of balance and makes the room feel wider.
Where Do I Start When Arranging an Empty Room?
We see it all the time—the "analysis paralysis" that comes from staring at four blank walls. It can feel overwhelming. The best way to tackle it is to focus on one thing first: the single most important piece of furniture for that room.
In a living room, that's almost always the sofa. In a bedroom, it's the bed. Place this "anchor" piece first. Your best bet is to position it against the longest wall or have it face the room's natural focal point, like a fireplace, a big window, or where the TV will go.
Once that main piece is in its spot, everything else falls into place much more easily. You can then start arranging the smaller items—chairs, side tables, lamps, and so on—in relation to it. This approach gives you a logical starting point and stops you from getting lost in the little details too early.
Can I Mix Different Furniture Styles in One Room?
Not only can you, but you absolutely should! Mixing styles is one of the best ways to create a room with real personality. It looks like a space that's been thoughtfully collected over time, not like you just bought a matching set from a catalog page.
The secret to making it work is to find a common thread that ties all the different pieces together. This is what keeps the room from looking like a chaotic jumble. You can do this by:
- Using a consistent color palette across various styles.
- Repeating a material, like a specific wood finish or metal like brass or black iron.
- Keeping the scale of the furniture similar.
For example, a sleek modern sofa can look incredible with a pair of classic, vintage-style armchairs—as long as they share a color family or are roughly the same scale. This curated method is what makes a space feel uniquely yours.
Planning your room is a rewarding process that can completely change how you feel about your home. If you're ready to start seeing how different pieces might look and feel in your own space, the team at Woodstock Furniture & Mattress Outlet is here to help. Our experienced staff can answer your questions and guide you to furniture that truly fits your space and your life. Visit one of our North Georgia locations today!